In SketchUp, modeling complex objects with high detail requires a lot of time to perform. In the following article, we will learn together about 3D construction tips for pattern details serving in partition walls, ..etc.
To create a detailed 3D model of the pattern on SketchUp, follow these steps:
CHOOSE AND DOWNLOAD PATTERNS

Download patterns with image formats
Tip: It is recommended to download high definition images to optimize the creation of the pattern vector format correctly
TEXTILE IMAGE PROCESSING ON ADOBE ILLUSTRATOR
-
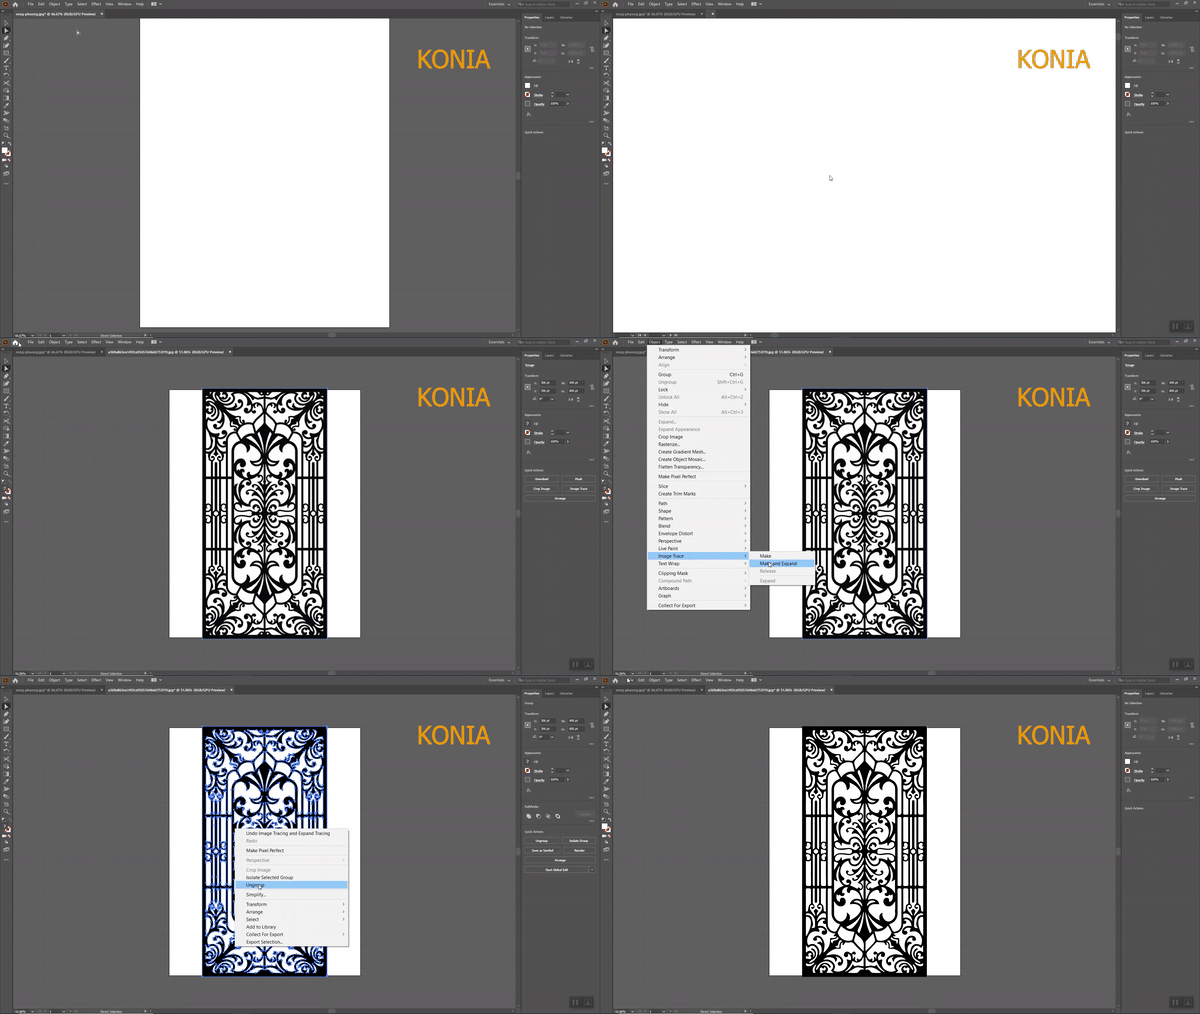
After opening Adobe Illustrator, go to Open, select the downloaded pattern image file
-
Go to Object → Image Trace → Make and Expand
-
Select the pattern, right-click and select Ungroup.
EXPORT IMAGE FILE TO DXF FORMAT
-
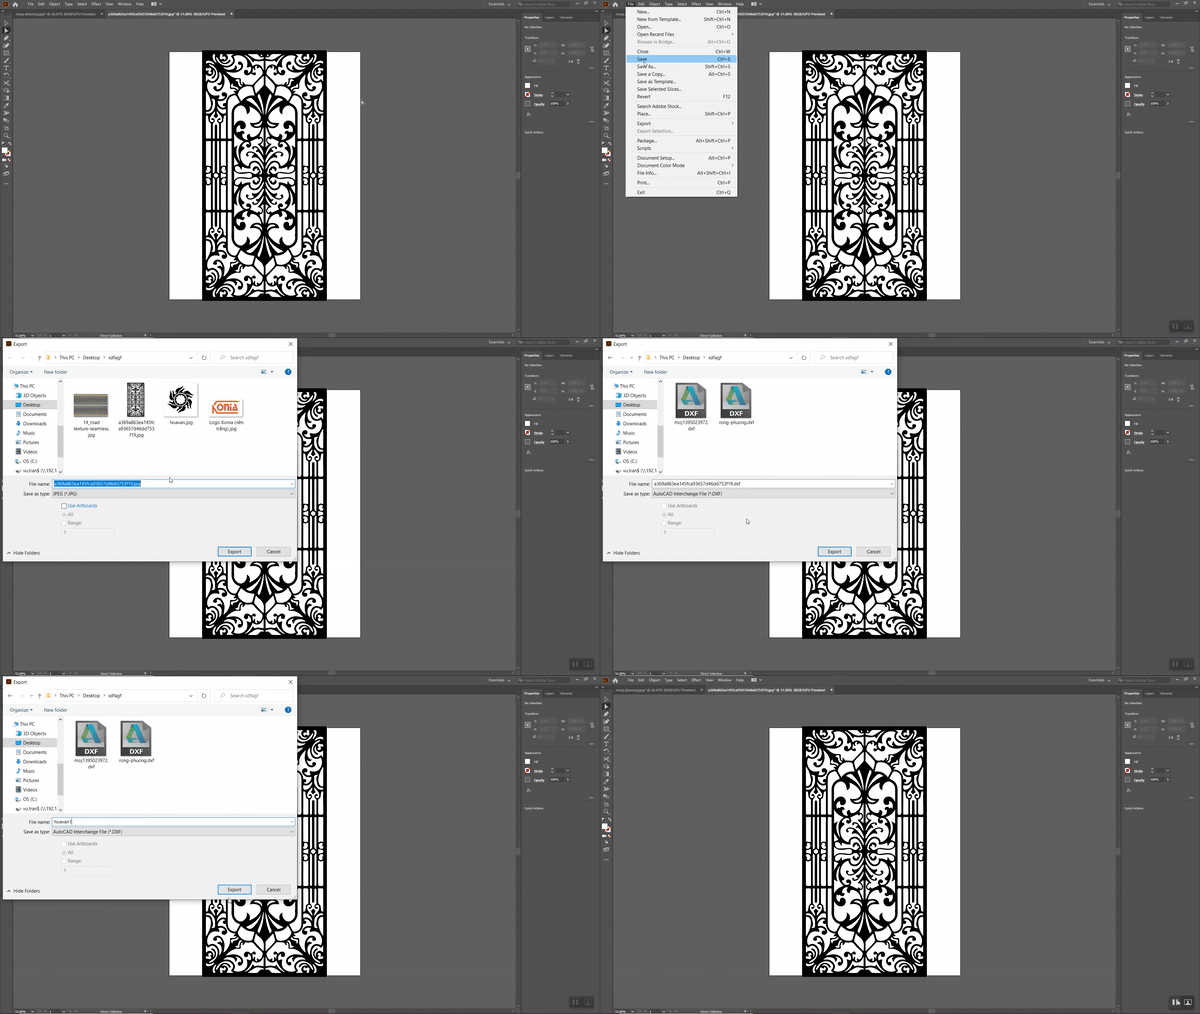
Click File → Export → Export As → Choose DXF format
-
Then click Export to export the DXF file.
PROCESSING DXF FORMAT FILE ON SKETCHUP INTERFACE
-
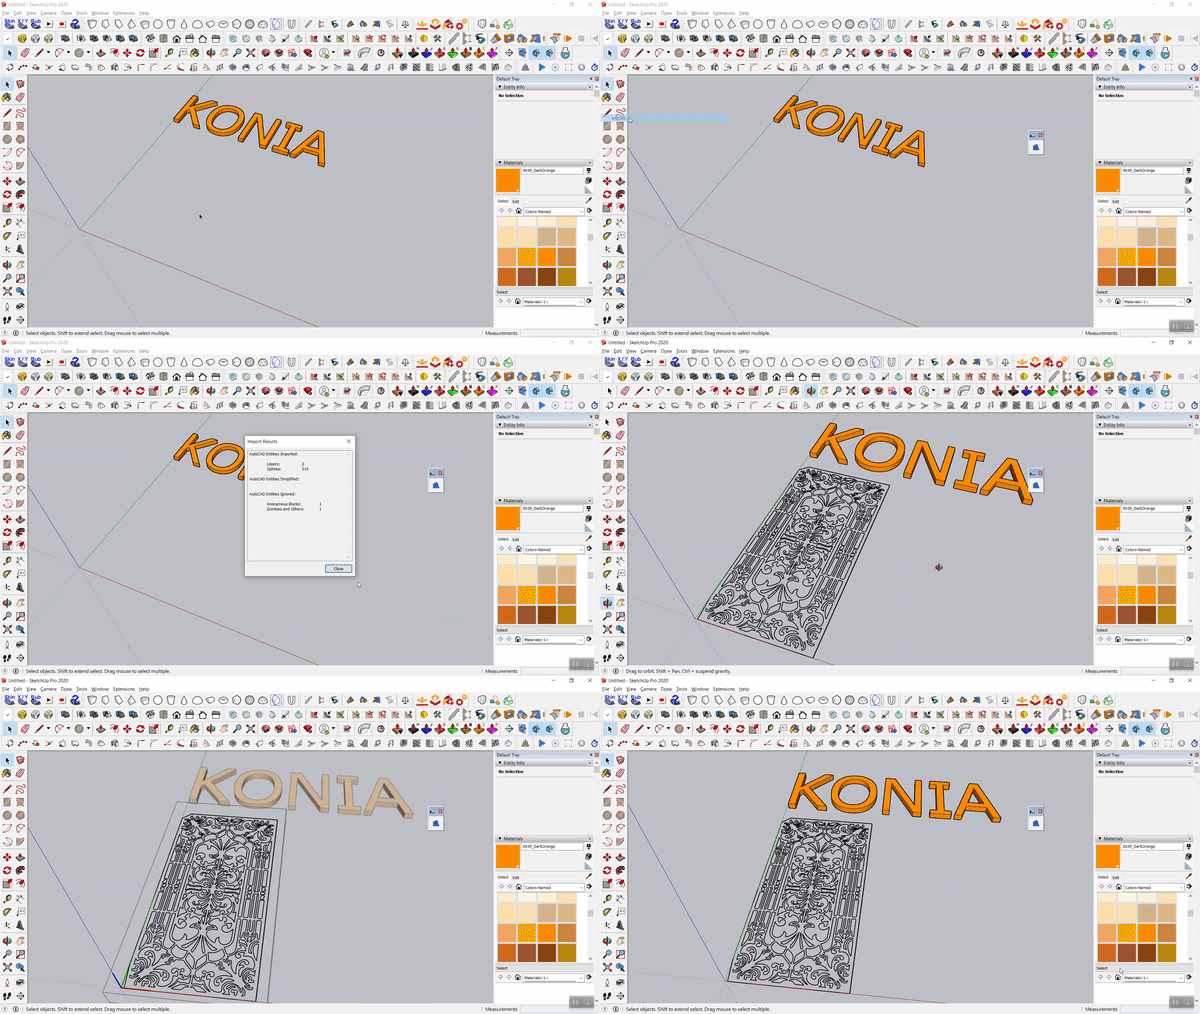
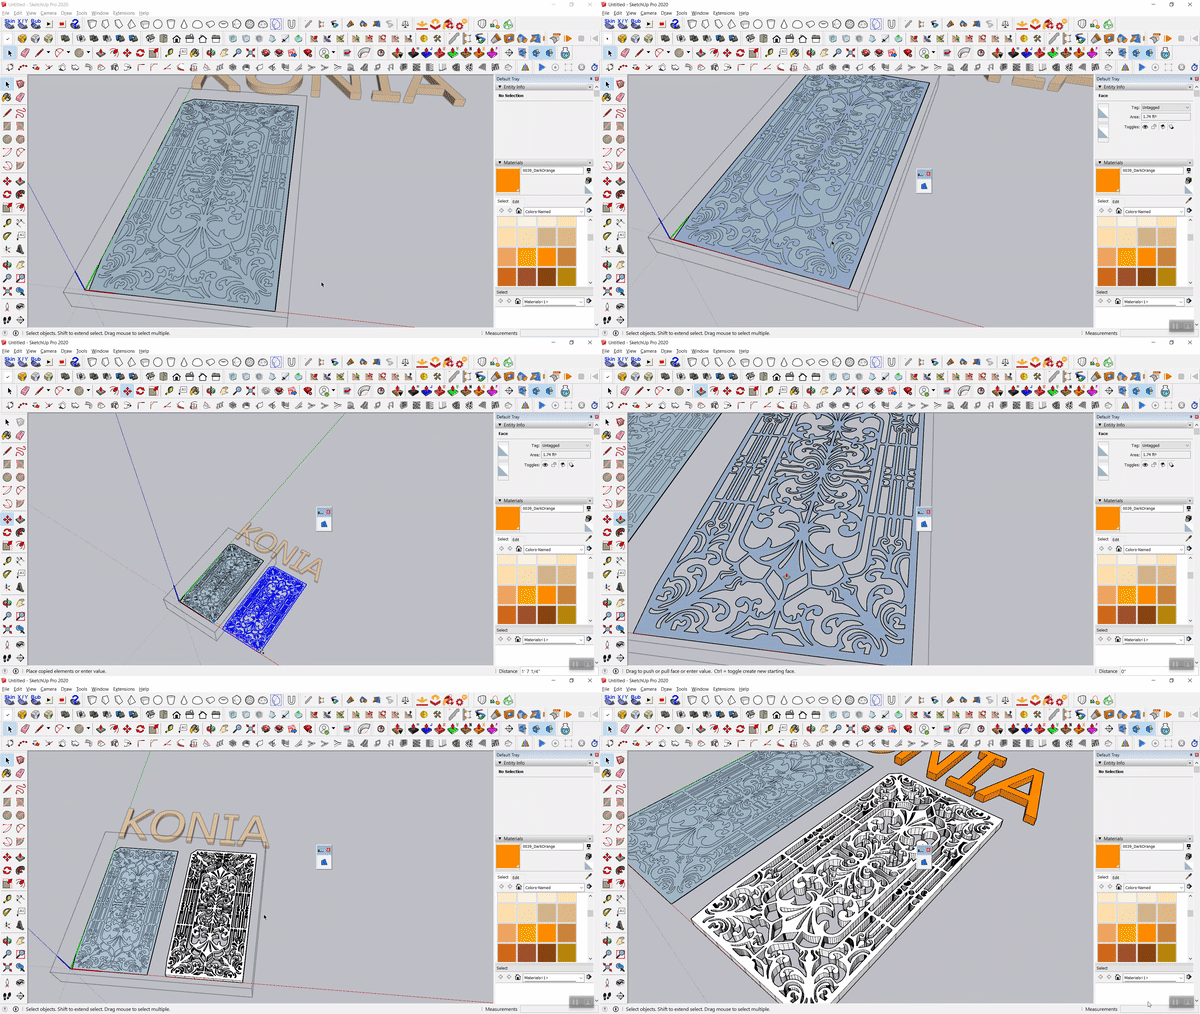
Open SketchUp, click File → Import → Select the imported pattern DXF file → Export.
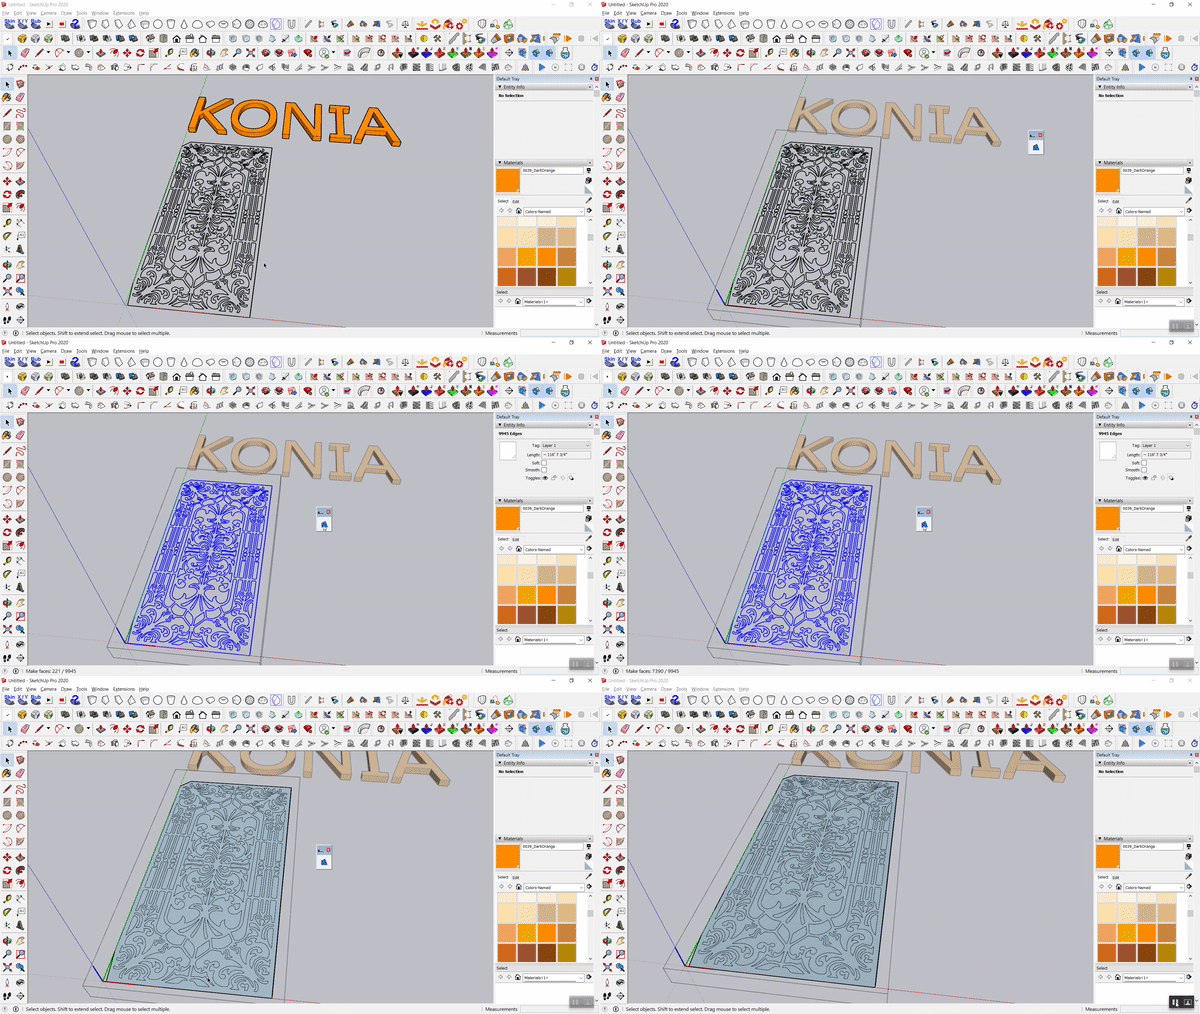
- To create a surface for a pattern, we need the Make Faces Plugin. Click on the
 icon to create a surface around the pattern object.
-
Select the required surfaces in the pattern image
-
Copy the selected image by Move + Ctrl and place it in another location
-
Push the pattern object just Copy , we get the pattern partition block as shown as desired.
Download Plugin Make Faces SketchUp


 Tiếng Việt