Turn off the SketchUp Shadows
Is turning off shadows in SketchUp a necessity?
If you use SketchUp to model interior spaces, you will have to set up shading adjustments for each scene you create, right?
With SketchUp you can easily do this.
Set Shadows Parameters
Follow these steps to start setting up the shadow parameters:
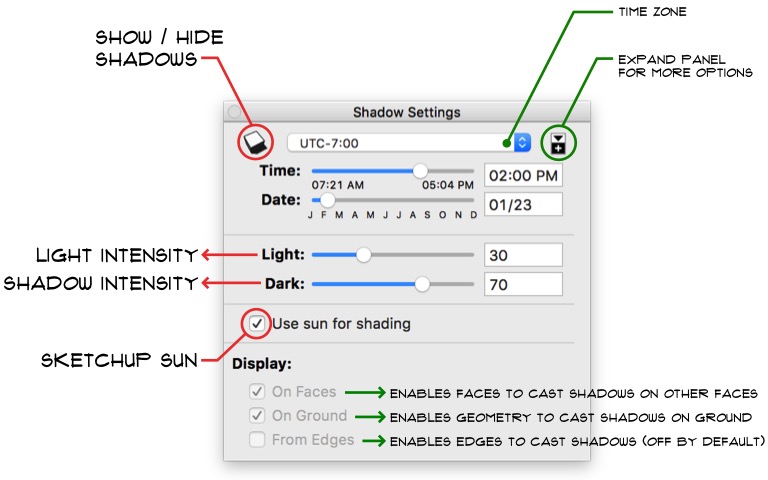
- Go to Window -> Shadows menu to open the Shadow Setting panel.
- If necessary, click the icon in the upper right corner to expand the Control Panel and get more options.
- Turn off shading by reversing the shadow in the upper left (or go to menu View -> Shadows).
- Tick Use sun for shading to turn on SketchUp Sun mode.
- Move the values to Light/Dark by dragging the slider to the value you want.
- Note, you can also adjust the Time & Date slider to change the shade, but the changes will be less interesting, so adjust in the Light & Dark slider.
- Don’t forget to save the settings by updating any suitable scene.
- See improvements in your SketchUp model.
In the video, there will be instructions on how to cast shadows when light penetrates the ceiling which is quite interesting. Let’s get a reference from it.


LIGHT SIMULATION
Follow these steps to simulate ceiling lighting in your space:
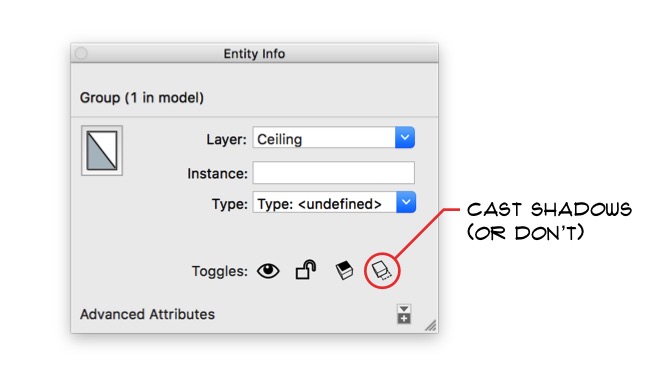
- Go to menu Window -> Entity Info to open the control panel.
- With the Select Tool, click on the object (in this case, the bare plane). Note that an object can be a group, part, or even an independent face.
- With the object selected, click on the far right icon in the Toggles row of the Entity Info panel to control whether a shadow is cast by the object. Note this also needs to be done for any lighting fixtures on your ceiling.
- Shadow mode must be enabled, so stick it to shadow reversal.
- Adjust the Time slider close to noon, which is important because midday creates shadows coming from a light source directly on the ceiling. You can also adjust the shading from the Date slider.
- Save the shadow settings to the new scene.
- Bask in the light of the enhanced interior scene.


 Tiếng Việt