Source: unrealarchviz.com (Mr. Hoang Ngoc Duy – Darchviz Studio)
Architectural Visualization is the most important skill for all of the architects if they want to do well in the work they love. During my college years, I was confused between tons of software advised by seniors, which are 3ds Max, Revit, ArchiCad, … with diverse advantages and disadvantages. At that moment, I found SketchUp which was the best choice for me. It’s really handy, easy to use and fully capable of developing a wide array of fields in future.
Proved by reality, my choice is right. SketchUp is an extremely effective support in today’s architecture field. SketchUp is both powerful and simple. However, because of its simplicity, many people mistakenly think that it’s easy to become negligent. It’s a bad habit even we – Darchviz Students have had since the first days of using. This is considered as one of difficulties in future work and one of the reasons leads to the underestimate of SketchUp potential.

All things considered, I made up my mind to share more about necessary remarks when modeling with SketchUp and bring to us ever-great products.
Shortcuts
Shortcuts are created to save your time, so bear in mind it is essential to optimize the work.
Experienced 3D Artists have never used the standard toolbars and menus. Unless you need to use Plugins that don’t have quick shortcuts available. If necessary, they will find a way to assign keyboard shortcuts to them. As well as my SketchUp interface is extremely simple with basic Layer, Shadow tools or required Plugins (not often).
With SketchUp, It’s very convenient when you can export your own set of shortcuts into a specific file, just don’t overlap with SketchUp built-in shortcuts. When you need to use it on another computer, just reload to use it. You can refer to assigning a keyboard shortcut for a necessary command here:
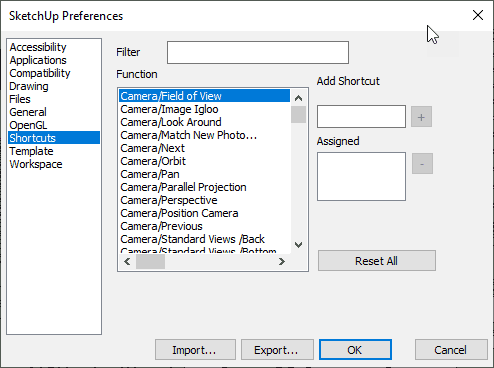
+ Group: Shift + G
+ Hide: Shift + H
+ Unhide: Shift + U
+ Reverse Face: Shift + R
+ Section: Shift + C
+ Paste In Place: Ctrl + Shift + V
+ Perpestive: Alt + P
+ Two-point Perpestive: Shift + N
+ Delete Guide: Shift + D
Nevertheless, too many unnecessary shortcuts will make the operation more complicated. Assign only the ones you really need and use them at any time. For example, I usually use the Tape Measure Tool to create contour lines for concept work and when I want to delete because of too many of them, I just type Shift + D.
Set of 2 modeling tools
The above suggestions are necessary commands for the rendering process. And do not forget SketchUp’s built-in tools, they are very useful too. They allow you to quickly test the model while working and have your full control.
Monochrome mode
When building shapes in SketchUp, especially those that have been assigned a Texture. It is essential to use Monochrome to check whether the shape has been correctly constructed. The right side (white) needs to be the top priority. The opposite error often occurs when using the Push/Pull or Follow Me command. Other plugins can also cause this error. It should be noted that when constructing, the surfaces of the cube should be always checked.
X-Ray mode
X-Ray allows you to see through shapes instead of having to rotate or hide shapes around to catch points or draw more details. You just need to use X-Ray mode and edit easily. The effect remains the same, but time is saved.
Hide Rest & Hide Similar
A design often has a lot of details and working for a long time could make you dizzy and easily make mistakes. This tool is extremely convenient for you so solve the mentioned issue.
Use Hide Rest & Hide Similar to hide shapes that you do not interact with, make the workspace more tidy and you will be focusing more on details and of course, the editing operations are also faster.

Managing shapes with Group – Components – Layer
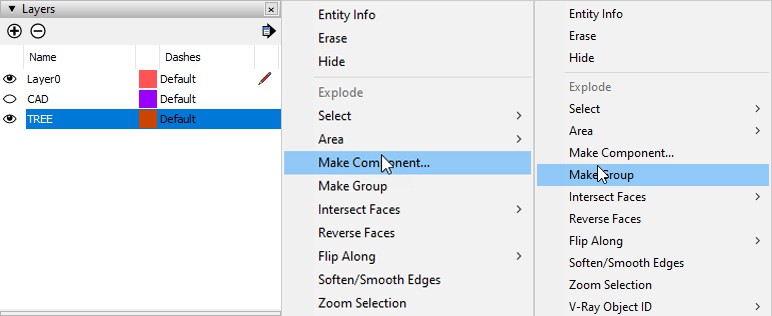
One rule when modelling is that shapes must be Group or Components. This helps to separate the shapes and use them for different purposes when designing. That’s the basic difference between SketchUp and the vast majority of other software. Without Group/ Component, the cubes are easy to stick together and make it difficult for the next manipulation step.
You will easily manage those Group/ Components with Layer. Layer can hide/ show shapes according to the scene they need to show. For a space with lots of objects, SketchUp’s features help you keep it organized.
AutoSave
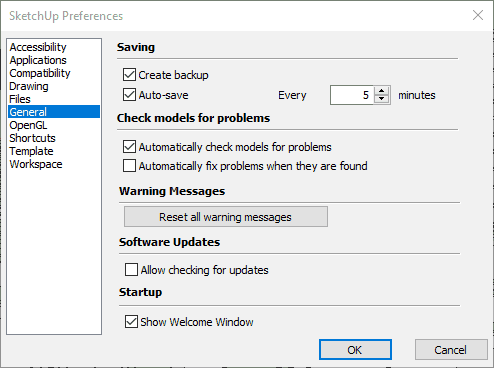
Do you know that SketchUp will be out and will be definitely out when you import a file that is too large, or when a plugin is creating a file? Therefore, always open AutoSave to ensure your data is saved.
The AutoSave speed depends on your settings, for example AutoSave every 30 minutes. I often remind my students to use the AutoSave button but do not overdo it. Self-save the working file at any time makes sense.
Use the necessary Plugins
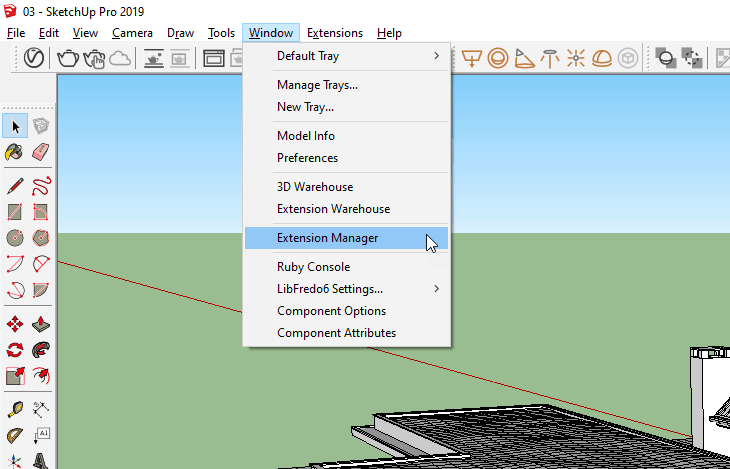
SketchUp is incredibly efficient, but SketchUp needs Plugins to be more productive. They solve many problems during modelling and even rendering at a much faster speed. My advice is to use but do not overuse it.
There are many plugins to increase productivity in SketchUp. Please choose the one that is really necessary for your needs. List of my favorites Plugins are:
– Profile Builder 3
– Transmutr
– Skimp
– Skatter
– V-Ray for SketchUp
Get more details of each and find your most appropriate tools for your architectural visualization work.


 Tiếng Việt