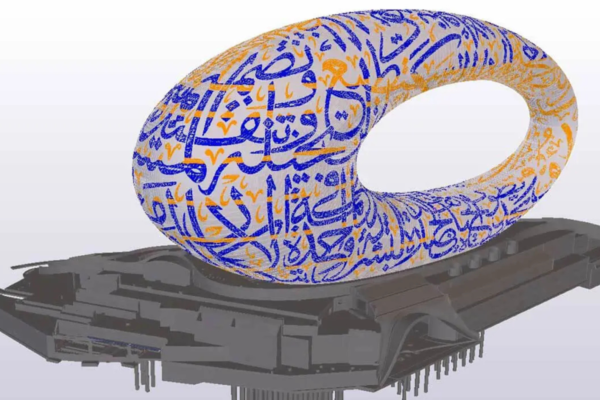
Project image courtesy of DRMA
Ever wondered how design professionals manage to create gorgeous but more importantly functional models? (Ones that don’t take an age to load up and orbit?!) Well, wonder no more!
We gleaned ten top tips from Anders Hus Folkedal, a Landscape Architect at DRMA Architects with a love for technology, gaming, 3D visualization, and VR. He’s worked at Ramboll, one of the largest AEC firms in Denmark and across the globe. He creates projects large and small, models predominantly in SketchUp, and churns out high-quality rendered stills, fly-overs and animated walkthroughs using Lumion.
We asked Anders the question, “What advice would you give for anyone looking to model large projects in SketchUp?” You’ll want to bookmark this page. Let’s dig in!
1. Plan ahead.
Before you start, ask yourself, “What do I define as the core project and what makes up the context?”. Try to reduce terrain detail in the area defined as context by using larger triangles/polygons. Put the context on a separate layer as models run much smoother when the context layer is frozen. When visualizing your project in external rendering software such as Lumion, it’s a good idea to export large context geometry in a separate SketchUp file. You can then import this into your renderer but remember to keep all SketchUp file origins the same.
Project courtesy of M Moser Associates
2. Hi-Lo.
Keep both low and high-resolution aerial images at hand, on separate layers. You can swap the low-res for high-res when needed in the texture editor. Try saving large aerial images using an image editor like Photoshop. Remember to drop your jpg’s image quality to reduce file size without compromising image quality.
3. Agree and coordinate the model early with every contributor.
Architects, MEP, structures all favor unique software to deliver their tasks. Before any major modeling work is done, run exports and imports from their individual software into SketchUp. This will ensure that every effort can be synthesized into one master model as the project develops and that no work is wasted.
Project image courtesy of Ramboll/DRMA
Try to place your model’s axis at SketchUp’s origin to improve visual stability and reduce geometry clipping when zooming in. Working on smaller details in a large city model can be challenging, and clipping will occur. I usually solve this by copying the geometry I’d like to develop and pasting in place (Edit > Paste in place) in a new SketchUp file. Once I’m done working out the details, I copy and paste it back into the city model – again using the paste in place feature.
4. Group objects wisely.
Try to group objects, for example, buildings into city blocks, and create a system that is applicable across the model. If you keep all modeled objects as parts or exploded geometry in one single group instead of many small groups, replacing all of them will take up a lot of loading time. As in the example, it’s much more efficient to only replace certain city blocks once they are altered. Take advantage of SketchUp’s Outliner to view your groups, components and sections planes as a hierarchical tree. Find it in the Menu Bar > Windows > Outliner. The ability to rearrange, rename and hide elements makes managing large models much easier.
Outliner window in SketchUp. Project courtesy of Ramboll & DRMA
5. Optimize the render view.
Save the magic dust for later and improve drawing speed by turning off unnecessary elements such as Profiles, Depth Cue, Extension, Endpoints, Jitter, Sketchy Edges, and shadows.
Project courtesy of Ramboll & DRMA
SketchUp’s Fast Styles automatically have these features disabled and are easy to spot with the green clock icon. Consider reducing display texture quality and anti-aliasing (a technique for making jagged lines on graphics look smoother) when modeling. In addition to these, selecting the Fast Feedback setting will improve SketchUp’s performance especially with large models.
Tweak your graphics settings. Project courtesy of M Moser Associates.
Set your Graphics Processing Unit (more on this below) priority to optimize for performance as opposed to quality — you’ll need to see what your device manufacturer advises.
6. Choose your renderer wisely.
A renderer is simply a software that creates photorealistic and non-photorealistic images from a 3D model. There are lots of rendering extensions that work in combination with SketchUp. Clarify the properties of your desired outputs based on what is most appropriate for your work stage and project type. Do you need stills (2D drawings or 3D images) or animations (3D motion in time); high, medium or low-resolution exports; and conceptual or photoreal outputs? “In my work, I tend to favor Lumion or TwinMotion which work well for both animations (3D in motion) and still image outputs”, says Folkedal.
Render wisely. Image courtesy of Ramboll/DRMA
Keep in mind that Lumion LiveSync for SketchUp — a real-time rendering tool similar to Enscape — has a lot going on and this will place a large demand on your machines’ performance. To improve your experience, use the renderer without Livelink and reload your SketchUp model at intervals instead. Simply grab a cup of coffee (or water) while you wait.
7. Purge, purge, purge.
SketchUp stores Components, Styles and materials that you’ve added to your model even if you’ve erased or replaced them, in case you need them later. To get rid of them, you’ll need to tell SketchUp to let it all go. Purge Unused, a native SketchUp functionality, can massively reduce your file size and reduce the time it takes to save and load your model. You’ll find this under Window > Model info > Statistics. Find more in this Help Center article.
Purge unused geometry to lighten your model. Model courtesy of Barton Malow
8. Adjust autosave settings.
This might not cross your mind often but it’s definitely worth a thought. Autosaving a large model every five minutes is hardly worth it. Increase the time between autosaves to reduce processing time. On the other hand, you can’t afford to lose too many hours of work, so find a balance and autosave every 20 – 25 minutes.
Adjust autosave settings.
9. Switch up your model’s look.
Leverage SketchUp’s display styles and toggle between full texture, X-ray and white box mode (using SketchUp’s monochrome style) to keep your model loading smoothly.
Use an appropriate display style whilst modeling. Model courtesy of M Moser Associates
Model existing elements even if you strictly don’t have to. Adding familiarity to the model, both in geometry and textures will help you communicate better with your client and team more than you would think. Remember to have fun!
10. Always bring the model to meetings.
In addition to your renders and drawings, always make your model the centerpiece of client and team conversations. A lot of effort and thought has gone into it so leverage it as best as you can. I’ve found that it helps align disparate stakeholders around the context and removes ambiguity during discussions. Put it on the wall or on a screen and make it the anchor for your team discussions.
Make your model the talking point. Image courtesy of Ramboll
Bonus tip — Get a powerful computer.
A few minutes saved can add up precious hours that could be spent on other work. You know best what type of work you do, how your models need to be built and what you’re looking to achieve. Consider cloud rendering for larger projects, leverage cloud storage with solutions like Trimble Connect to free up space on your computer.
A few specs to keep an eye on:
Central Processing Unit (CPU): The computer’s brain carries out most input and output operations. It has an impact on processing your commands like mouse clicks or keyboard instructions, and in this scenario, your ease of modeling. Note that 3D modeling is a logical process, where for example; step 2 is reliant on step 1’s existence. It cannot take advantage of multiple cores for splitting and crunching tasks simultaneously (multithreading). More on this here.
Graphics Processing Unit (GPU): As the name implies, this processing unit is dedicated to rendering, takes the load off the CPU, and enables faster picture rendering and better visual outputs.
Random Access Memory (RAM): Your computer’s short-term memory holds the information your CPU needs to run memory-hungry tasks. Bigger, better RAM will improve the speed of modeling and enable more multitasking.
All in all, research the required specifications and requirements for the software you use often and make an informed decision on what will work best for you.
Additional resources — If you’ve got a lunch slot free, see this presentation on massive model management from Dr. Matthew Nichols who has used SketchUp to model ancient Rome as part of his research at the University of Reading.
We share some of Anders’ projects whilst at Ramboll in this article and whilst this article reveals his top 10 SketchUp extensions for extra-productivity.


 Tiếng Việt