V-Ray 5 for 3ds Max features exciting new possibilities for interior designers! Learn how to use it to create a realistic kitchen interior step-by-step.
Want to discover V-Ray’s newest functionalities in 3ds Max? In this tutorial, you’ll find out how our new features give greater creativity to interior designers. You will learn how to bring a kitchen interior visualization to life quickly and efficiently. Watch the video below, or read on for a step-by-step guide.
We’ve broken down the video tutorial into three separate blog posts to make it easier to follow. Feel free to jump to part two and three.
In the first part of the tutorial, you will learn how to:
- Set up V-Ray Denoiser
- Start the Interactive Production Render (IPR)
- Fill your scene with props using Chaos Cosmos
1. Reduce image noise for a sharp render
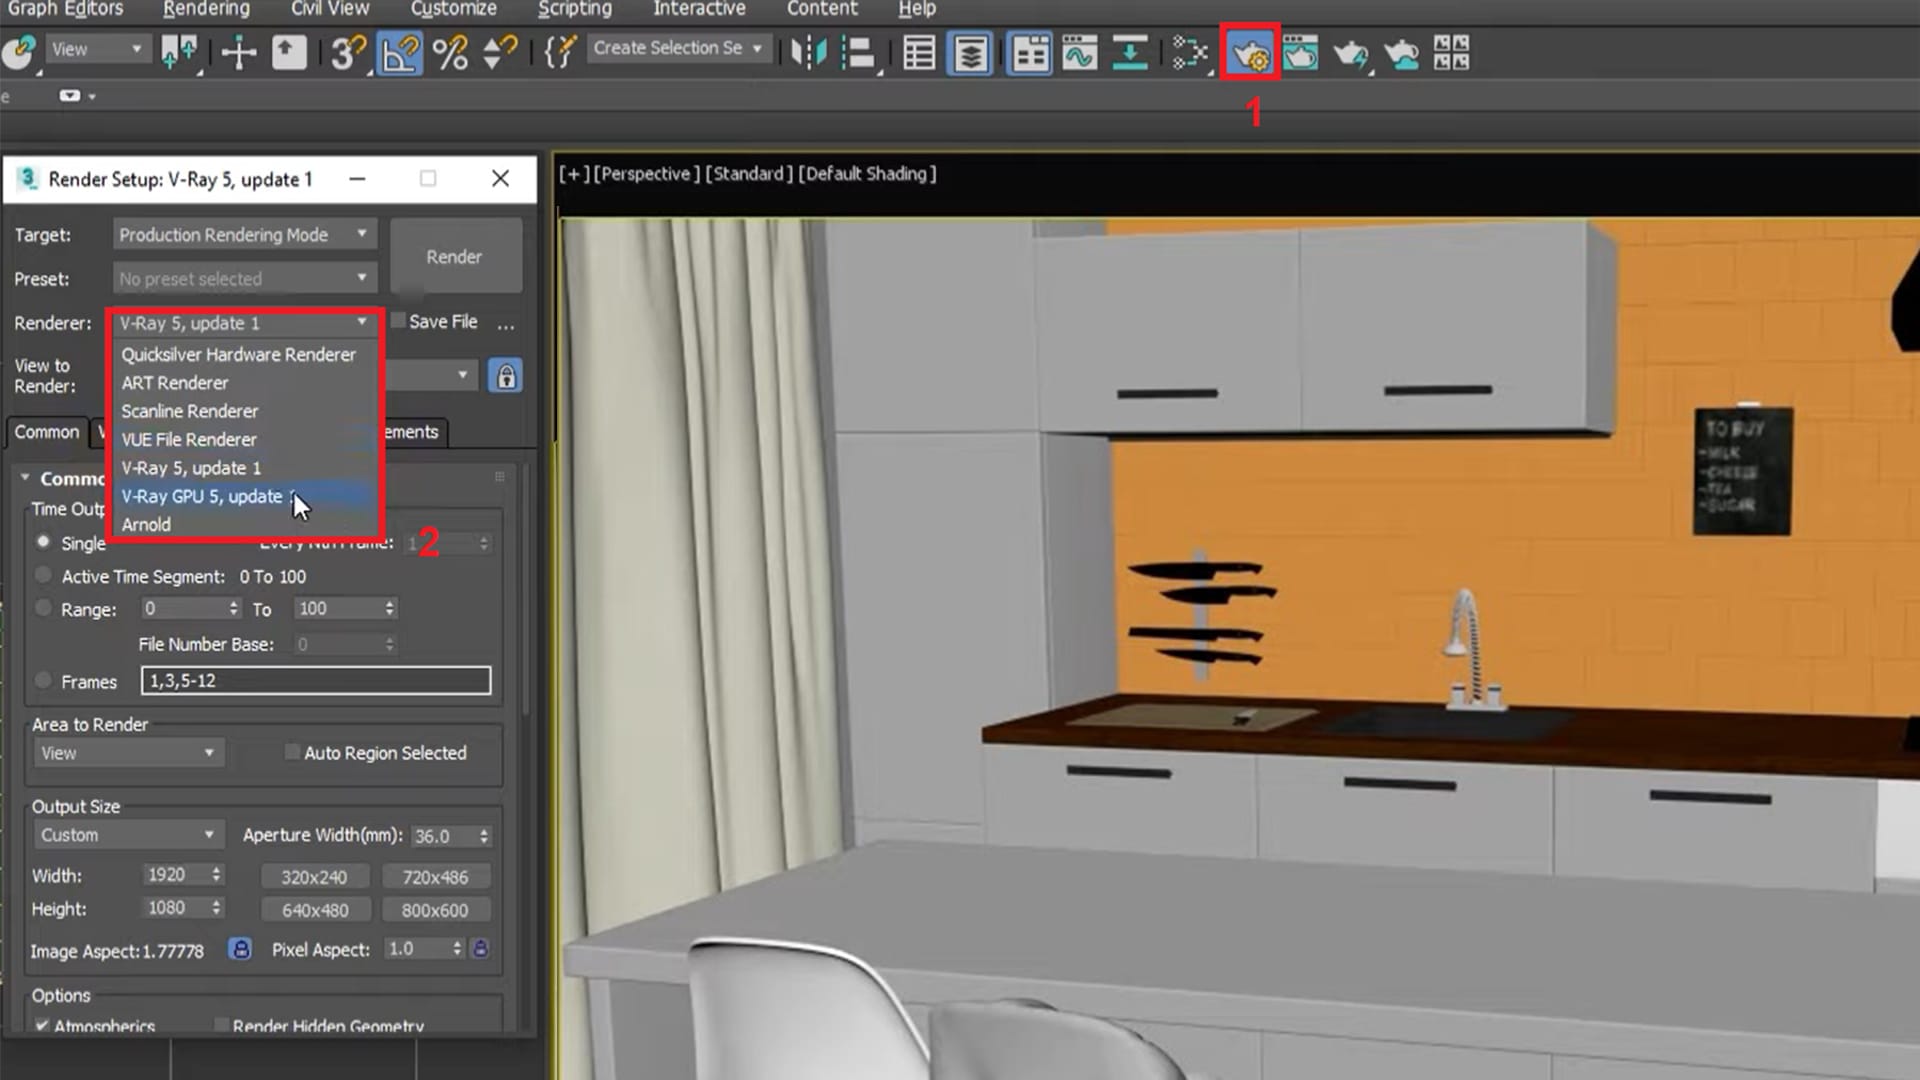
Before you begin working on your scene, you need to configure the render settings. Based on your hardware, you should select V-Ray GPU or CPU. If you need to test your hardware speed, check out this V-Ray Benchmark guide.
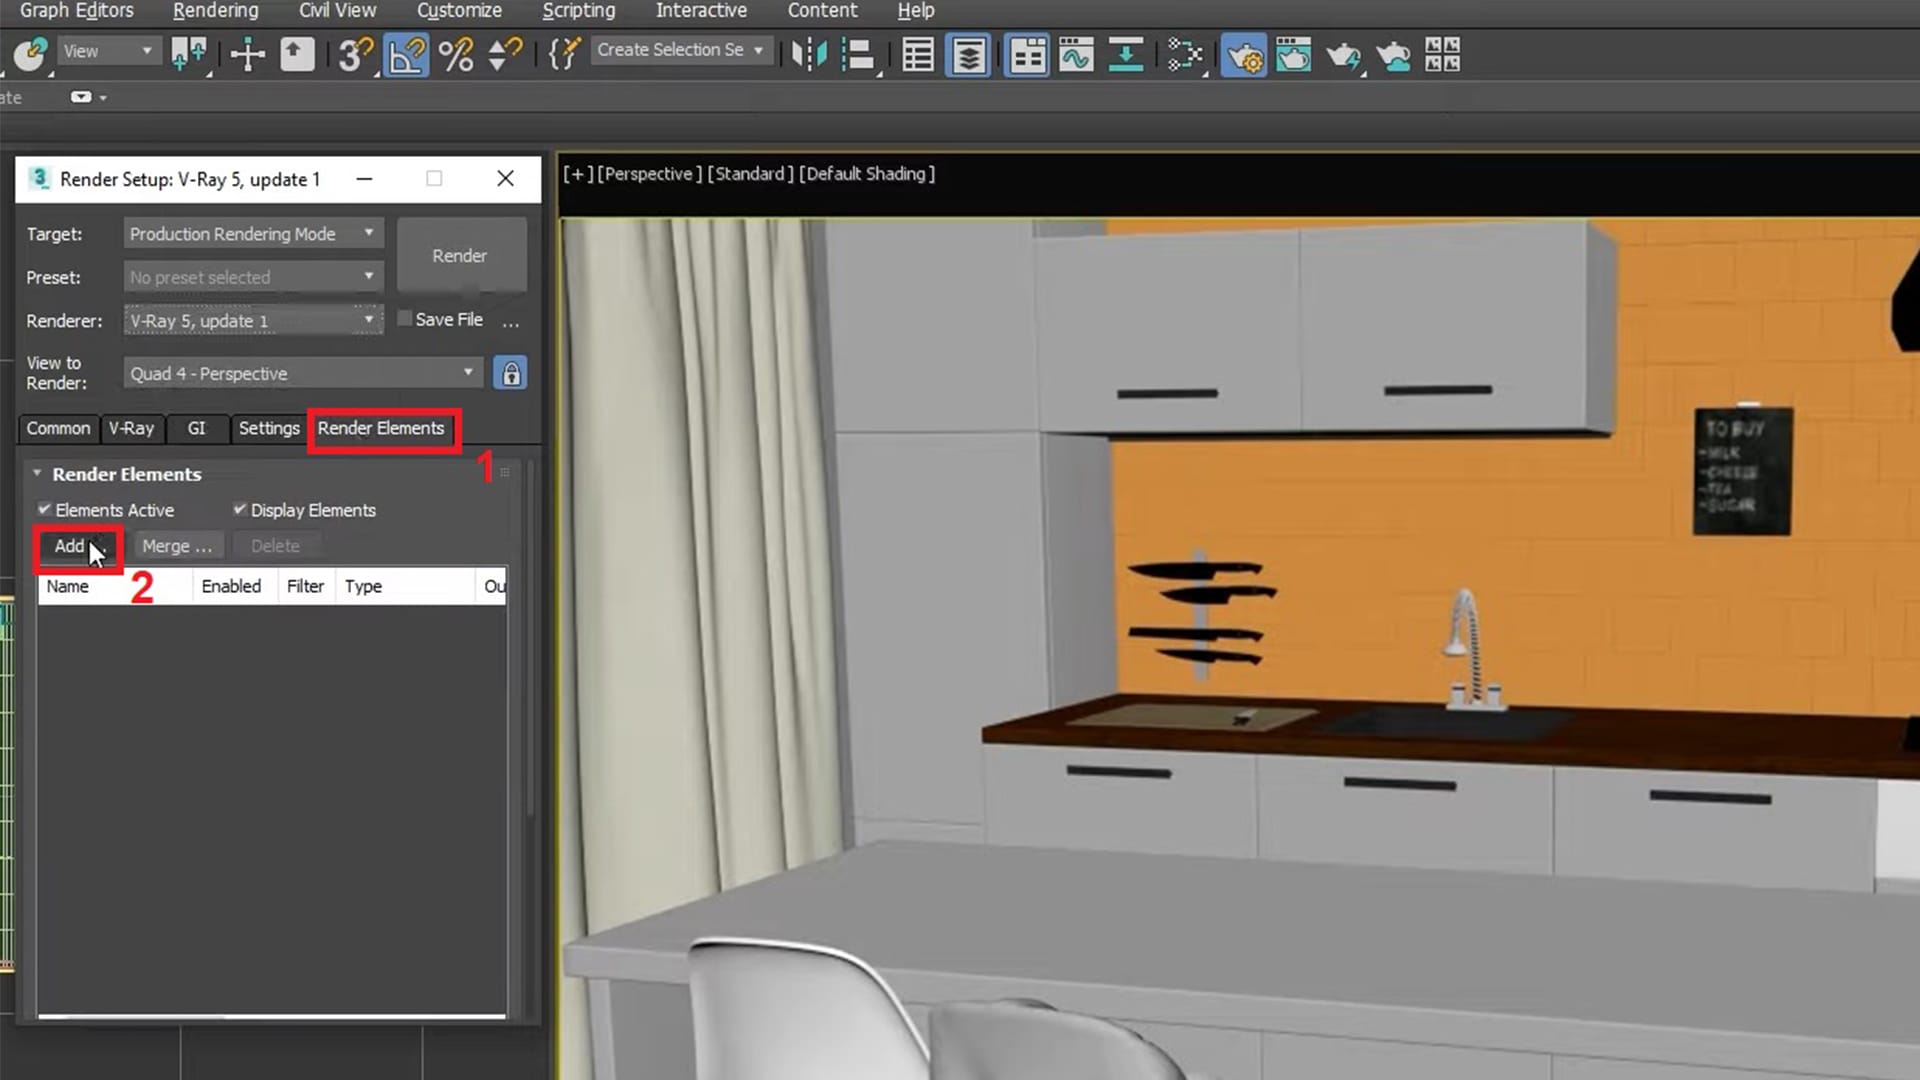
Next, you should add the V-Ray Denoiser from the Render Element tab. It will sharpen your visualization and make each object stand out in the scene. Click Add… and then select VrayDenoiser from the list and hit OK.
Scroll down the Render Elements menu until you see the VRayDenoiser Parameters. You have a few options to choose from: the Default V-Ray denoiser, the NVIDIA AI denoiser, and the Intel Open Image Denoise, depending on your hardware and preference.
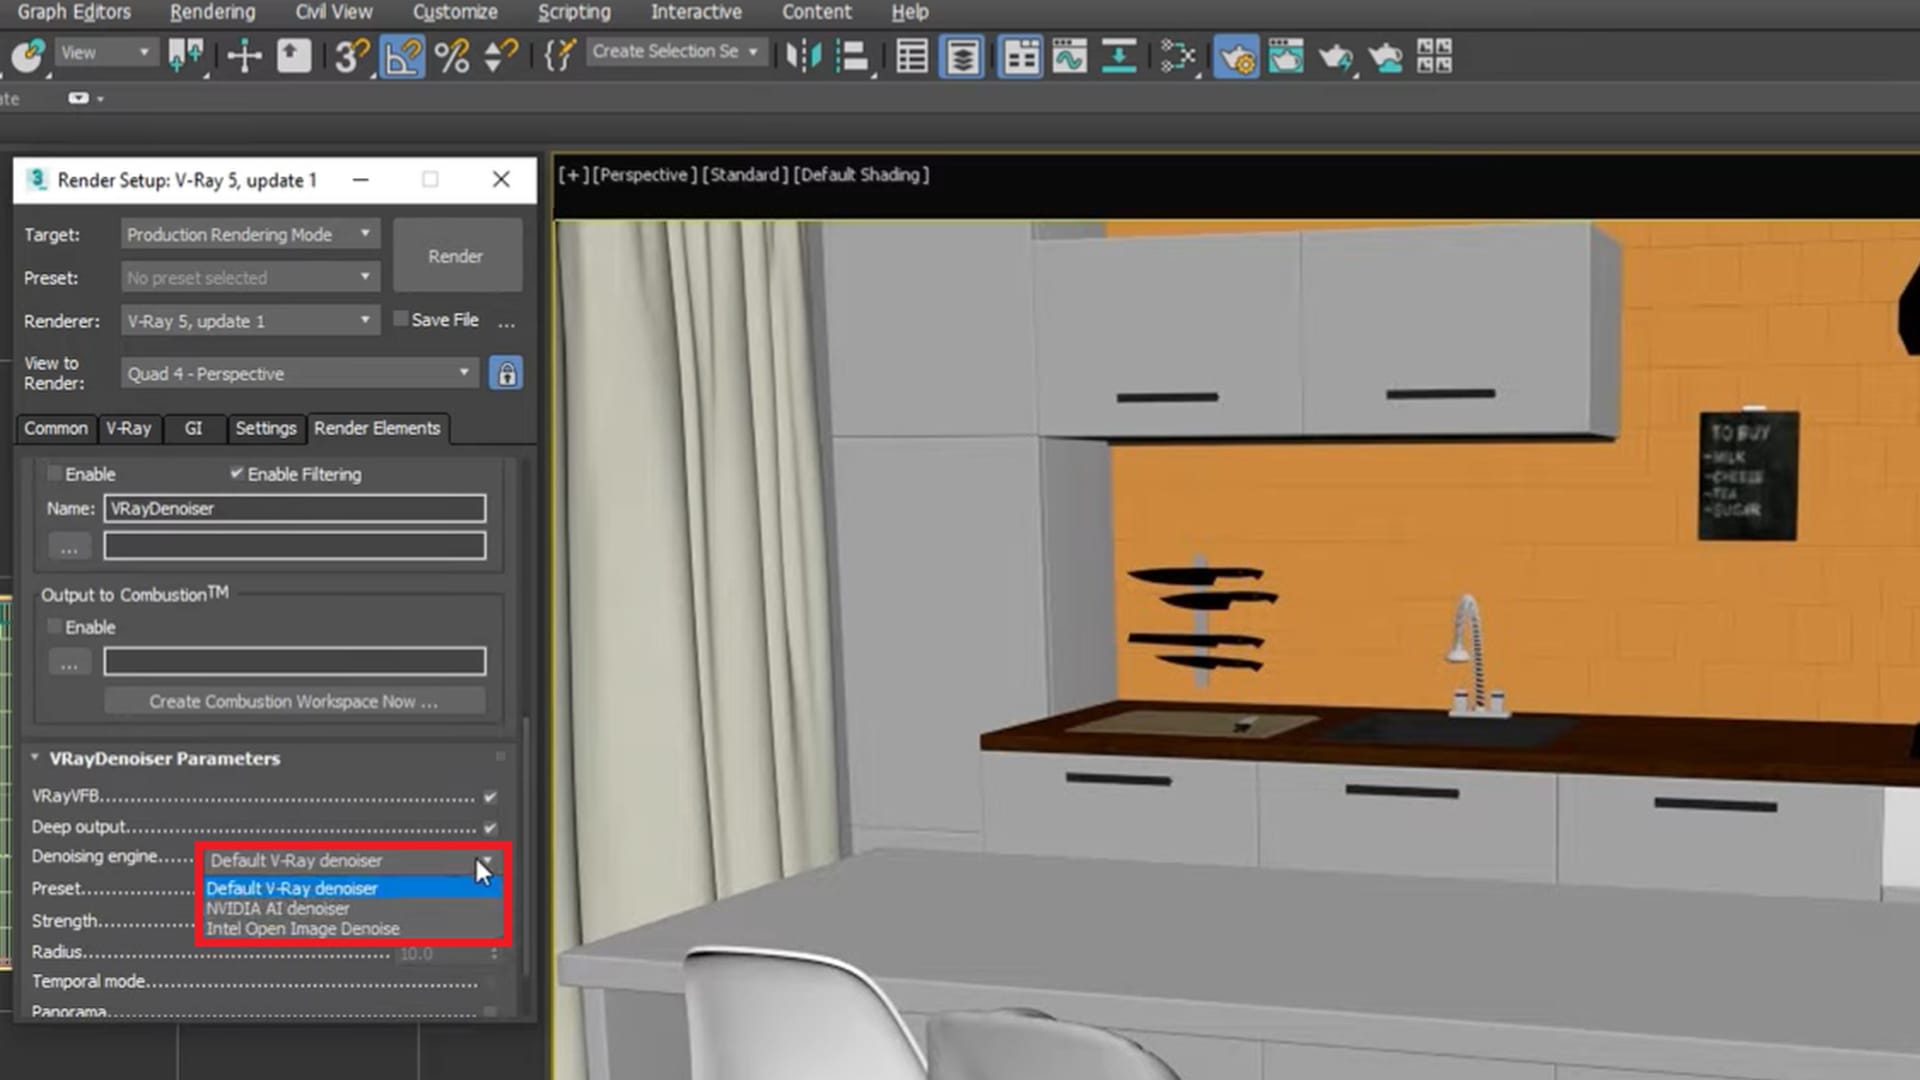
For faster initial feedback, select NVIDIA AI denoiser or Intel Open Image denoiser. If you need higher quality and no flickering for animated sequences, select V-Ray’s default denoiser.
2. Increase productivity with interactive rendering
Starting the Interactive Production Render (IPR) will allow you to see any changes that are made to the rendered image in realtime. Click on the Standard menu and then select V-Ray Viewport IPR to initiate rendering in the viewport.
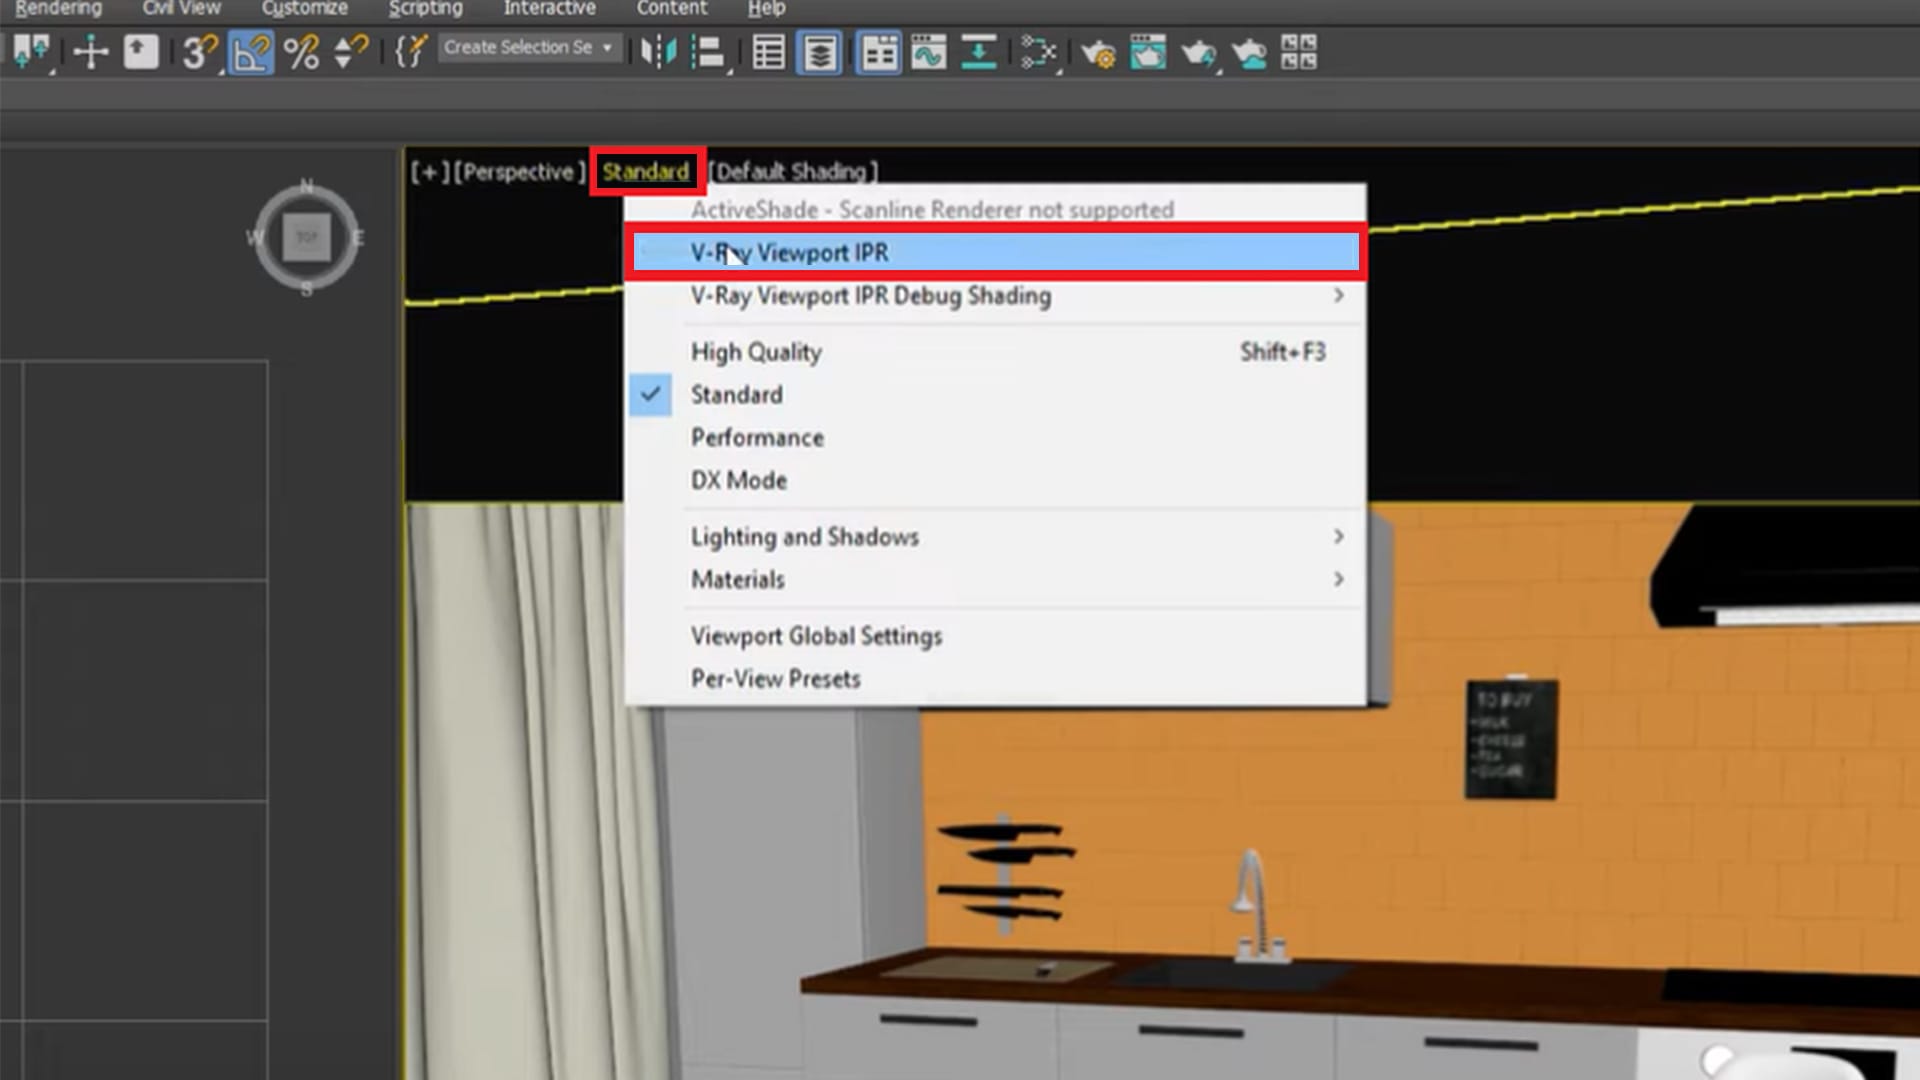
You will notice that your scene is dark since there are no light sources. To change this, you will need to add a V-Ray Sun and Sky.
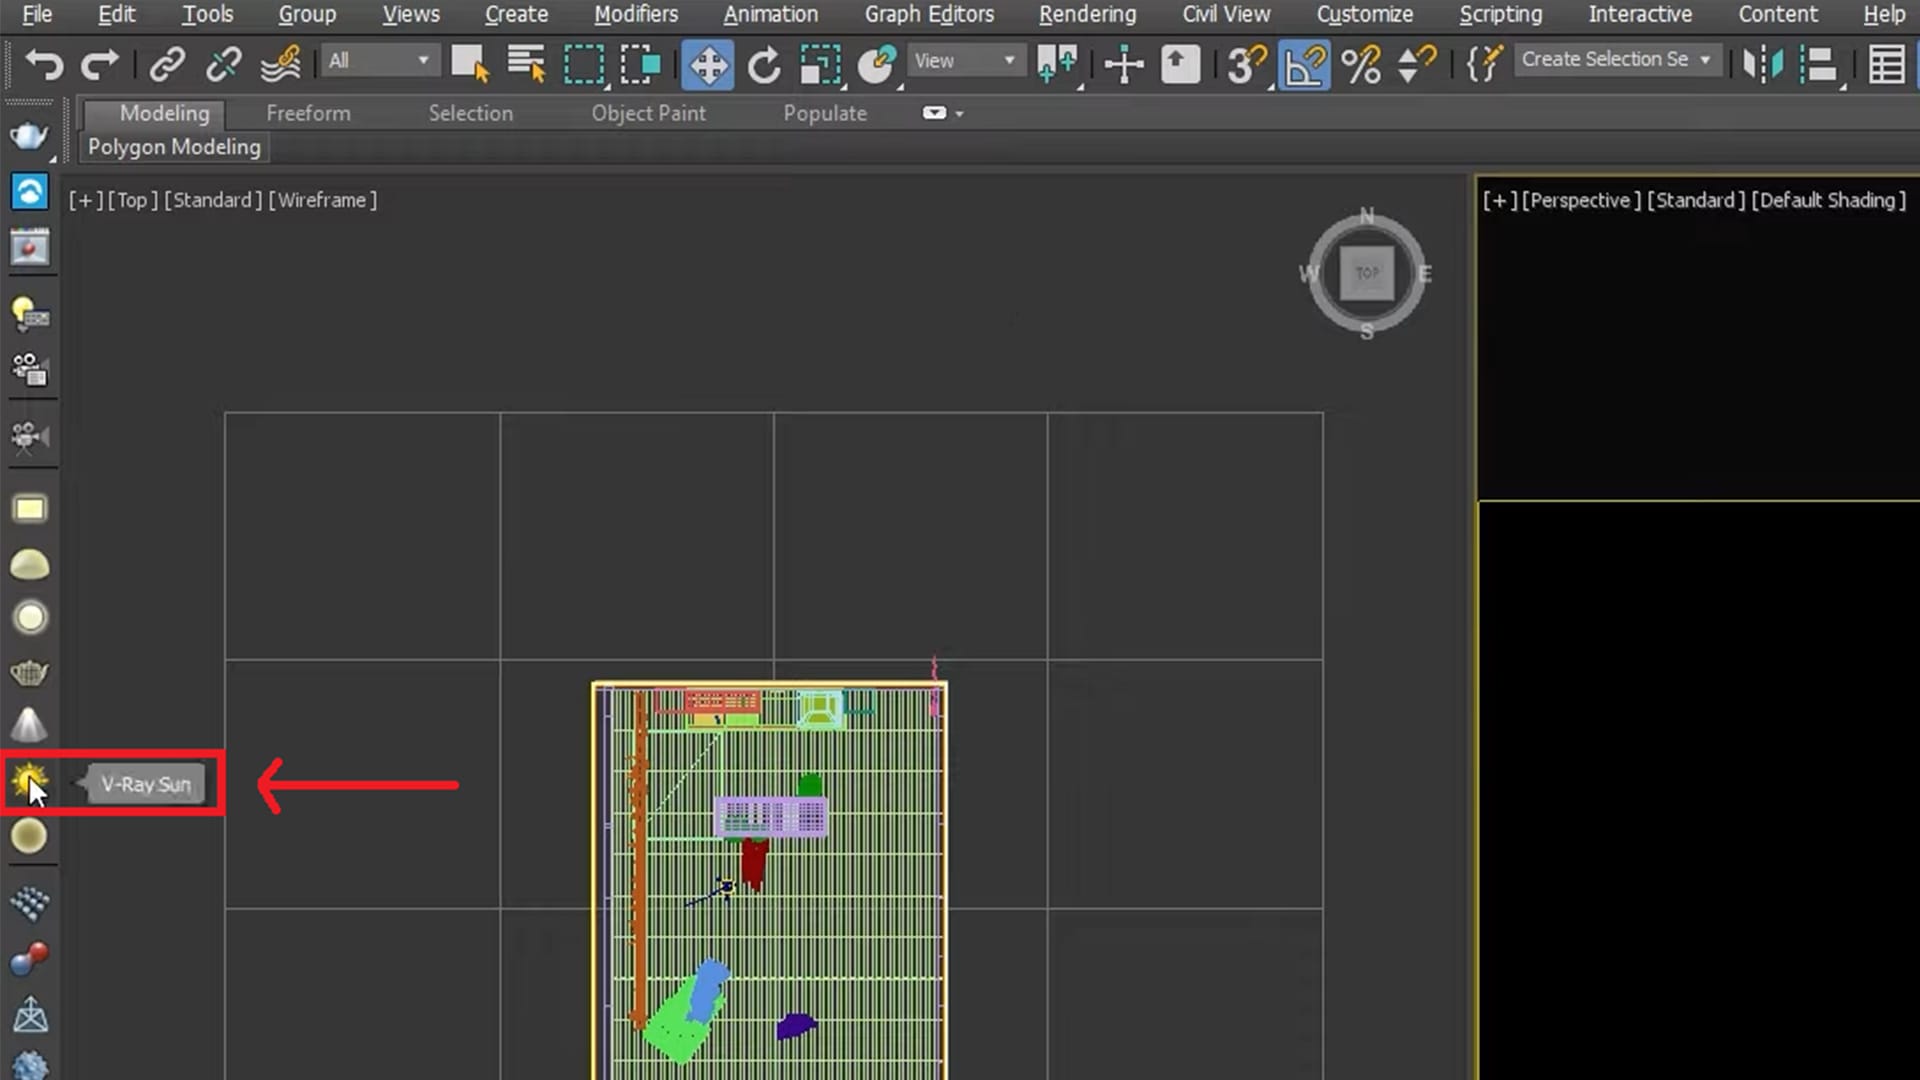
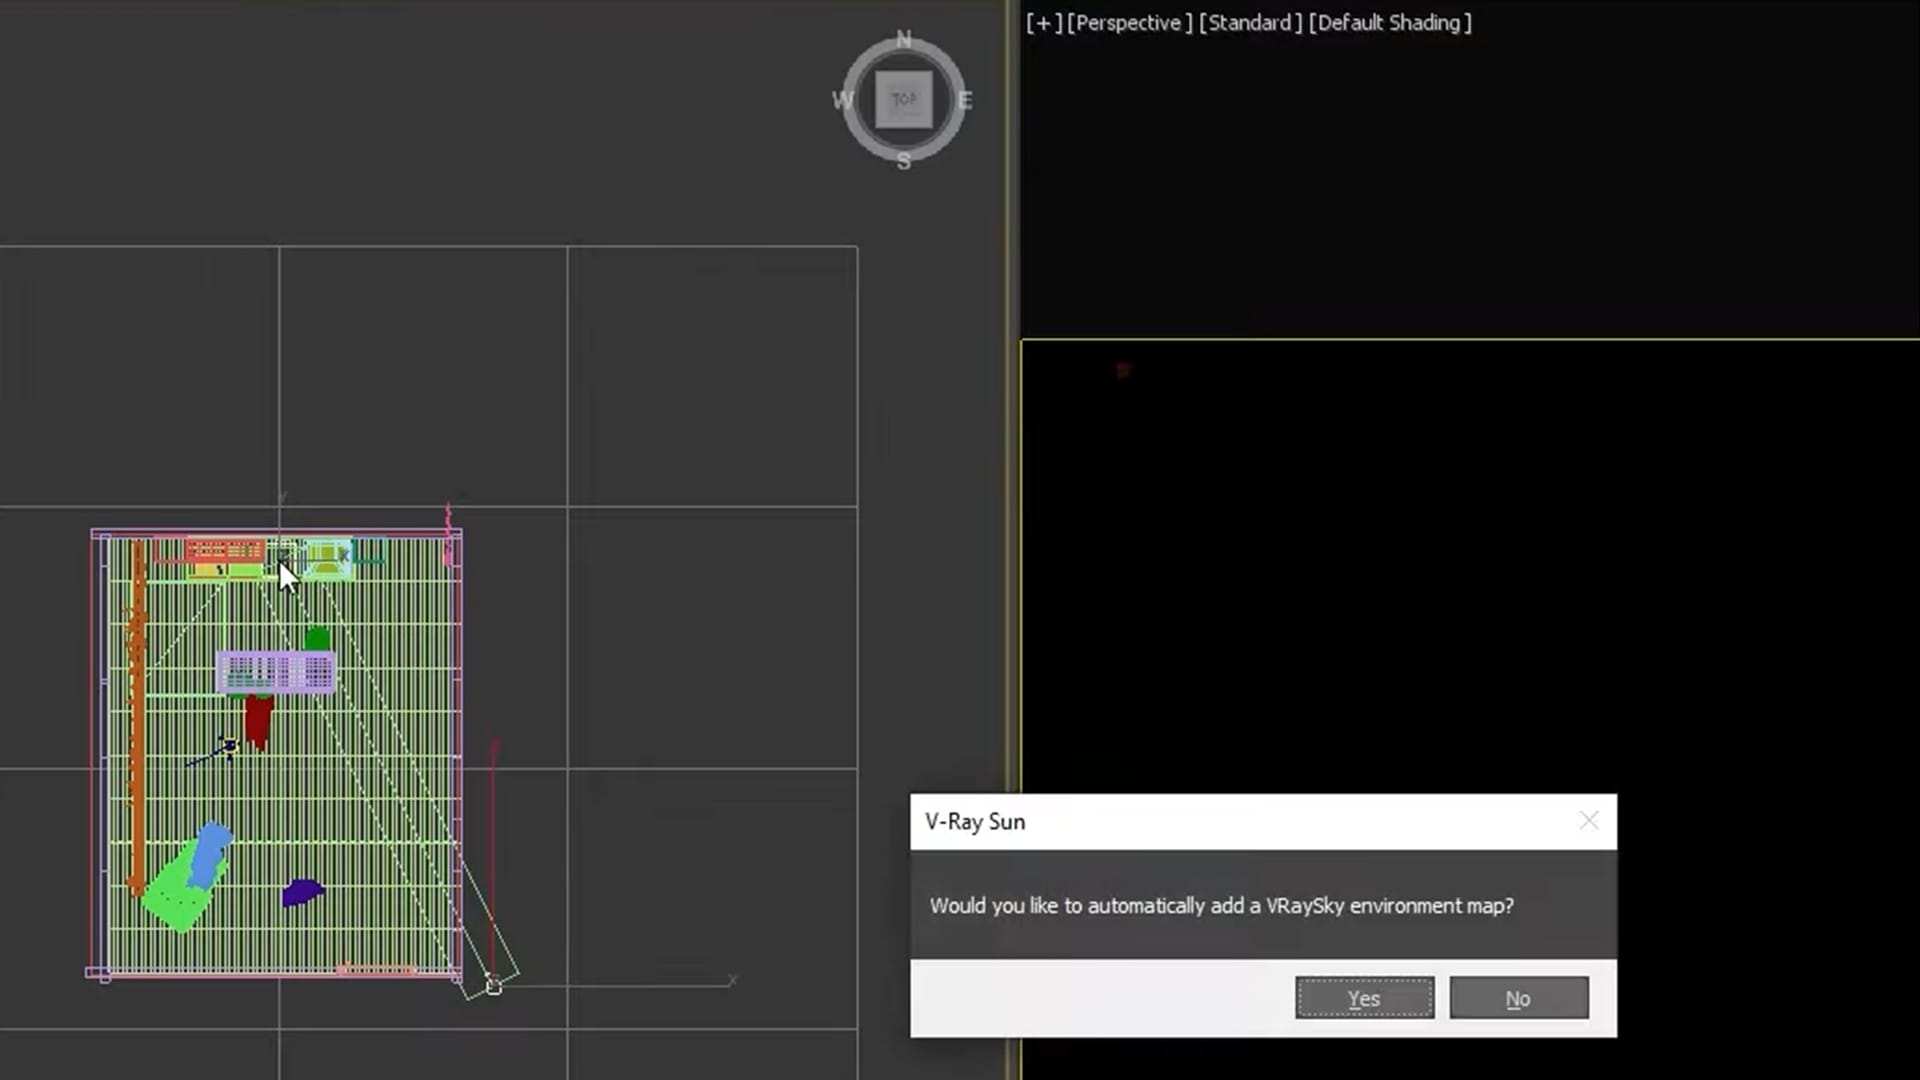
From the Top view, move the target of the sun, so that it is visible in the frame. Click “Yes” on the dialog box to add a VRaySky environment map.
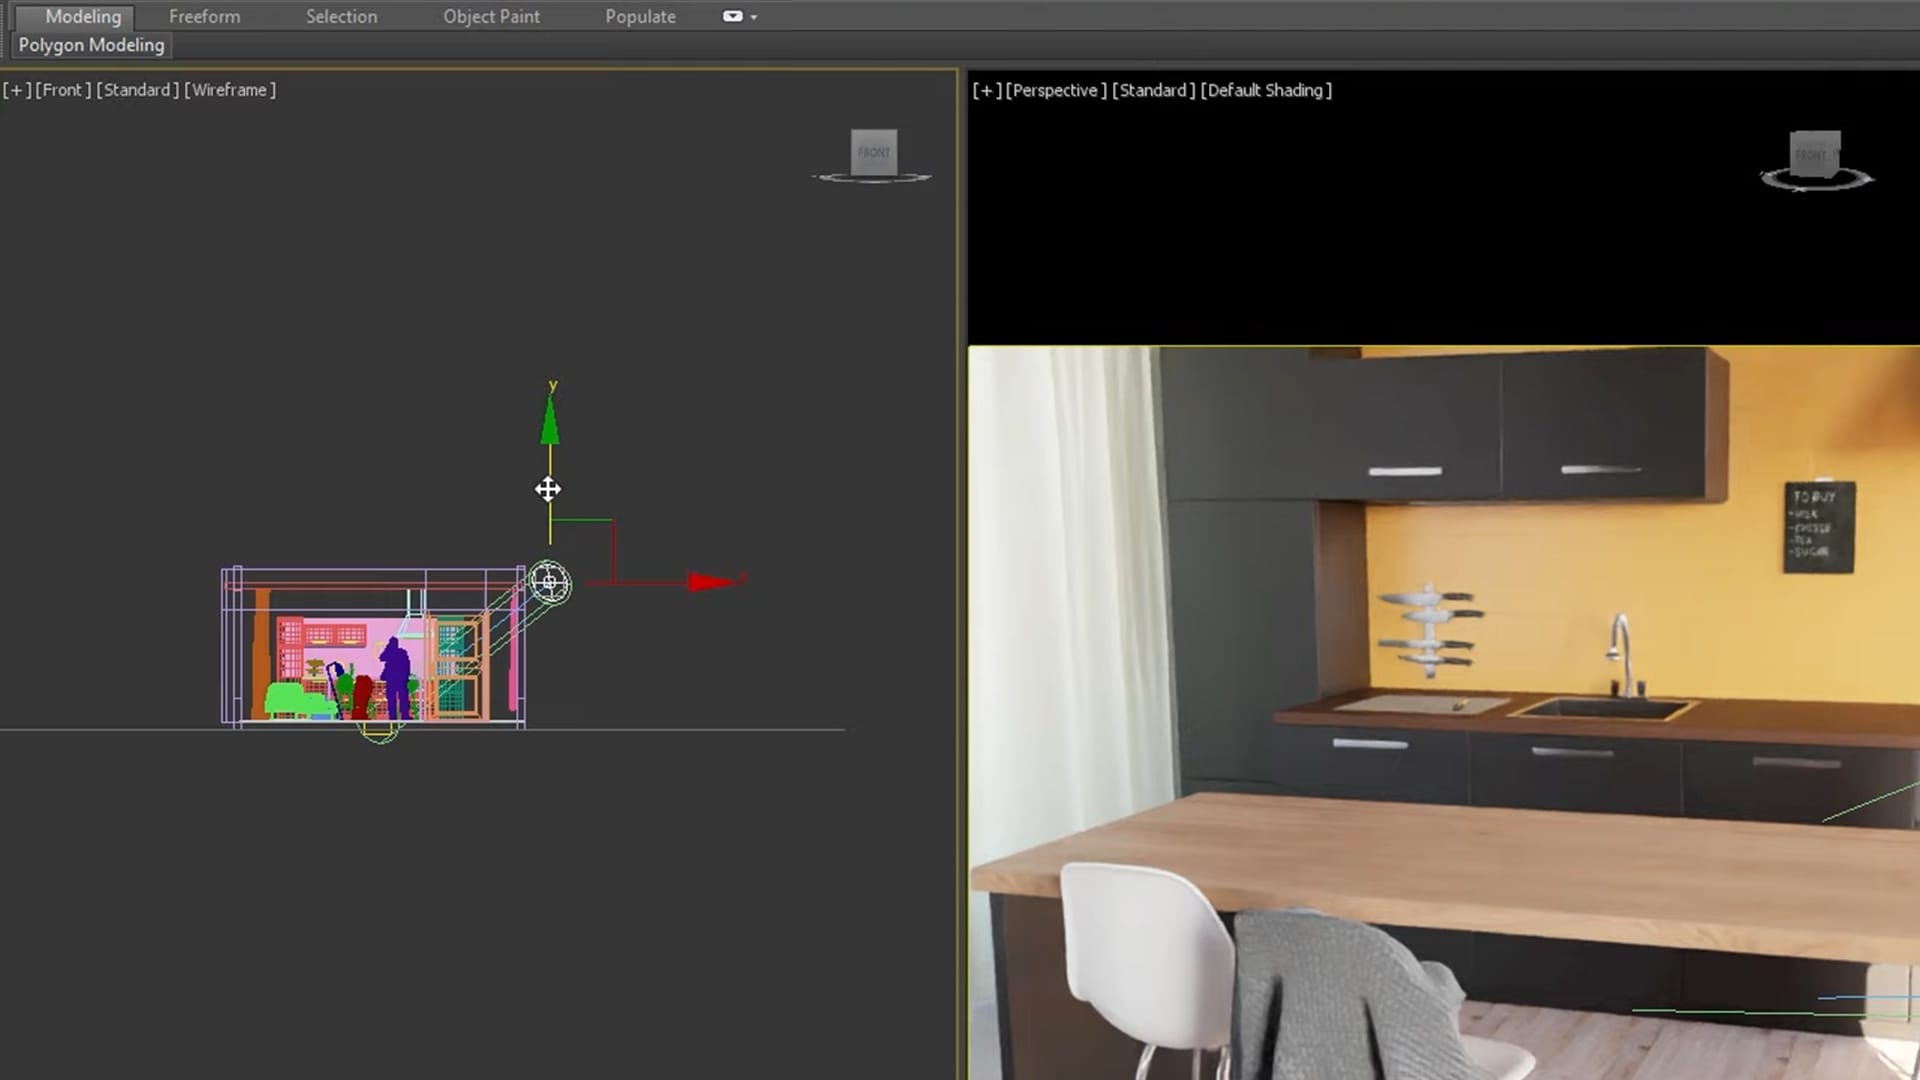
V-Ray Sun behaves just like the real life sun — the higher the position of the sun is, the brighter it gets. Drag the green arrow up and down to adjust the brightness in the scene to your liking.
We will focus on further adjustments to lighting in the third part of the tutorial.
3. Fill your scene with assets
Filling your scene with 3D assets using Chaos Cosmos adds engagement and a high level of realism to your scene. You can choose assets from various different categories, and place them with just a few clicks.
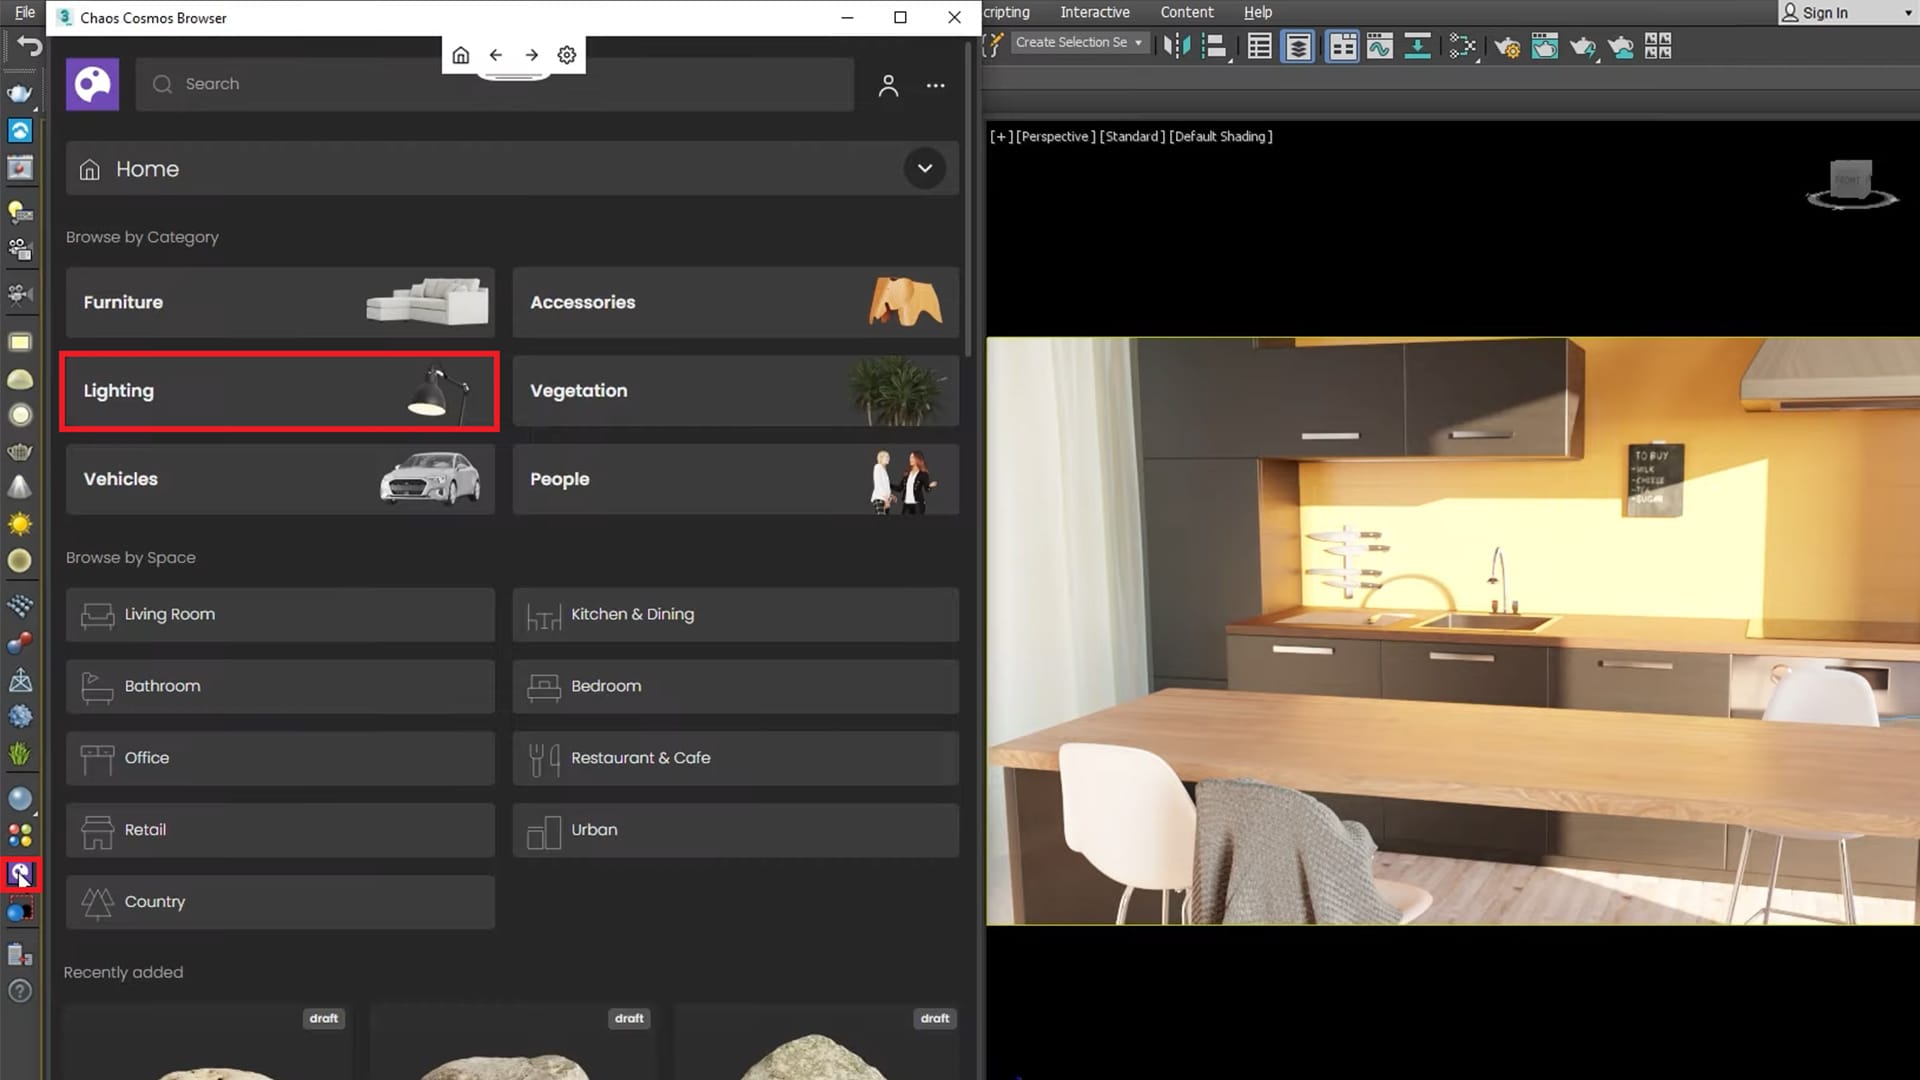
If you click on the “Lighting” category for example, you will find a large variety of unique light bodies.
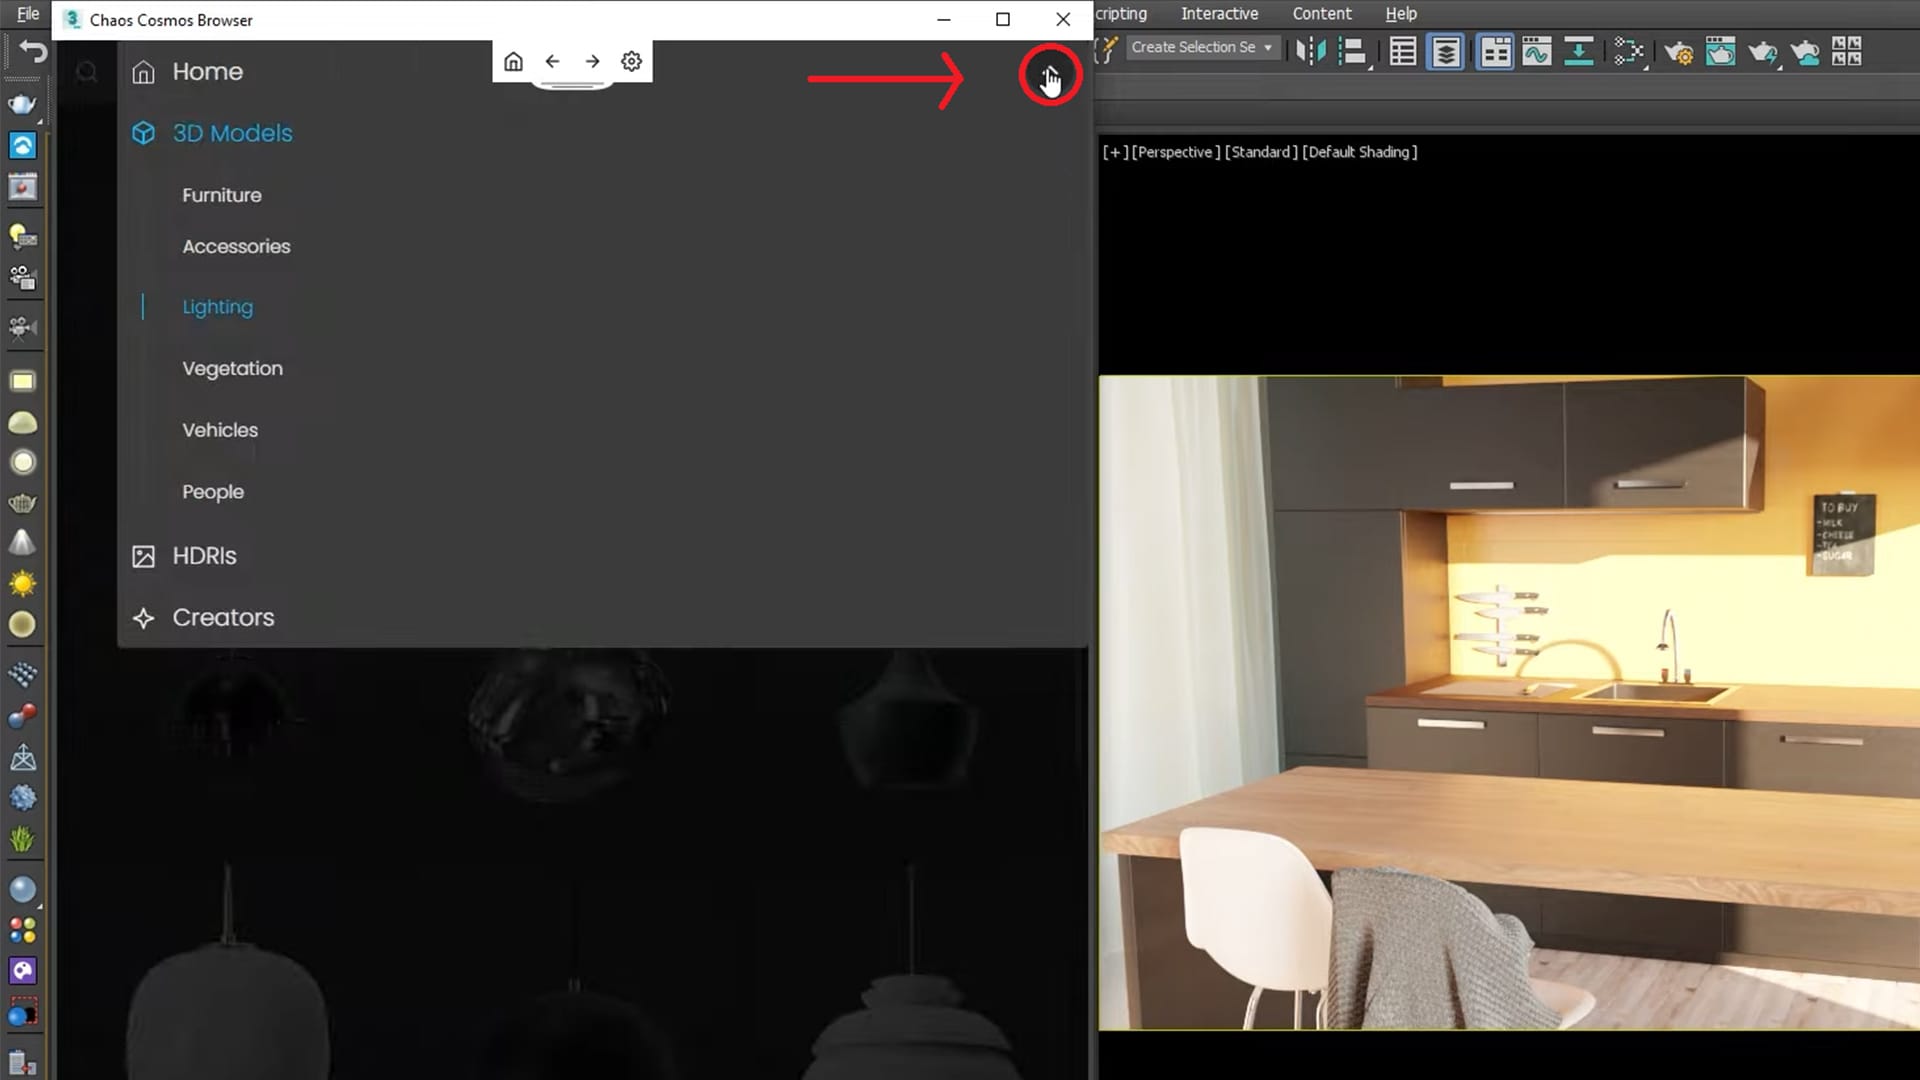
Click on the arrow to bring up all of the categories. By clicking on “Accessories”, different types of subcategories will be available. The scene is currently missing accessories and vegetation, so go ahead and browse through those categories.
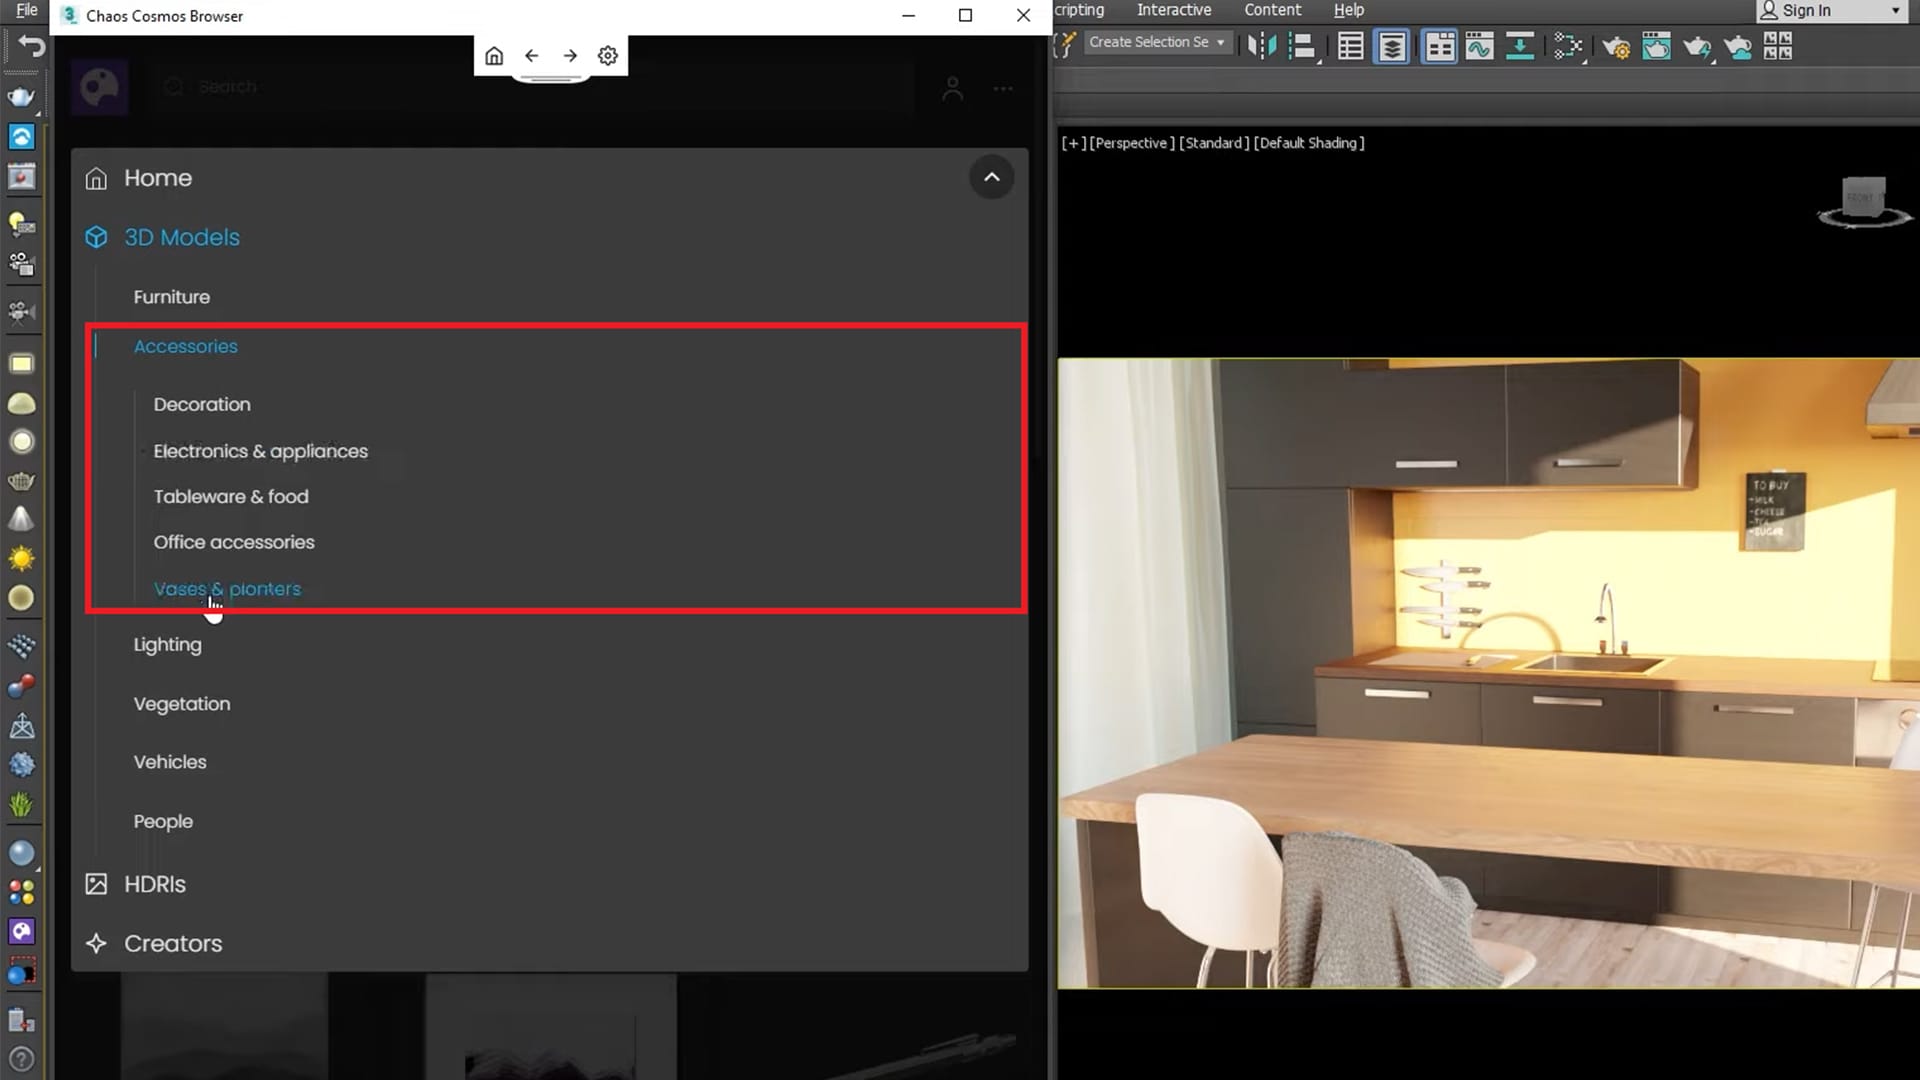
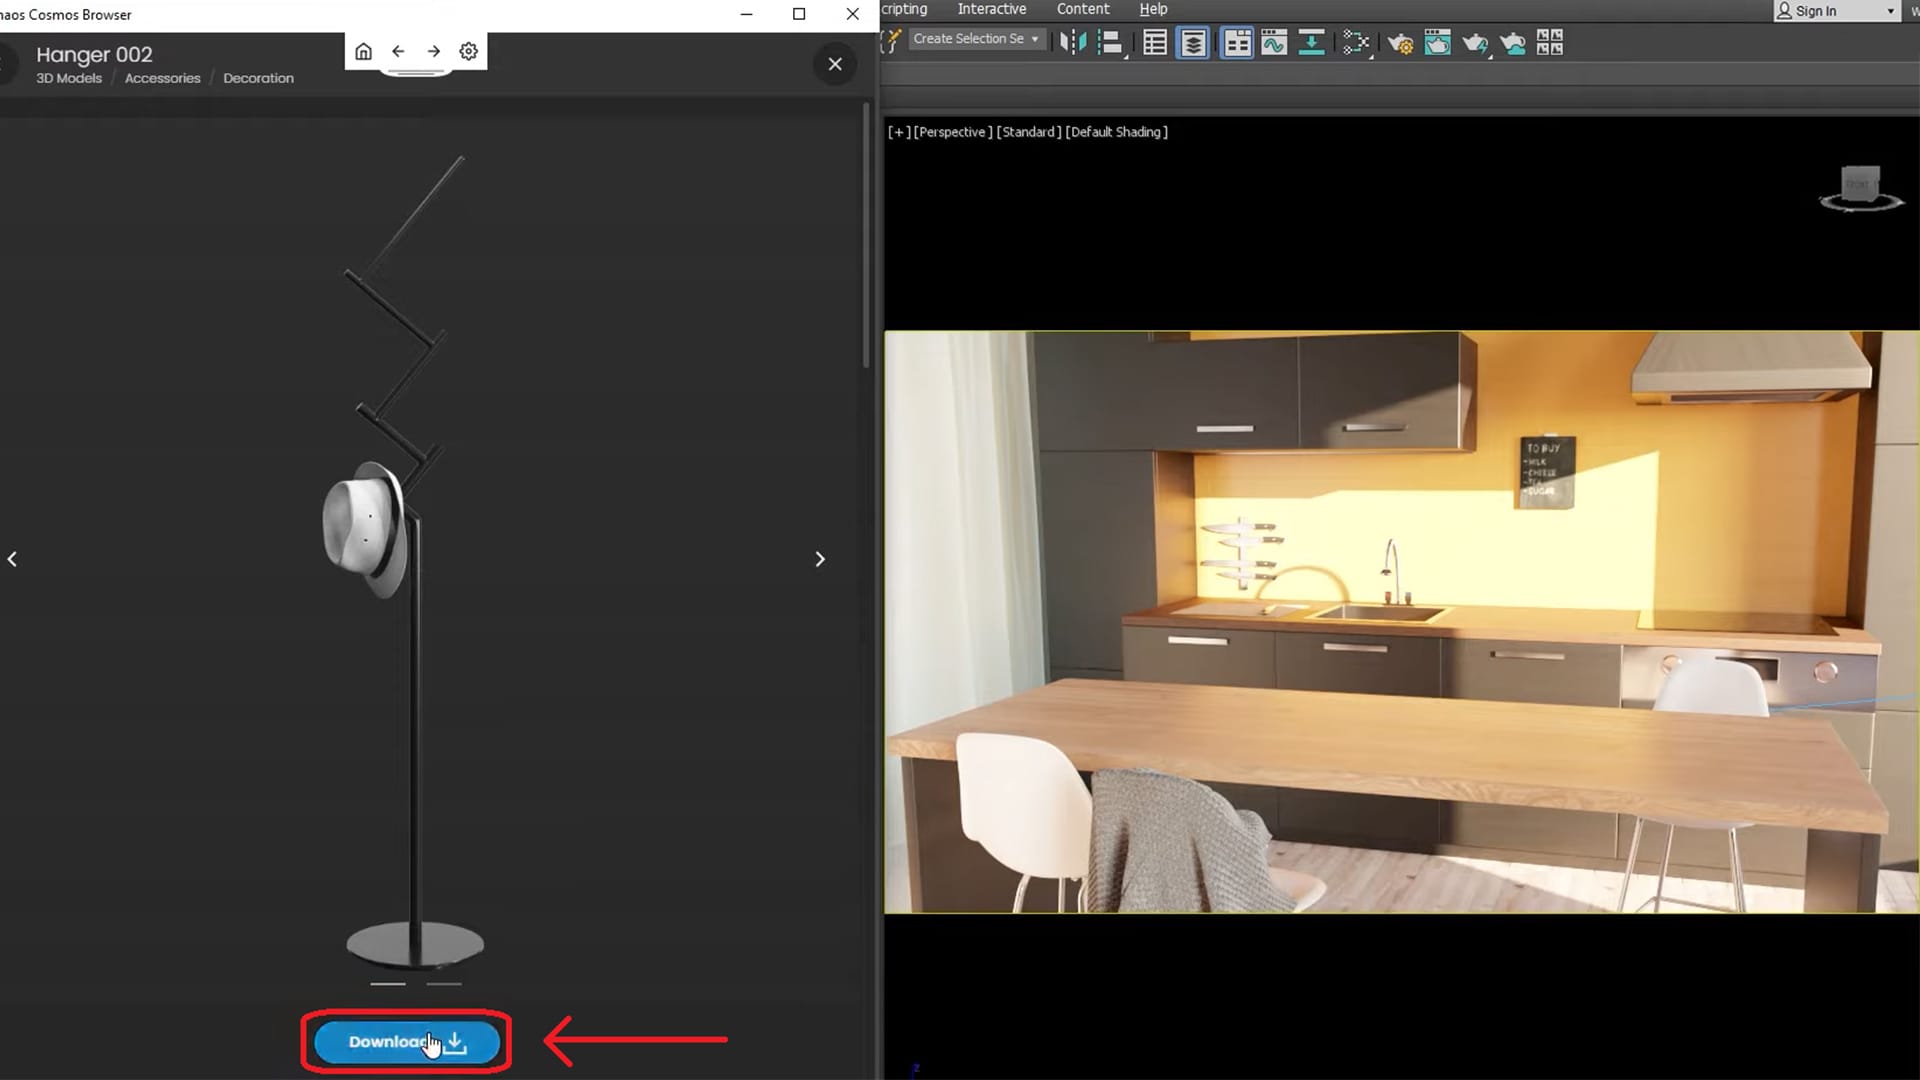
In the Accessories menu there are a variety of models. Select a model to preview it. After inspecting it, click on the Download button. Repeat this process for a few more models to get the hang of it.
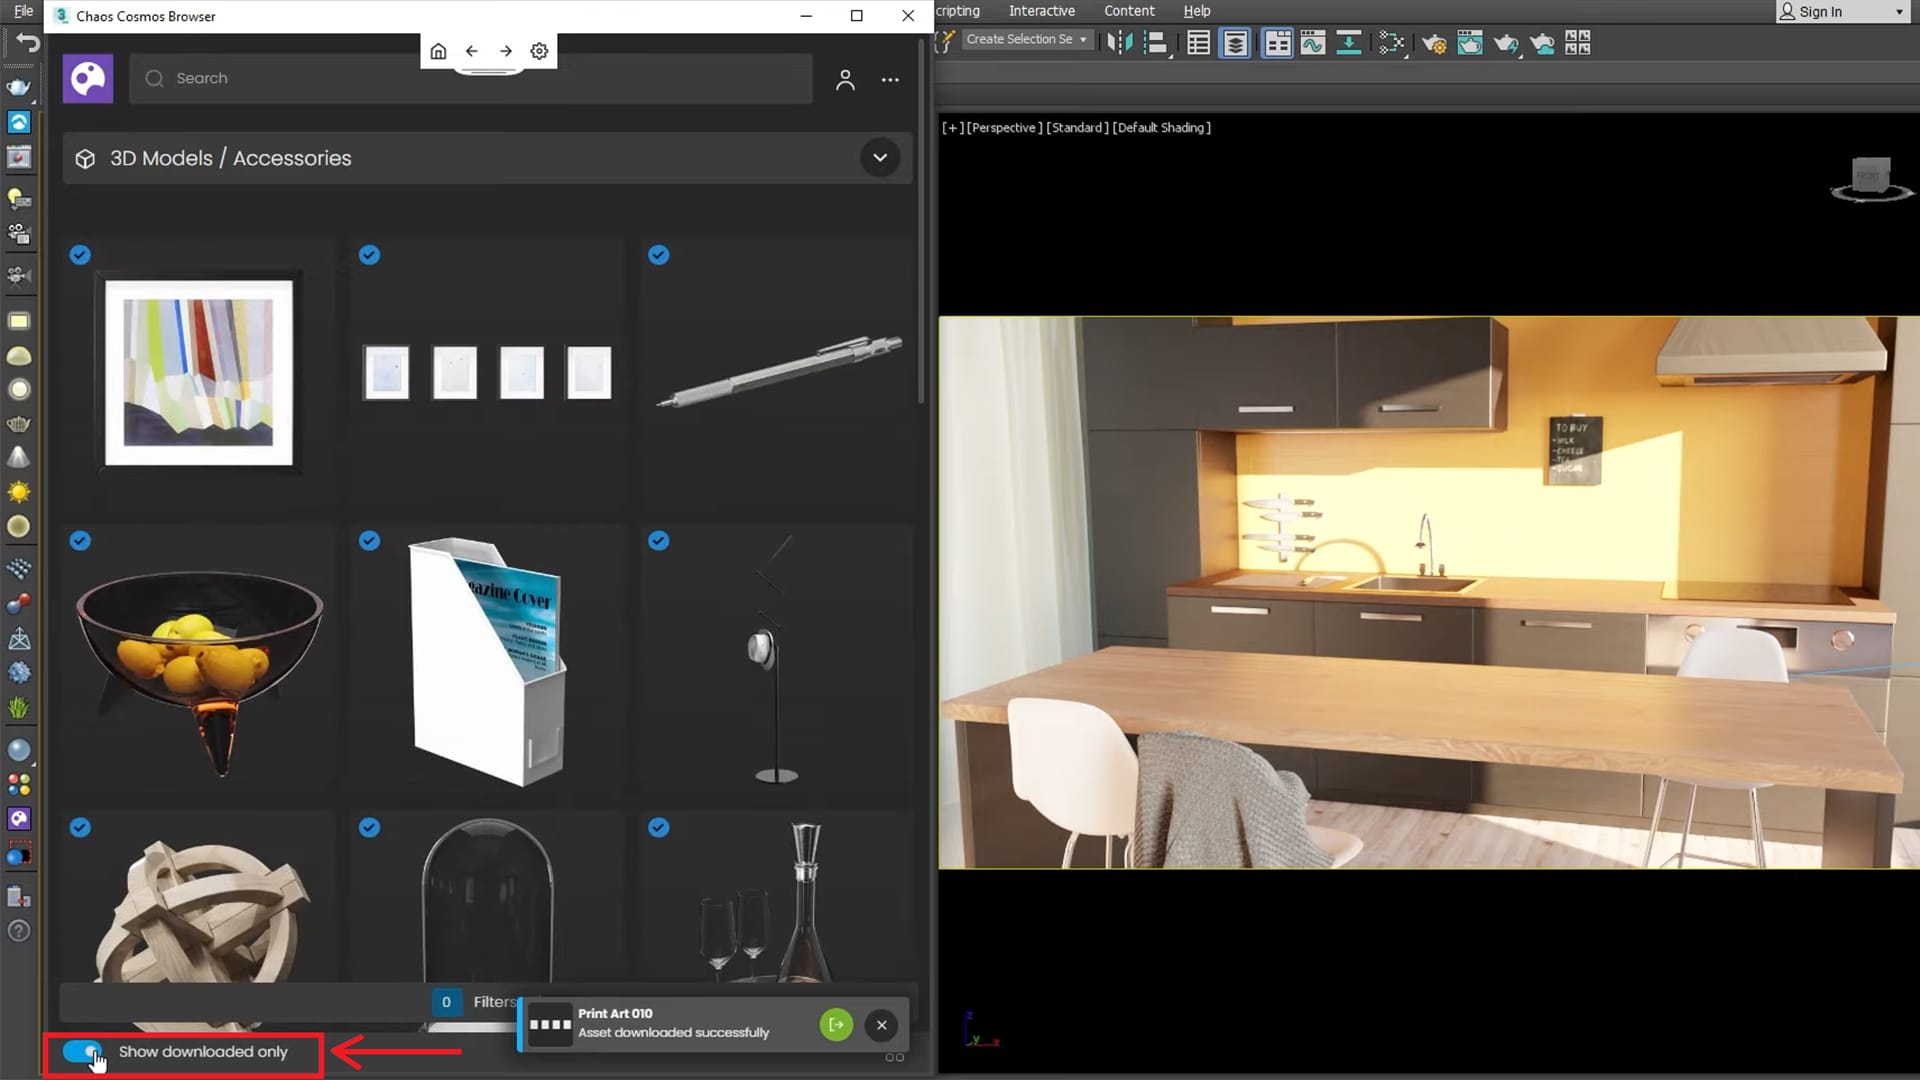
In order to see all of the models you downloaded for the specific category, click on the “Show downloaded only”.
Now you can start placing the downloaded assets into the scene. The easiest way is by dragging and dropping. All Chaos Cosmos assets are aligned based on the normal of the surface on which you’re placing them. The Cosmos Assets can also be stacked, rotated and scaled to fit your desired look.
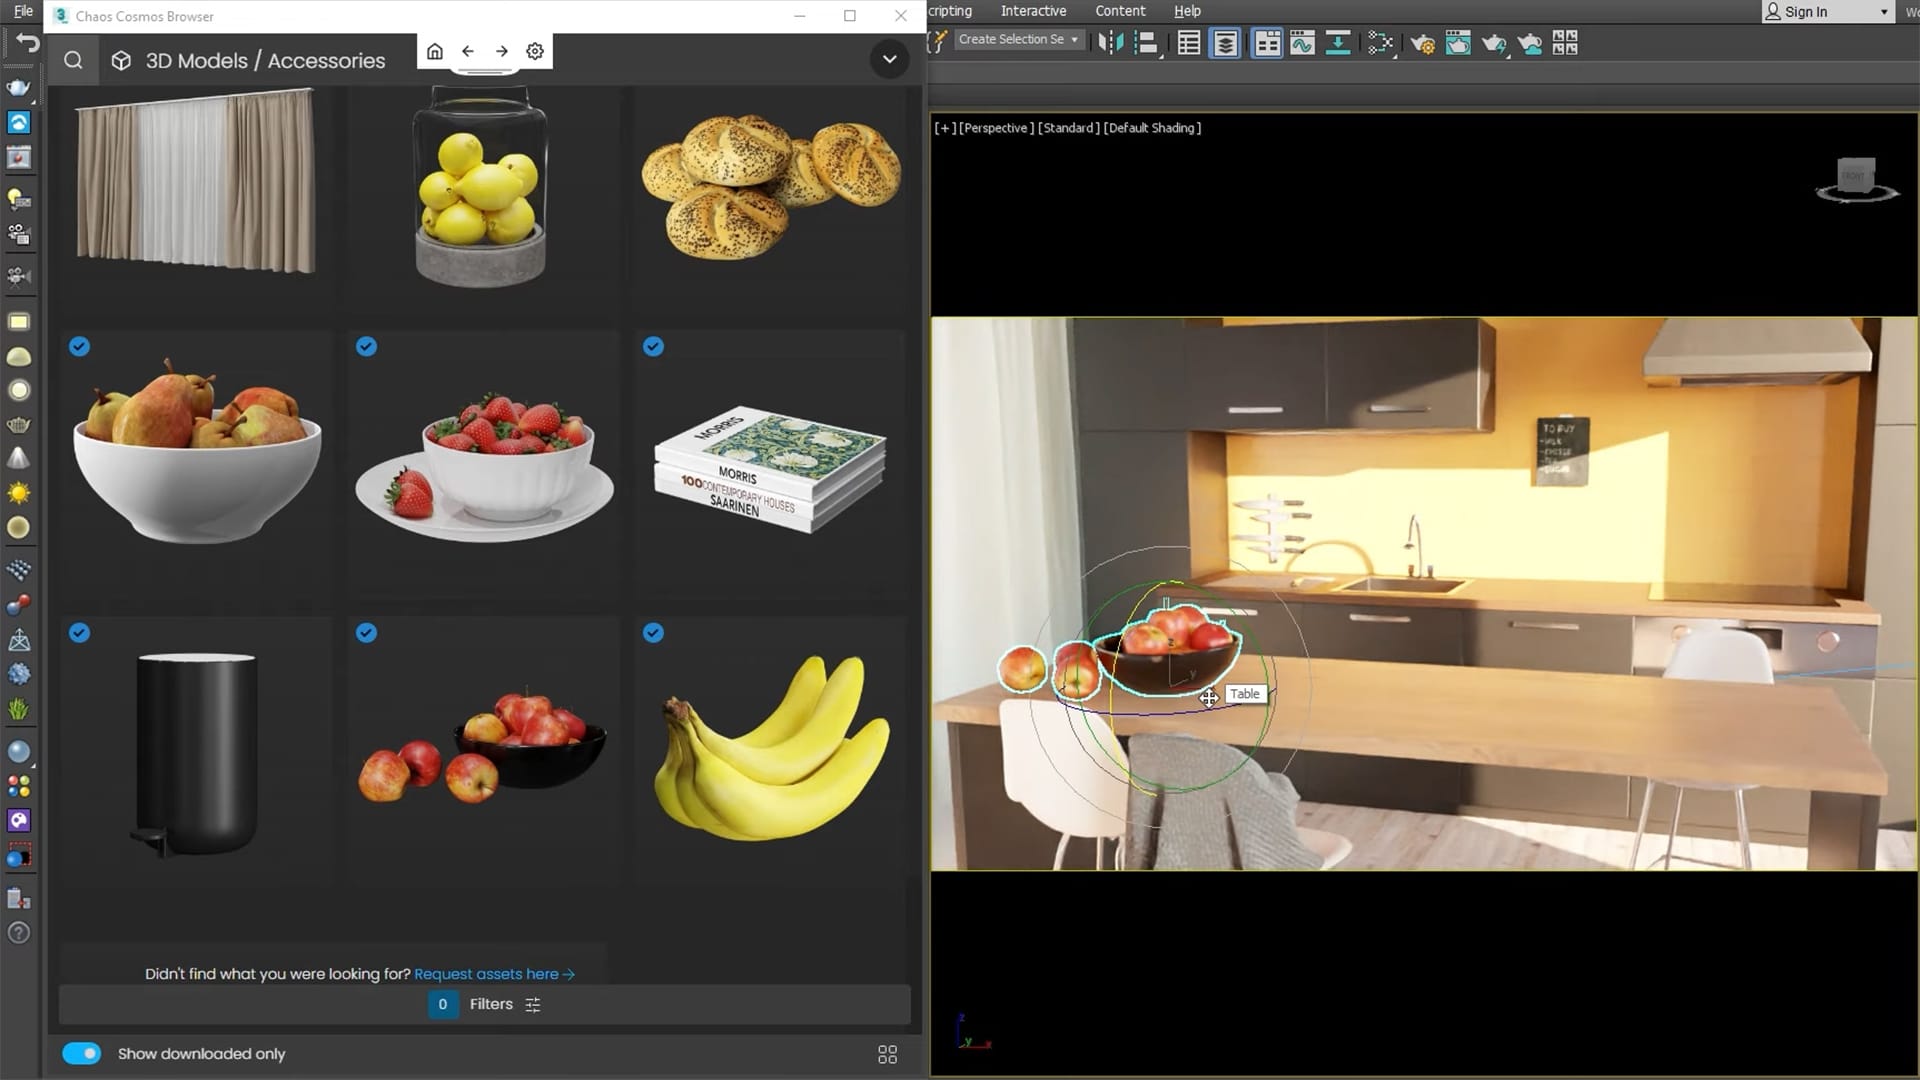
Once you are happy with the look of the kitchen, you can go ahead and minimize the harsh highlights on the kitchen tiles. To do that, you can add and position some trees from the Chaos Cosmos browser to the exterior so they cast shadows on the kitchen tiles.
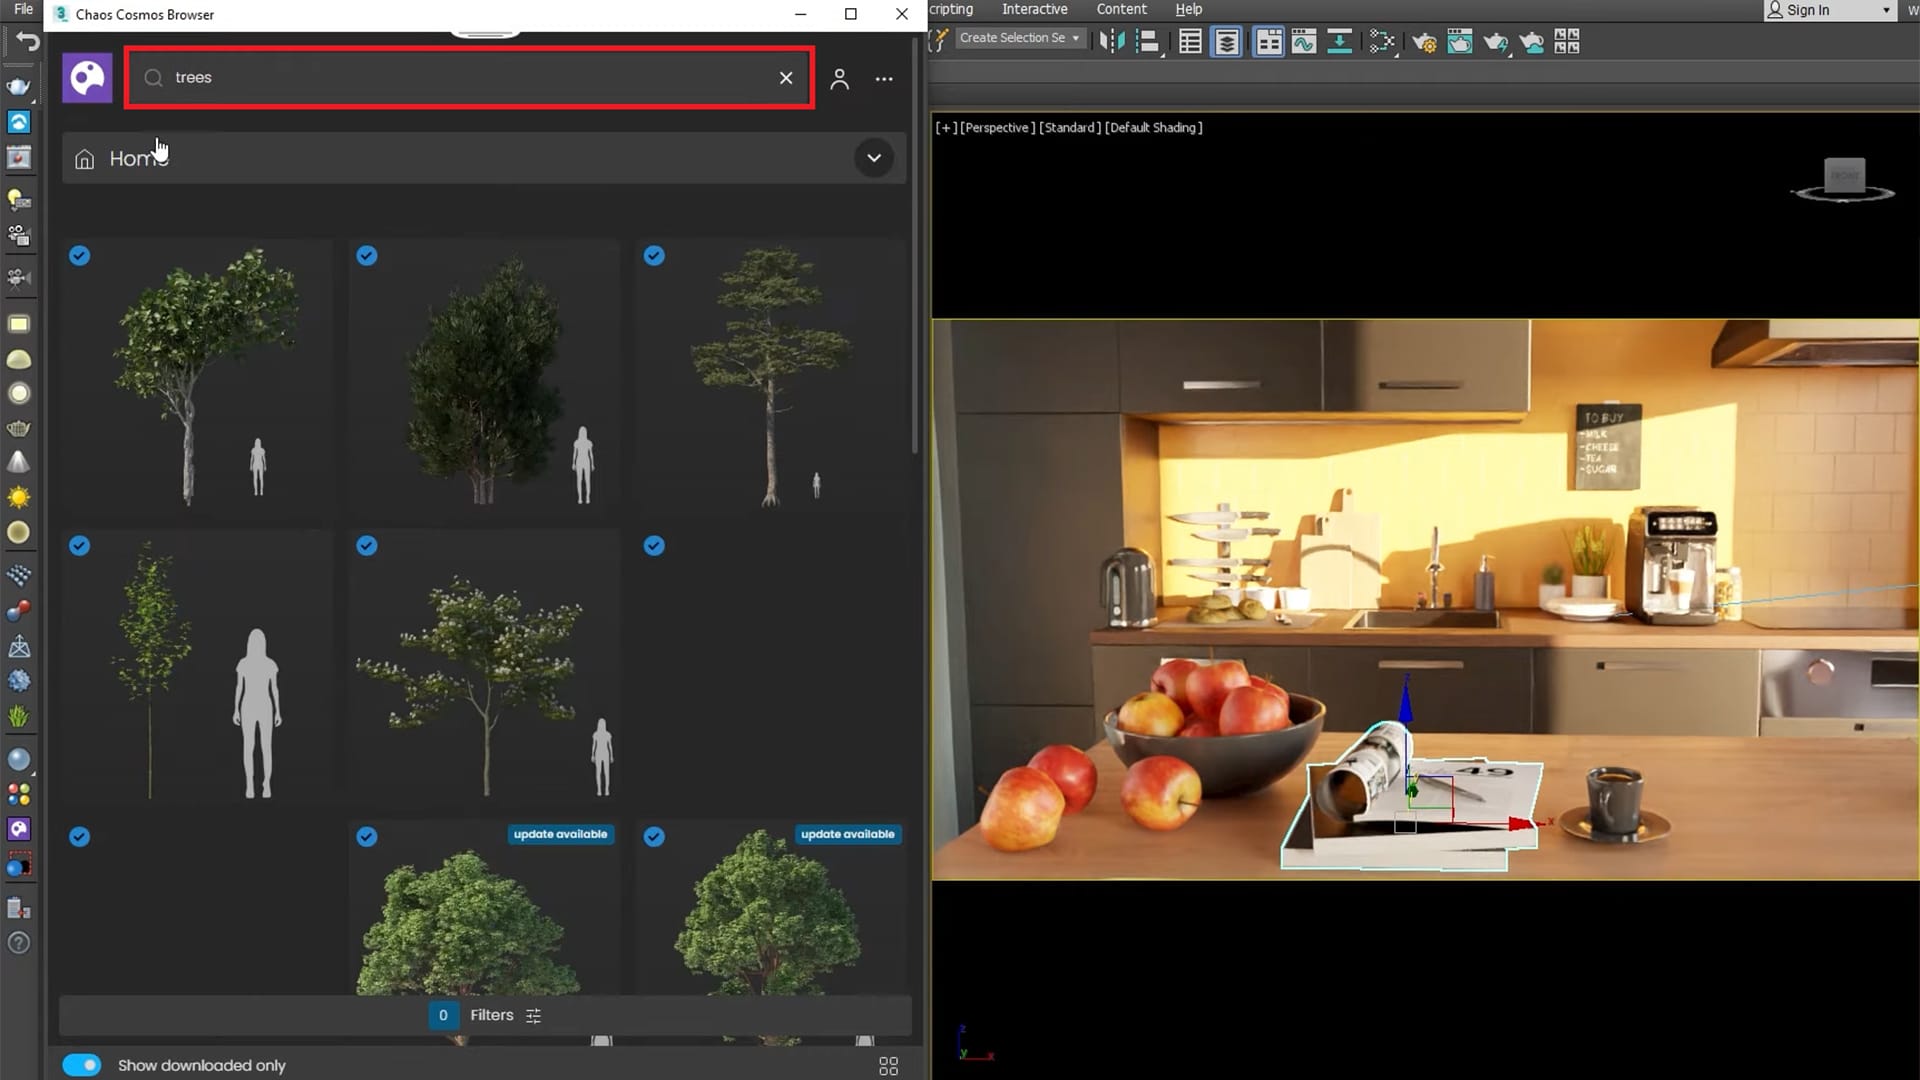
From the Top view we will position the trees so they cast shadows on the kitchen tiles.
Ready for part 2?
In the next part of the tutorial, you will learn how to set up and adjust VRayPhysical camera, work with materials and textures and create natural lighting for your kitchen interior.

 Tiếng Việt