Introduction
Chaos Cloud is a software as a service (SaaS) which allows you to submit and render scenes with cloud-based V-Ray. You can concentrate on designing and creating your scene, and Chaos Cloud will take care of installing and maintaining everything necessary to run V-Ray, without hogging your hardware and software. It is available for all 3D platforms compatible with V-Ray. Its interface is accessible by a web browser.
Rendering in Chaos Cloud is pretty simple and straightforward. All that is required is to have the Chaos Cloud Client application installed, after which you can access Chaos Cloud’s web-based interface and submit jobs to it directly from your host 3D software application. Once in the cloud, you are able to monitor the progress of your currently submitted jobs, queue up subsequent jobs, as well as change job settings and resubmit jobs without even opening a scene – right from your phone.

1. Render in Chaos Cloud – Submit your render jobs from V-Ray for SketchUp
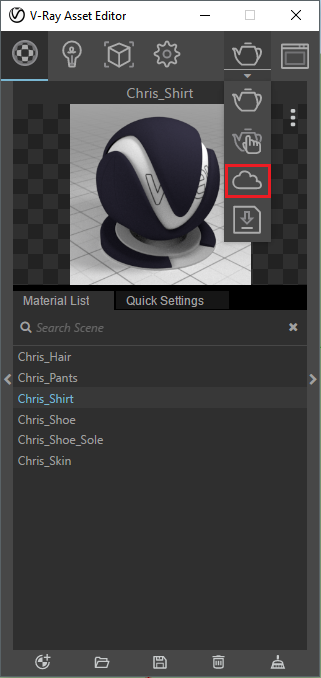
V-Ray for SketchUp provides in-built integration with Chaos Cloud, allowing you to submit render jobs to the cloud directly from SketchUp, using the dedicated Render in Chaos Cloud button. The button is located on the V-Ray Asset Editor.
Clicking on the Render in Chaos Cloud button will send over your currently opened scene to Chaos Cloud for analysis.

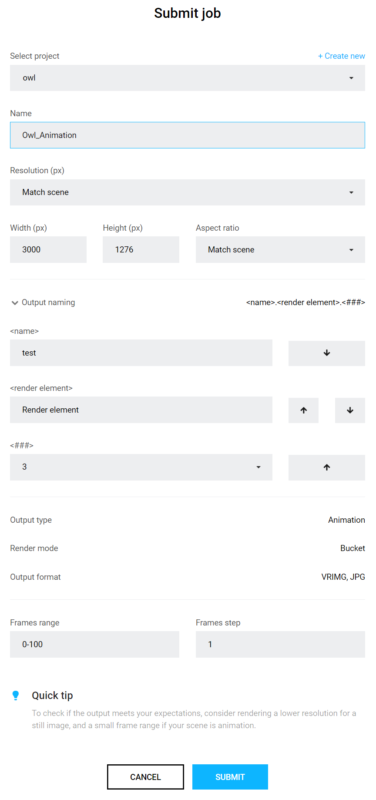
Once the scene is successfully analyzed, you have to finalize some of the settings of the render job before it starts rendering in Chaos Cloud.

The output image types that you are able to download by rendering in Chaos Cloud are JPG and the file type you have specified in the settings of your scene. These settings are customized in the 3D application you use for designing your scene. If you don’t specify anything in the 3D application, Chaos Cloud generates an EXR image beside the JPG one.
When submitting a render job requesting TIFF and/or TGA images as a result, the results might be unexpected as not all TIFF and TGA settings are exported to Chaos Cloud.
Note that the supported output image formats by Chaos Cloud regardless of the host application are the following: *.png, *.bmp, *.tga, *.hdr, *.sgi, *.rgb, *.rgba, *.jpg, *.jpeg, *.exr, *.pic, *.tif, *.tiff and *.vrimg.

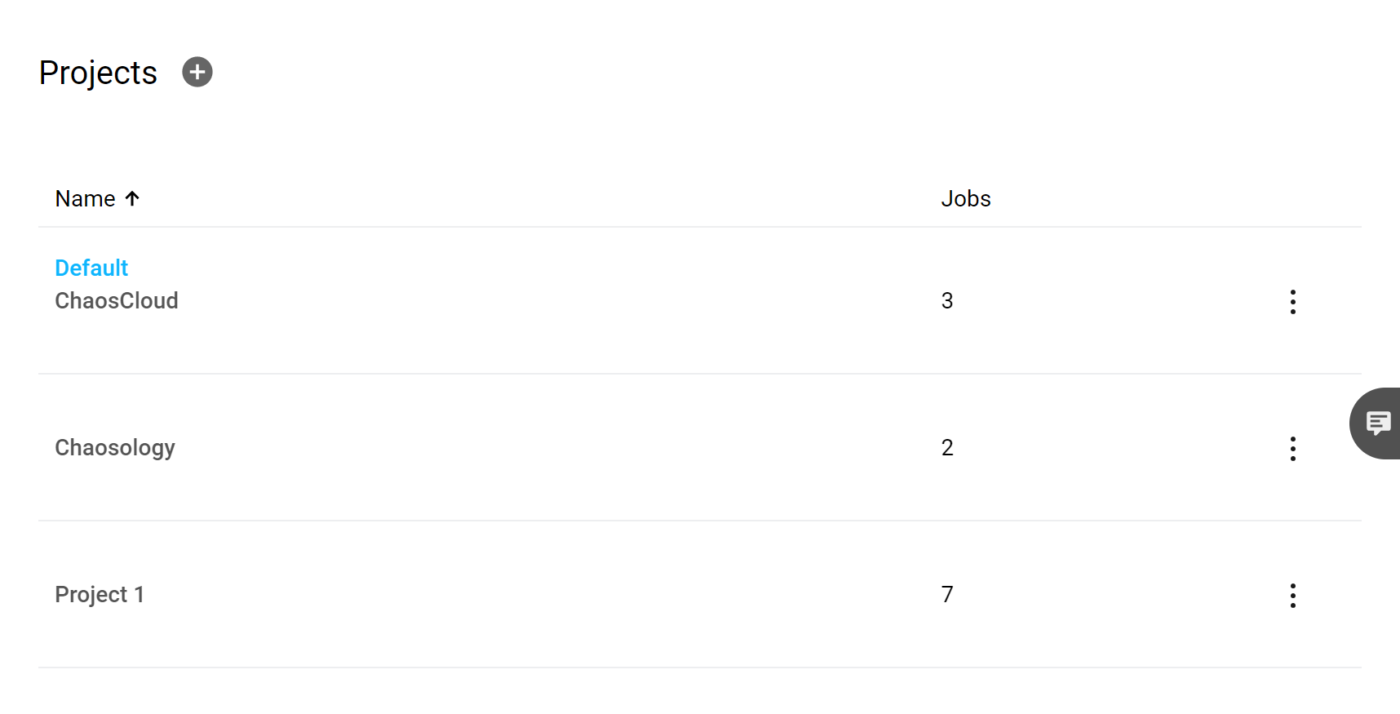
Clicking on View Job redirects you to the Projects tab of Chaos Cloud. There you can monitor the status of your render jobs, download them, organize them in projects, resubmit, or delete them. For more detailed information on these topics, see the Managing render jobs in Chaos Cloud page.

2. Prepare a scene for production rendering
This video guide reveals the essential tricks that help you optimize your scenes for rendering on the cloud — which ultimately reduces your rendering time, all the while improving how you efficiently manage resources.
It explains how to:
Set up your scene for an initial preview by dropping the quality settings and rendering it locally .
Check the results of your locally rendered preview with a preview render on the cloud — the results should be identical!
Set up your scene for final production rendering with high-quality settings.
- Open V-Ray Asset Editor. Disable the Interactive option, set the Quality option to Low, and render the scene locally.
- Enable the Save Image rollout. Choose a file path, name, and type for the scene.
- Press Render with Chaos Cloud button. You can change the settings in the new web page that shows.
- Once you are ready, press the Submit button to upload your job.
- When it is successfully scheduled for rendering, press the View Job button.
- A new web page opens. Wait for the rendering to finish and press the Download button.
- In the V-Ray Asset Editor, set the Quality option to Very High. Render with Chaos Cloud, and change the name and the pixels for the job in the newly open web page. Repeat steps 4, 5, and 6.

- Khi bạn đã sẵn sàng, nhấn nút Submit để tải công việc của bạn lên.
- Khi thời gian kết xuất đã lên lịch thành công, nhấn nút View Job.
- Một trang web mới được mở. Đợi cho việc kết xuất hoàn thành và nhấn nút Download.
- Trong mục V-Ray Asset Editor, thiết lập tùy chọn Quality ở mức Very High. Kết xuất với Chaos Cloud, và thay đổi tên và điểm ảnh cho công việc trong trang web mới mở. Lặp lại các bước 4,5 và 6.


 Tiếng Việt