This step-by-step tutorial teaches how to use Cryptomatte Render Elements in V-Ray Next for SketchUp, plus how to composite and color-correct your render layers.
The latest updates of V-Ray Next for SketchUp have introduced a lot of new features and performance improvements for users. You can see what’s new right here.
For me, one of my favorite updates is the implementation of the Cryptomatte Render Element into V-Ray Next for SketchUp. This now allows us to easily produce accurate masks of every object for our post-production work. Cryptomatte also supports motion blur and DOF effects — and the color-correction result is perfect.
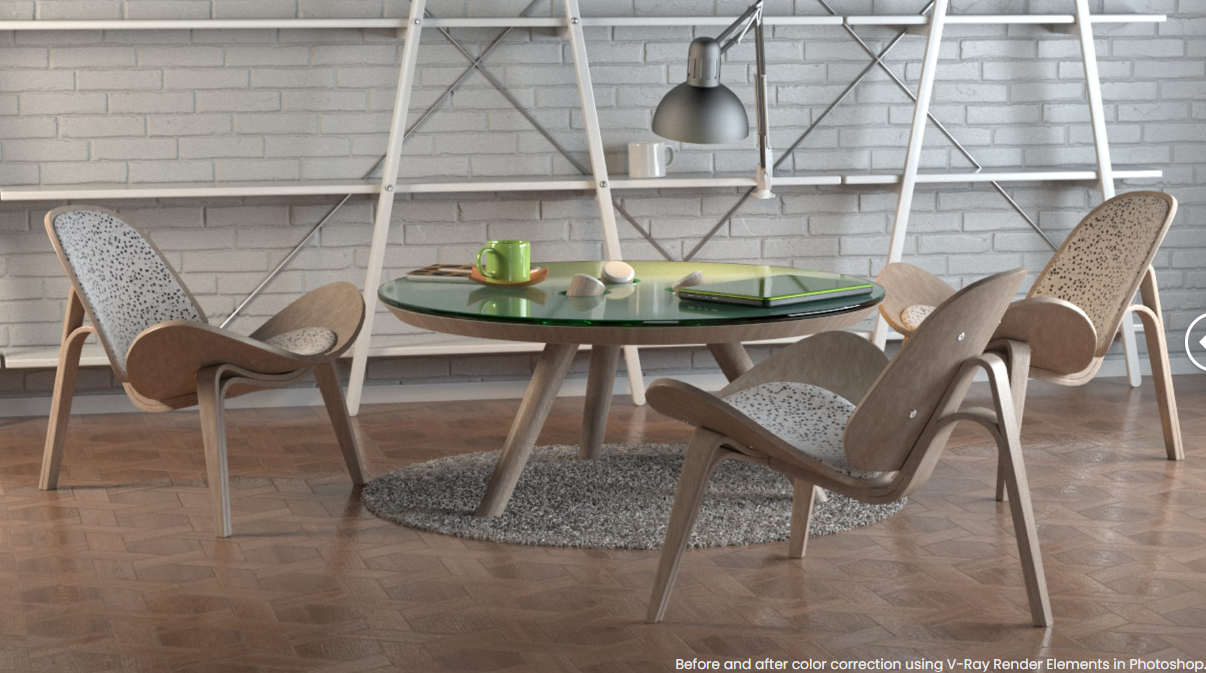
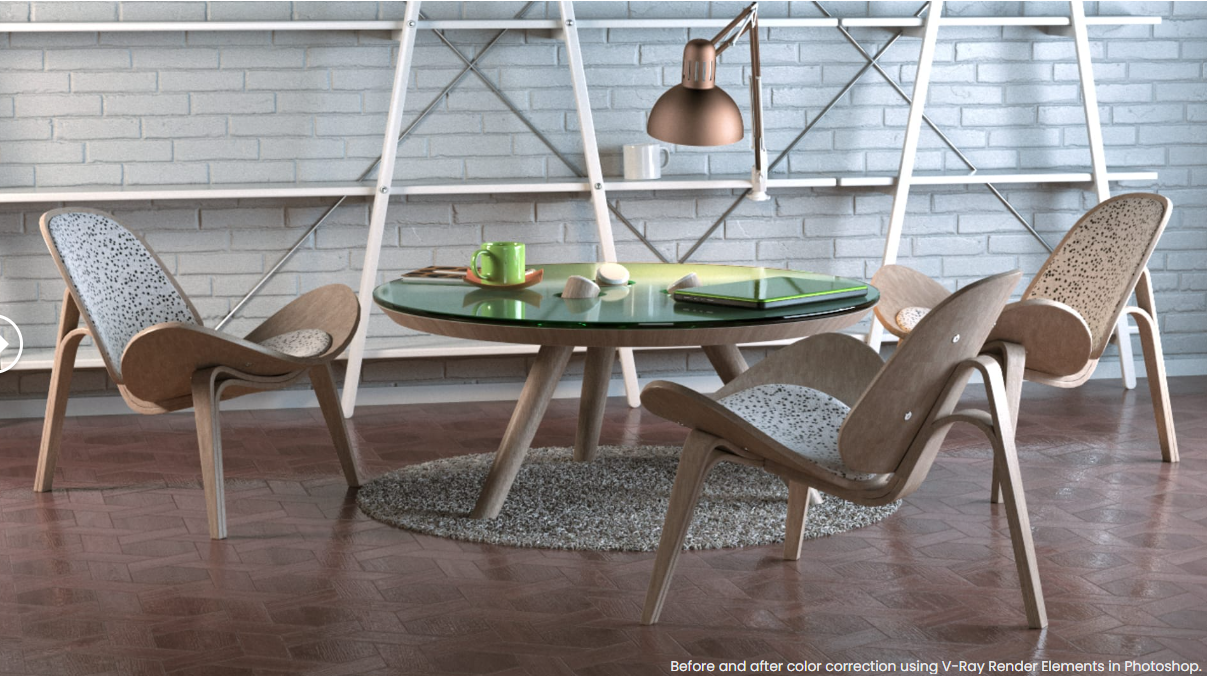
Before and after color correction using V-Ray Render Elements in Photoshop.
How to use Cryptomatte in V-Ray Next for SketchUp tutorial
This tutorial uses an example scene to show you exactly how to use Cryptomatte in V-Ray Next for SketchUp, as well as how to color-correct non-metal materials — the right way.
⬇ Download the example scene and assets to follow along with this tutorial here ⬇
Step 1: How to select Render Elements in V-Ray Next for SketchUp
Right-click the Render Elements icon in the Asset Editor and select the new Cryptomatte element to add it.
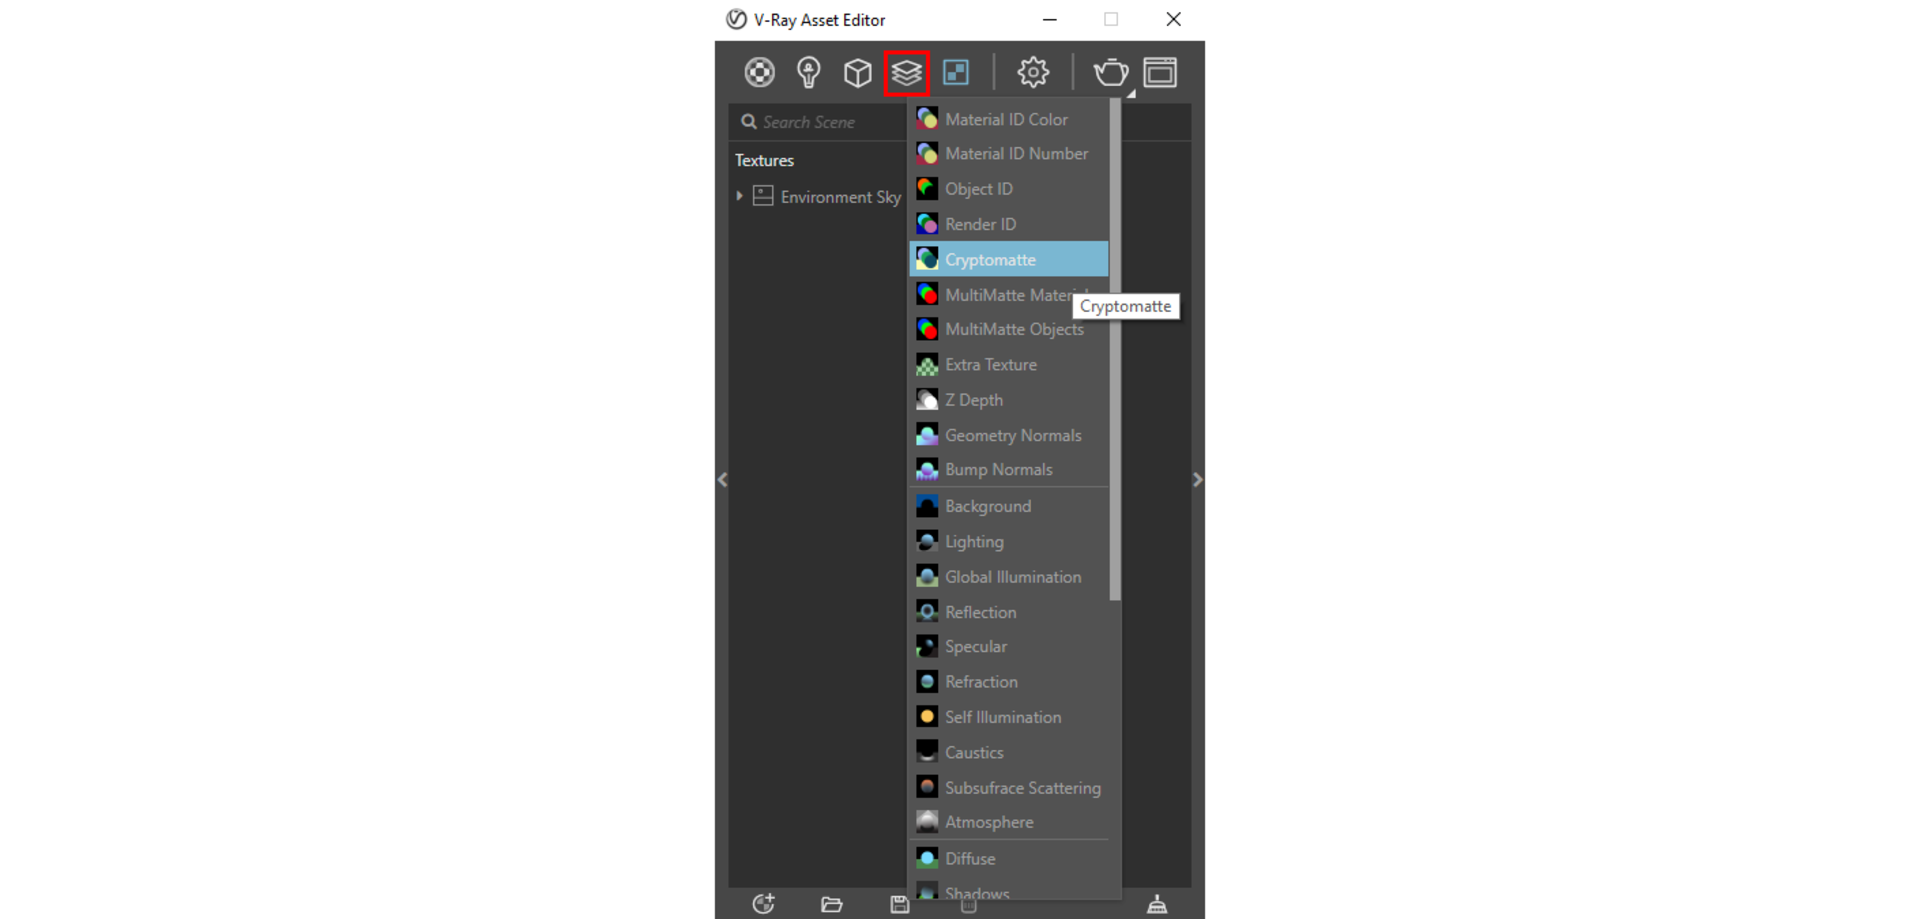
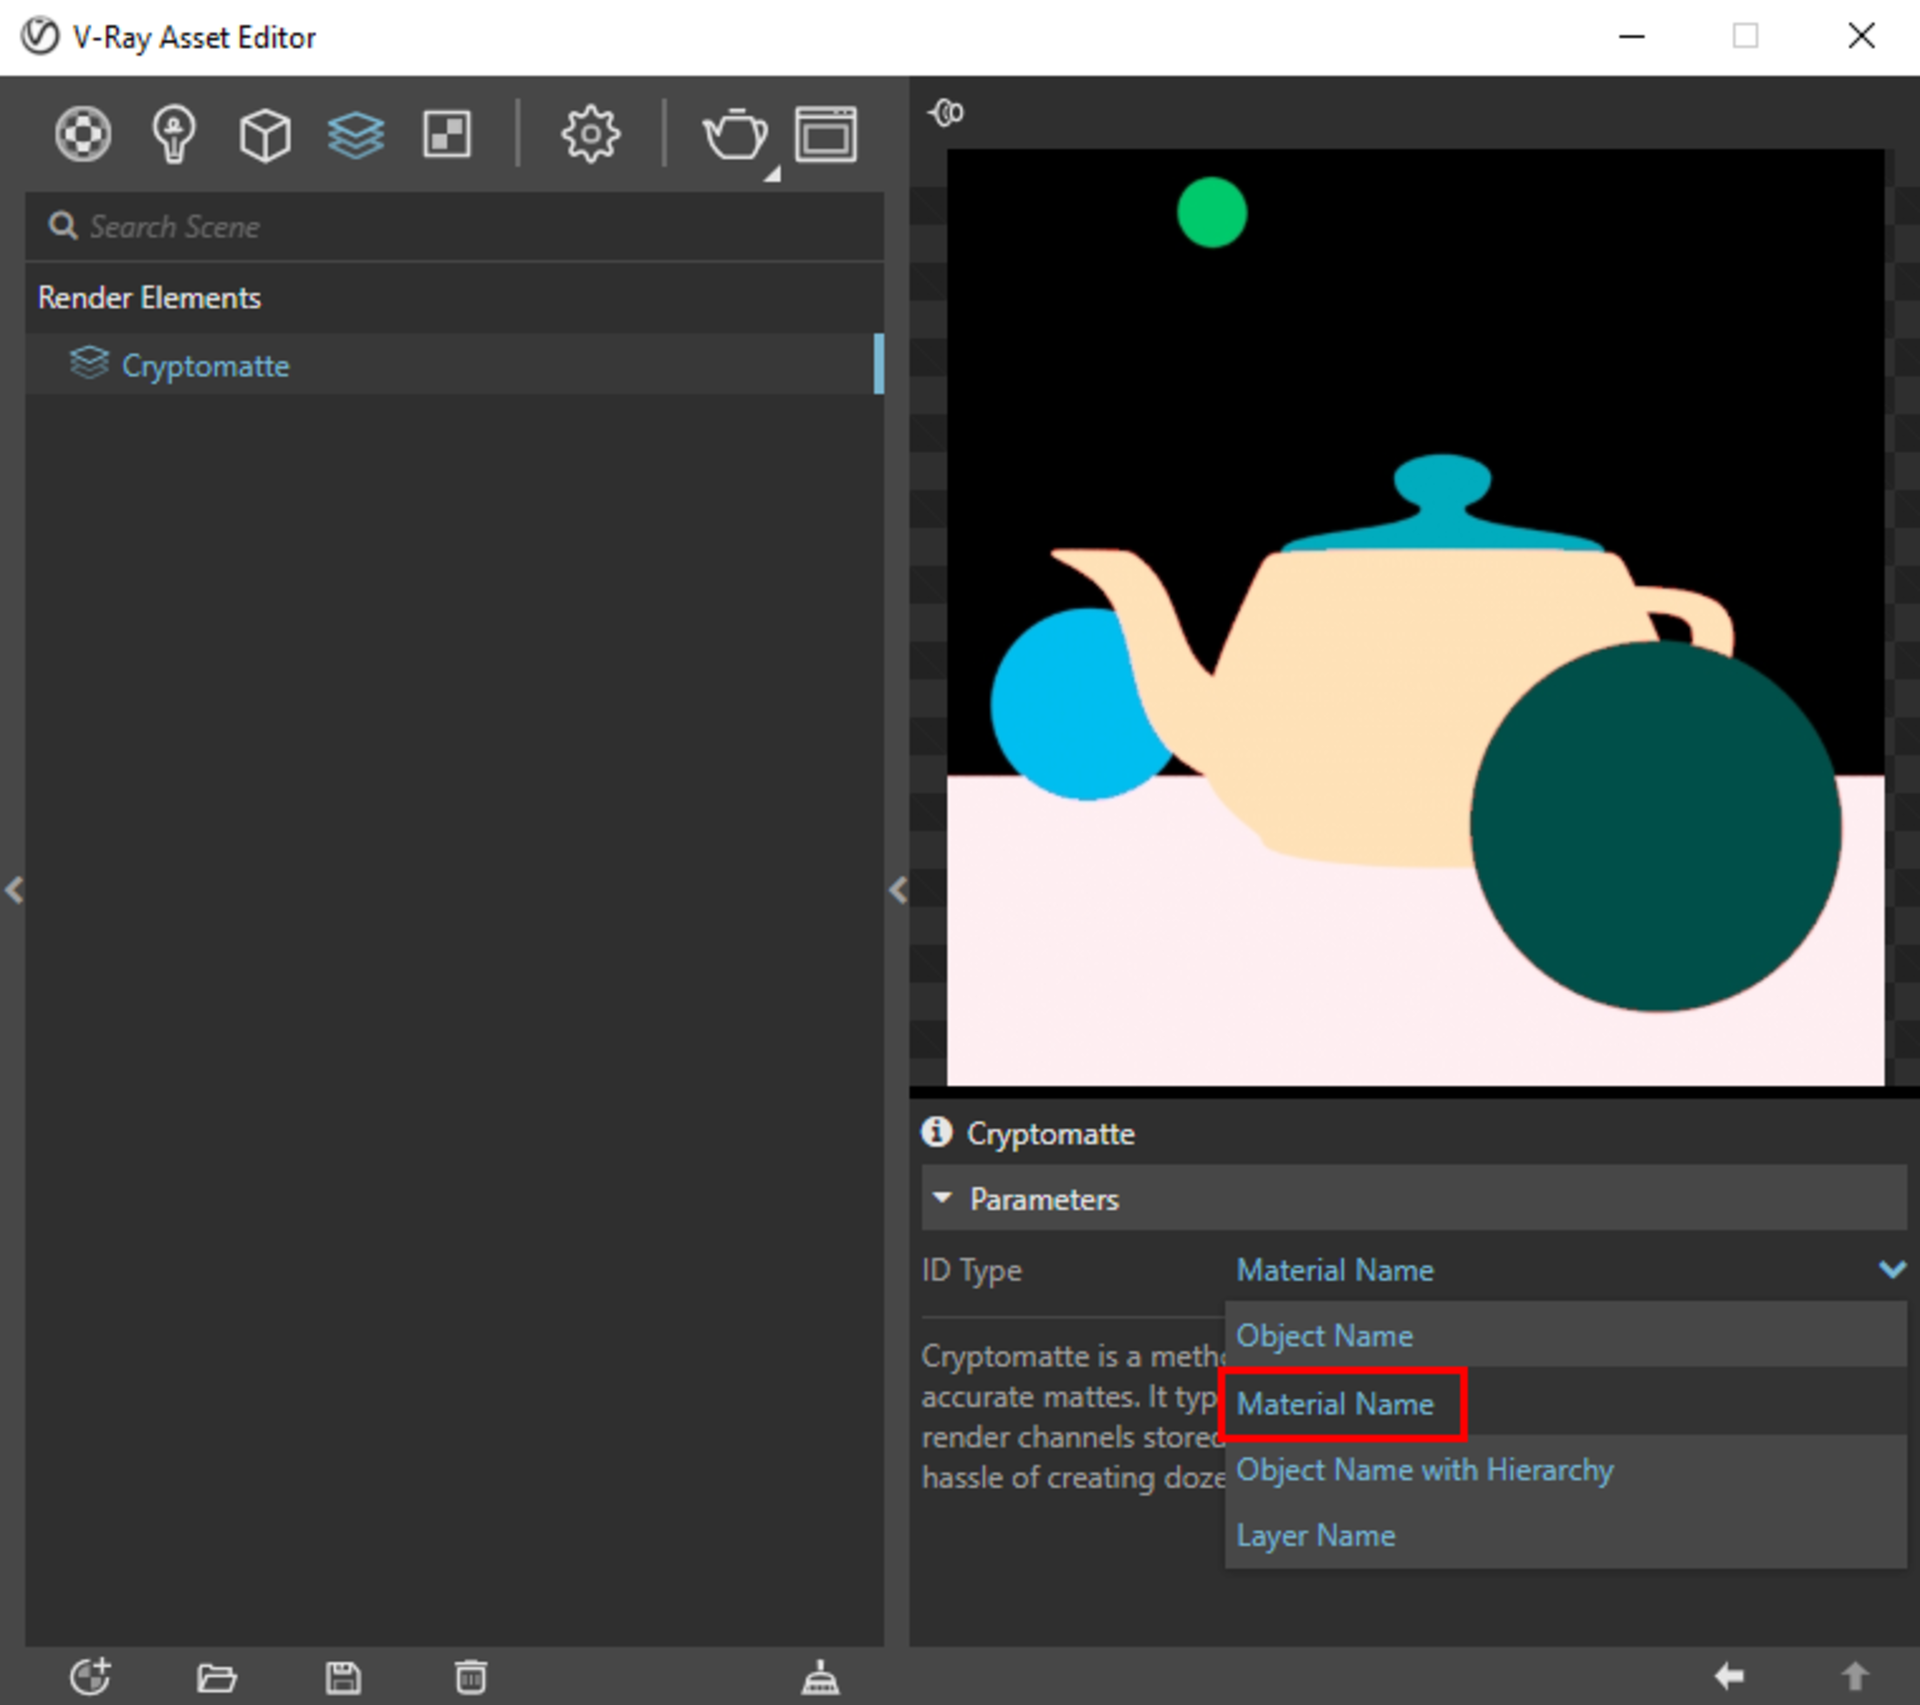
Now select the Cryptomatte Render Element and click on the little arrow to the right to expand the V-Ray Asset Editor. Here we can find a drop-down menu for ID type. You can create masks based on Materials, Objects or Layers. In this case, I’ll choose Material Name.
We will need more Render Elements for post-production. In this example, we need to add 5 Render Elements: Raw Total Light, Diffuse, Reflection, Specular and Refraction. We can use these to reassemble the Beauty pass later in photoshop.
Pro tip: Holding down the Ctrl/Cmd key allows adding multiple elements in one go.
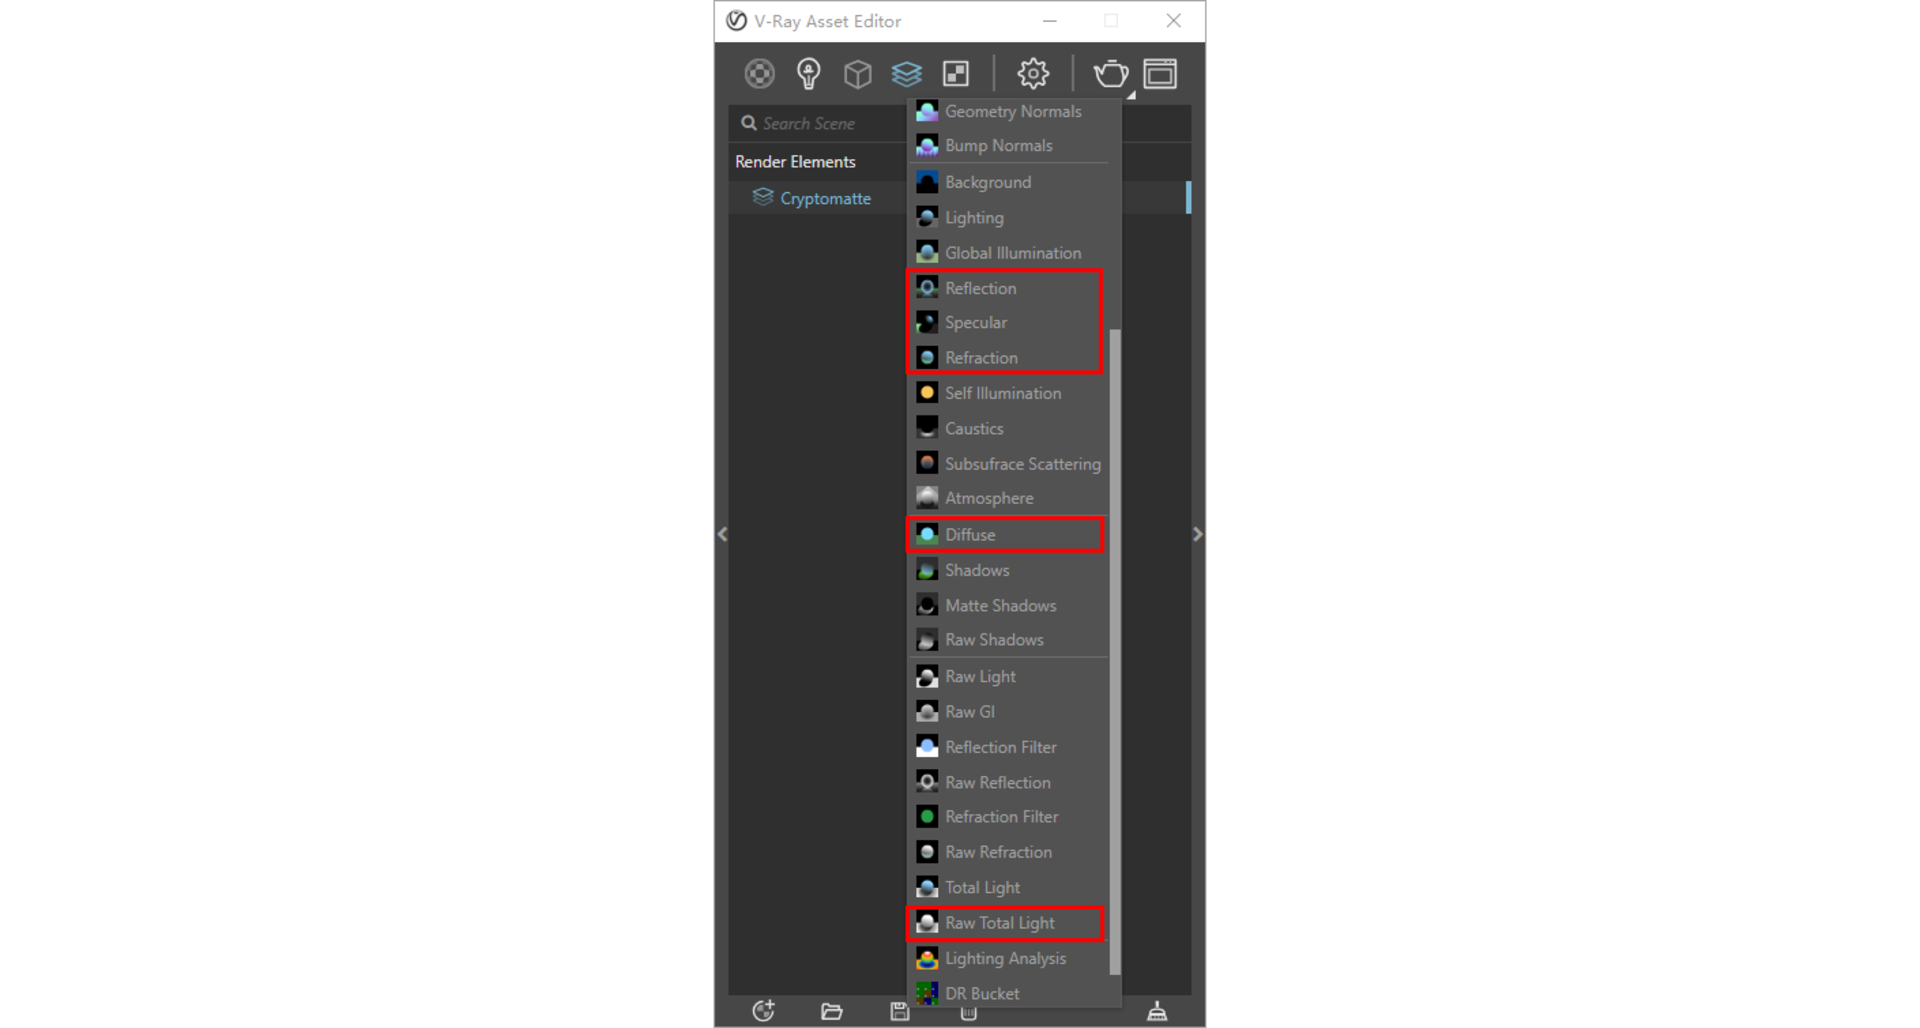
Note that 5 Render Elements will suffice for this example scene, but for other scenes various additional elements may also be needed.
The complete list required for compositing a Beauty pass can be found in the Preset Library: Create > Elements > Beauty.
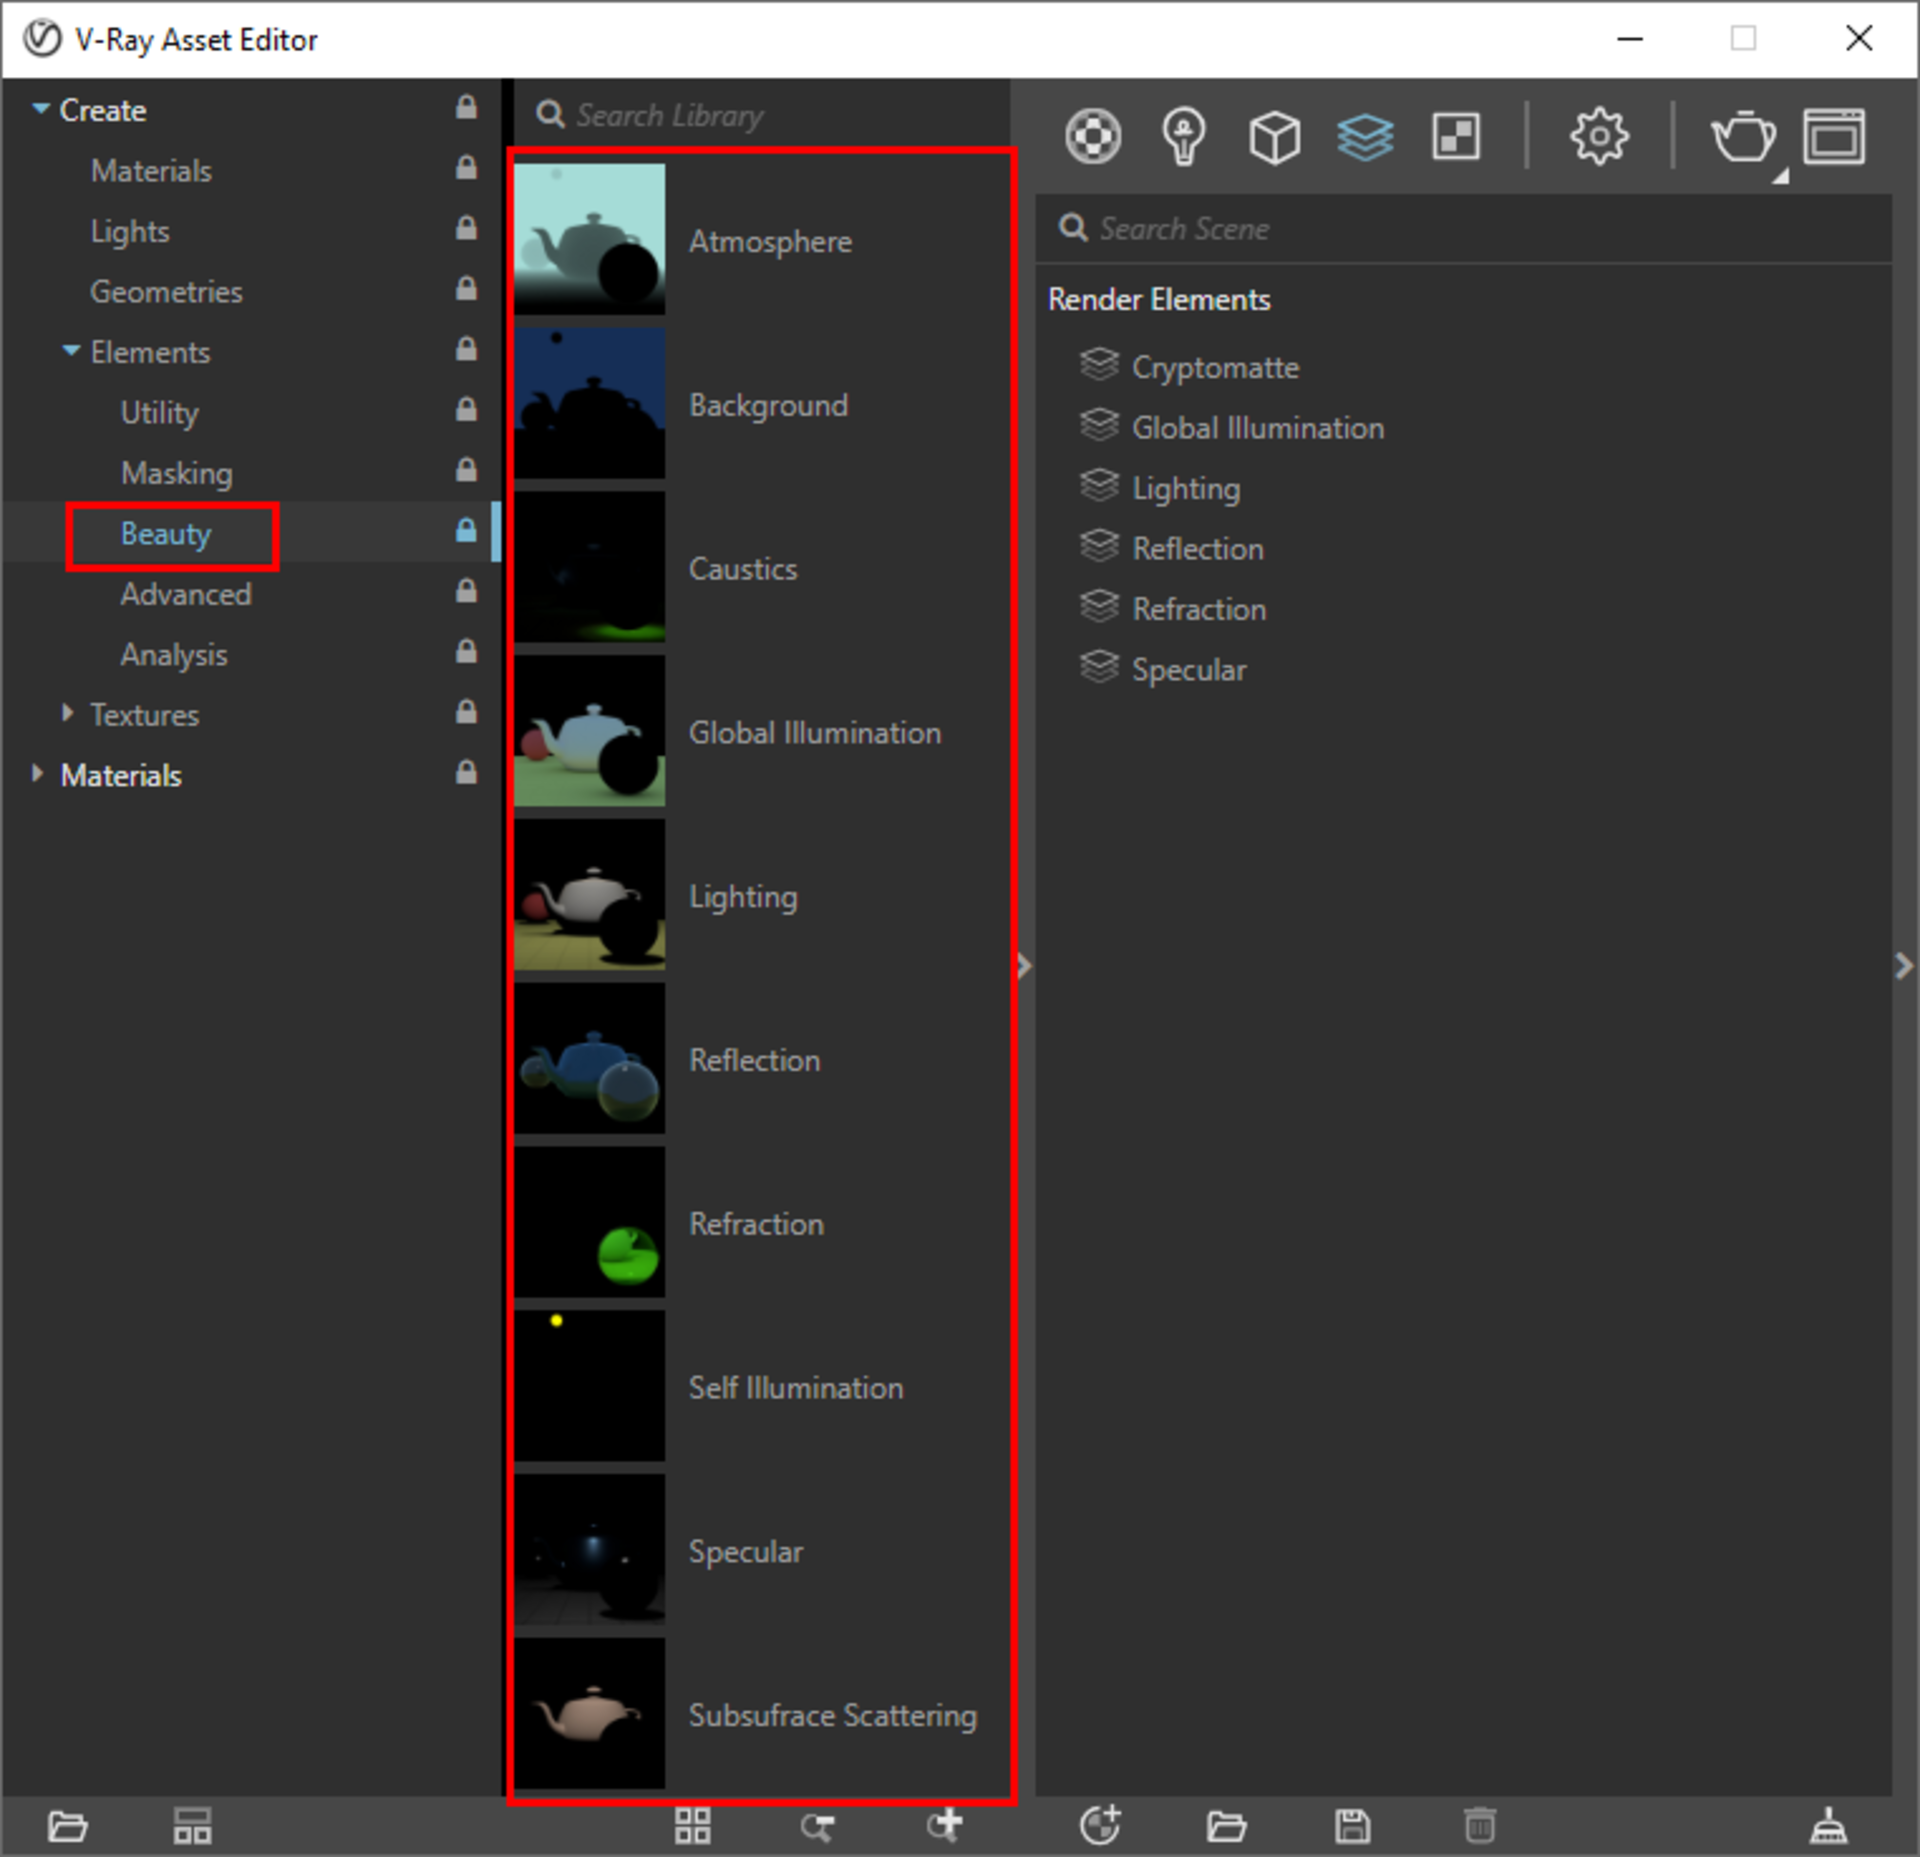
Step 2: Render & save the final render in V-Ray Next for SketchUp
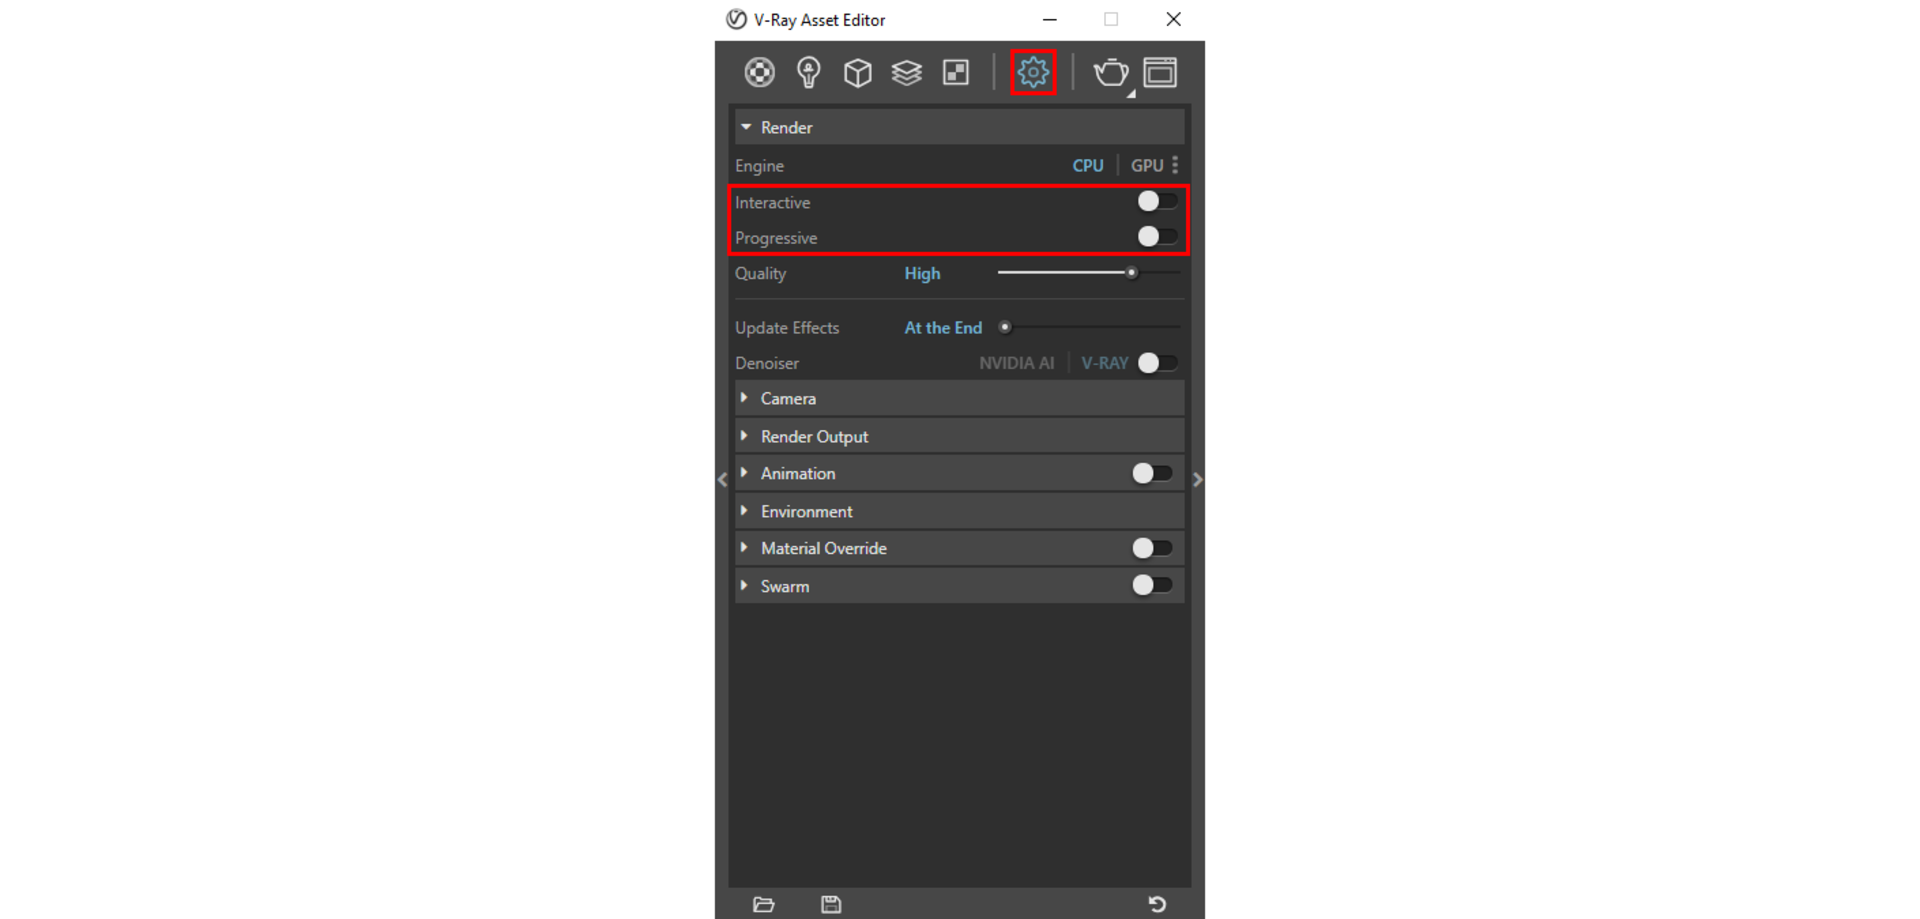
Select the gear icon to switch to the settings tab. Turn both Interactive and Progressive off, because now we are going to make a production render and Cryptomatte only works with the Bucket Image Sampler.
Now we can start the final render.
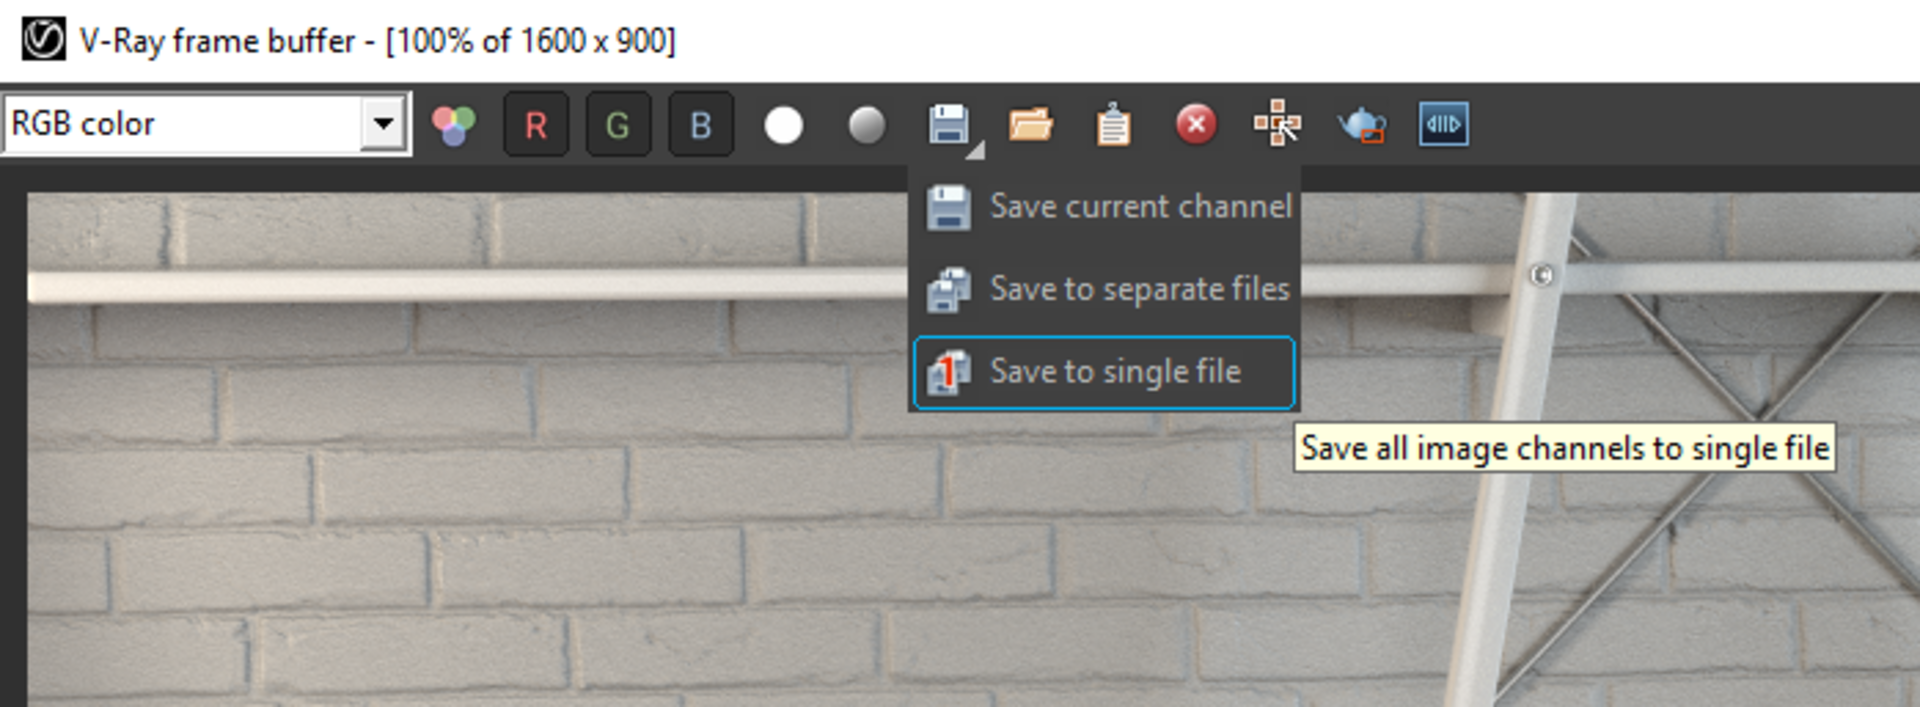
Once the render is done, long-press the Save icon on the V-Ray frame buffer (VFB) and select the third option: Save to single file.
Save the final render as an *.exr file.
The *.exr file will contain all the Render Elements — including the Cryptomatte.
Step 3: How to decode the Cryptomatte Render Element
To open the *.exr file correctly in Photoshop, we need to install a free plug-in from EXR-IO.
Once installed, simply double-click on the *.exr file to open it. You can also open it from the Photoshop Menu: File > Open.
Select and open the *.exr file that we just rendered. The following dialogue will pop up:
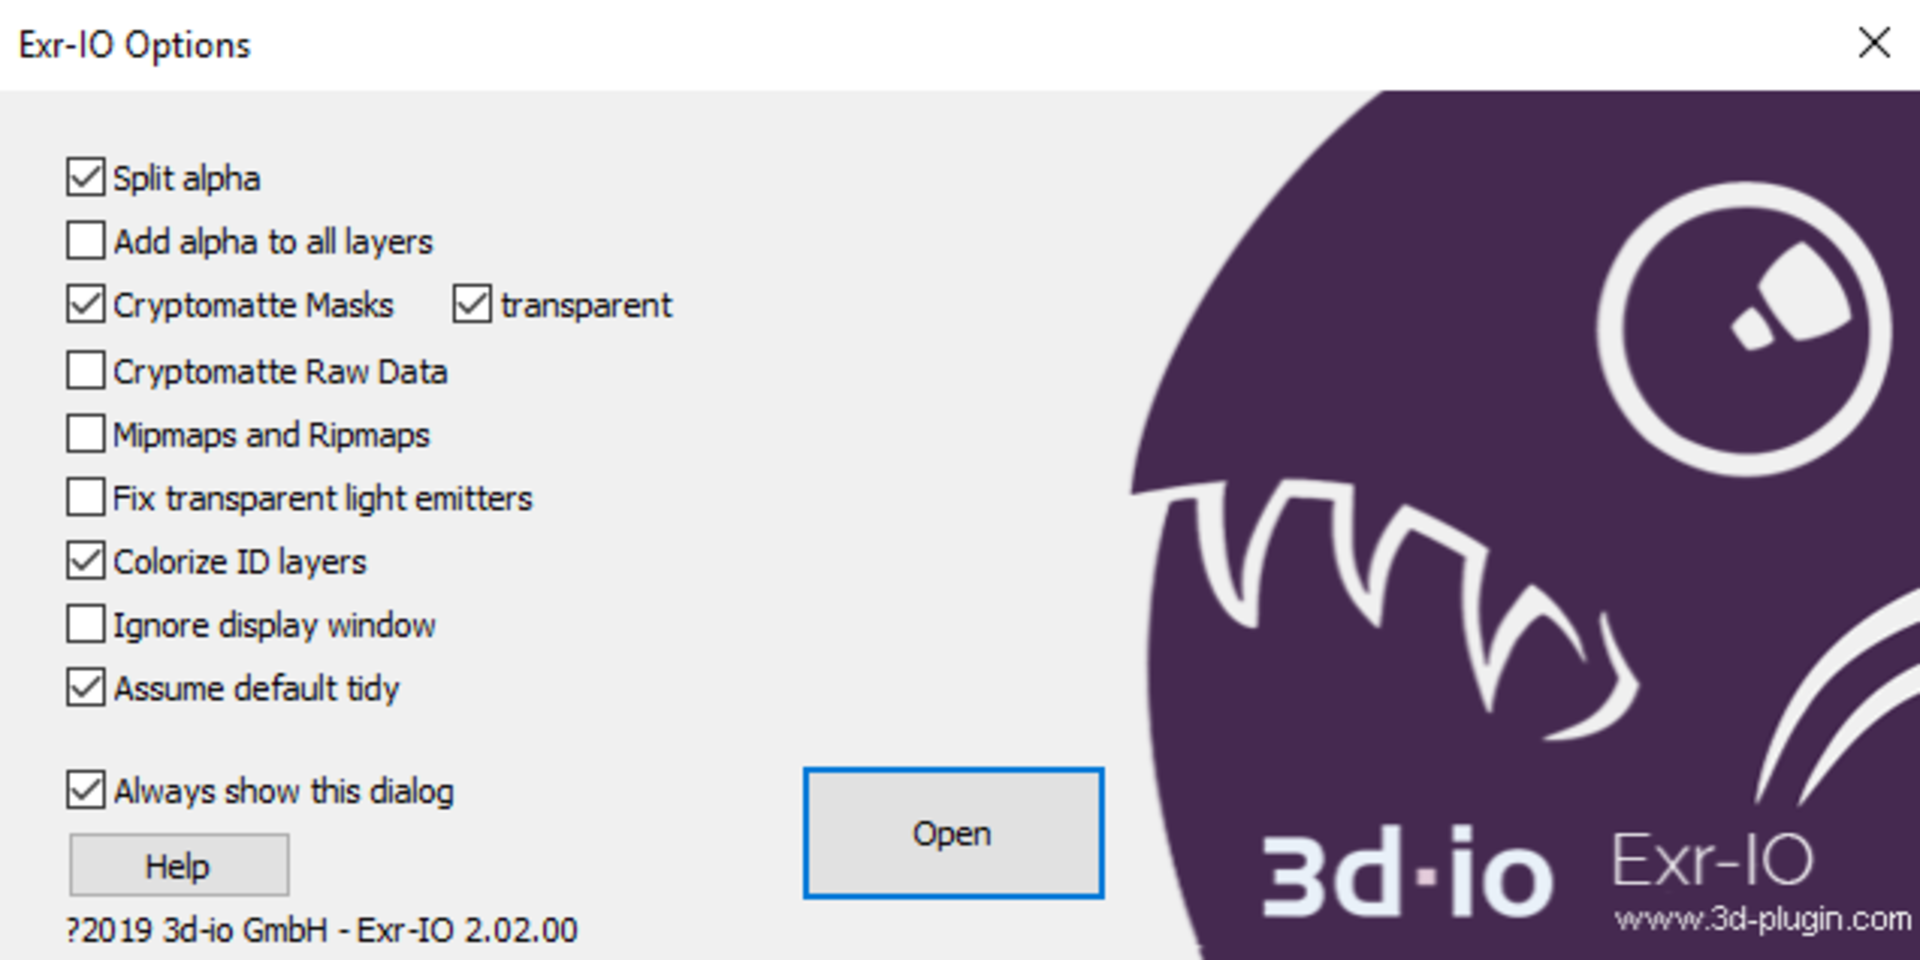
The first option, Split alpha, controls whether or not to add the alpha channel into the original RGB layer. Usually, I will enable this option to keep the background information in the Beauty pass and get a separate alpha layer.
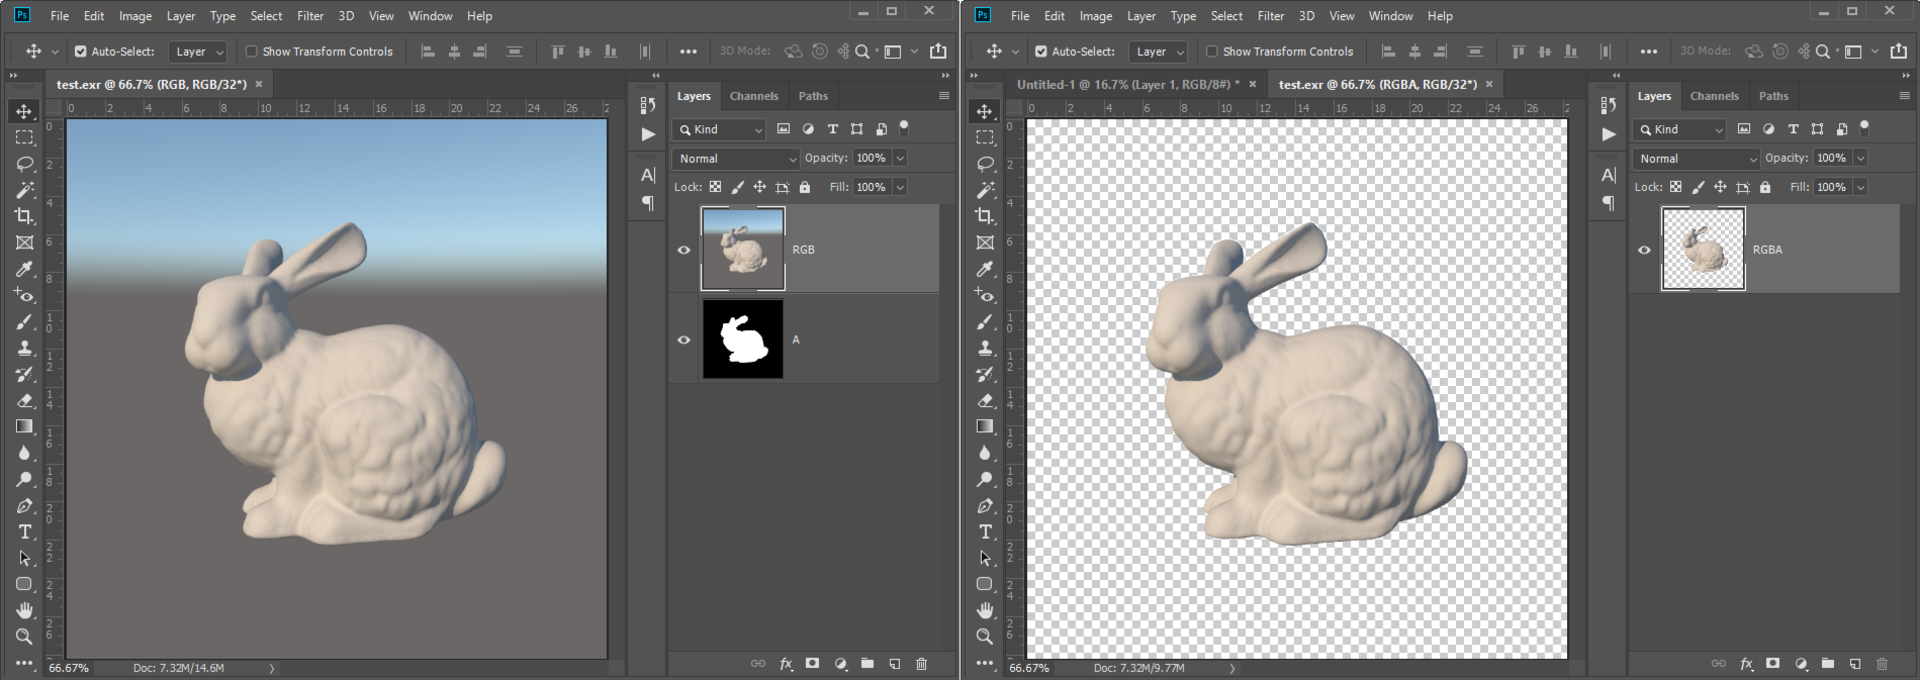
Left: Split alpha turned on Right: Split alpha turned off
The transparent option is also very useful. When it’s enabled, the objects in the Cryptomatte layers will be white pixels and the background will be transparent.
In this case, if you want to create a mask for any object, just hold down the Ctrl key and left-click its thumbnail to create a selection; you can then add a Layer Mask — or, adding an Adjustment Layer will automatically generate the Layer Mask based on the selection.
In this example, I am selecting the Split alpha and transparent options, and then I just click the Open button to open the final render.
Step 4: Compositing V-Ray Render Elements in Photoshop
Now we have opened the final render exr. file, you can see the Beauty pass (see the layer labeled “RGB” in the Layers window) along with the other Render Elements, including Raw Total Light, Diffuse, Reflection, and so on.
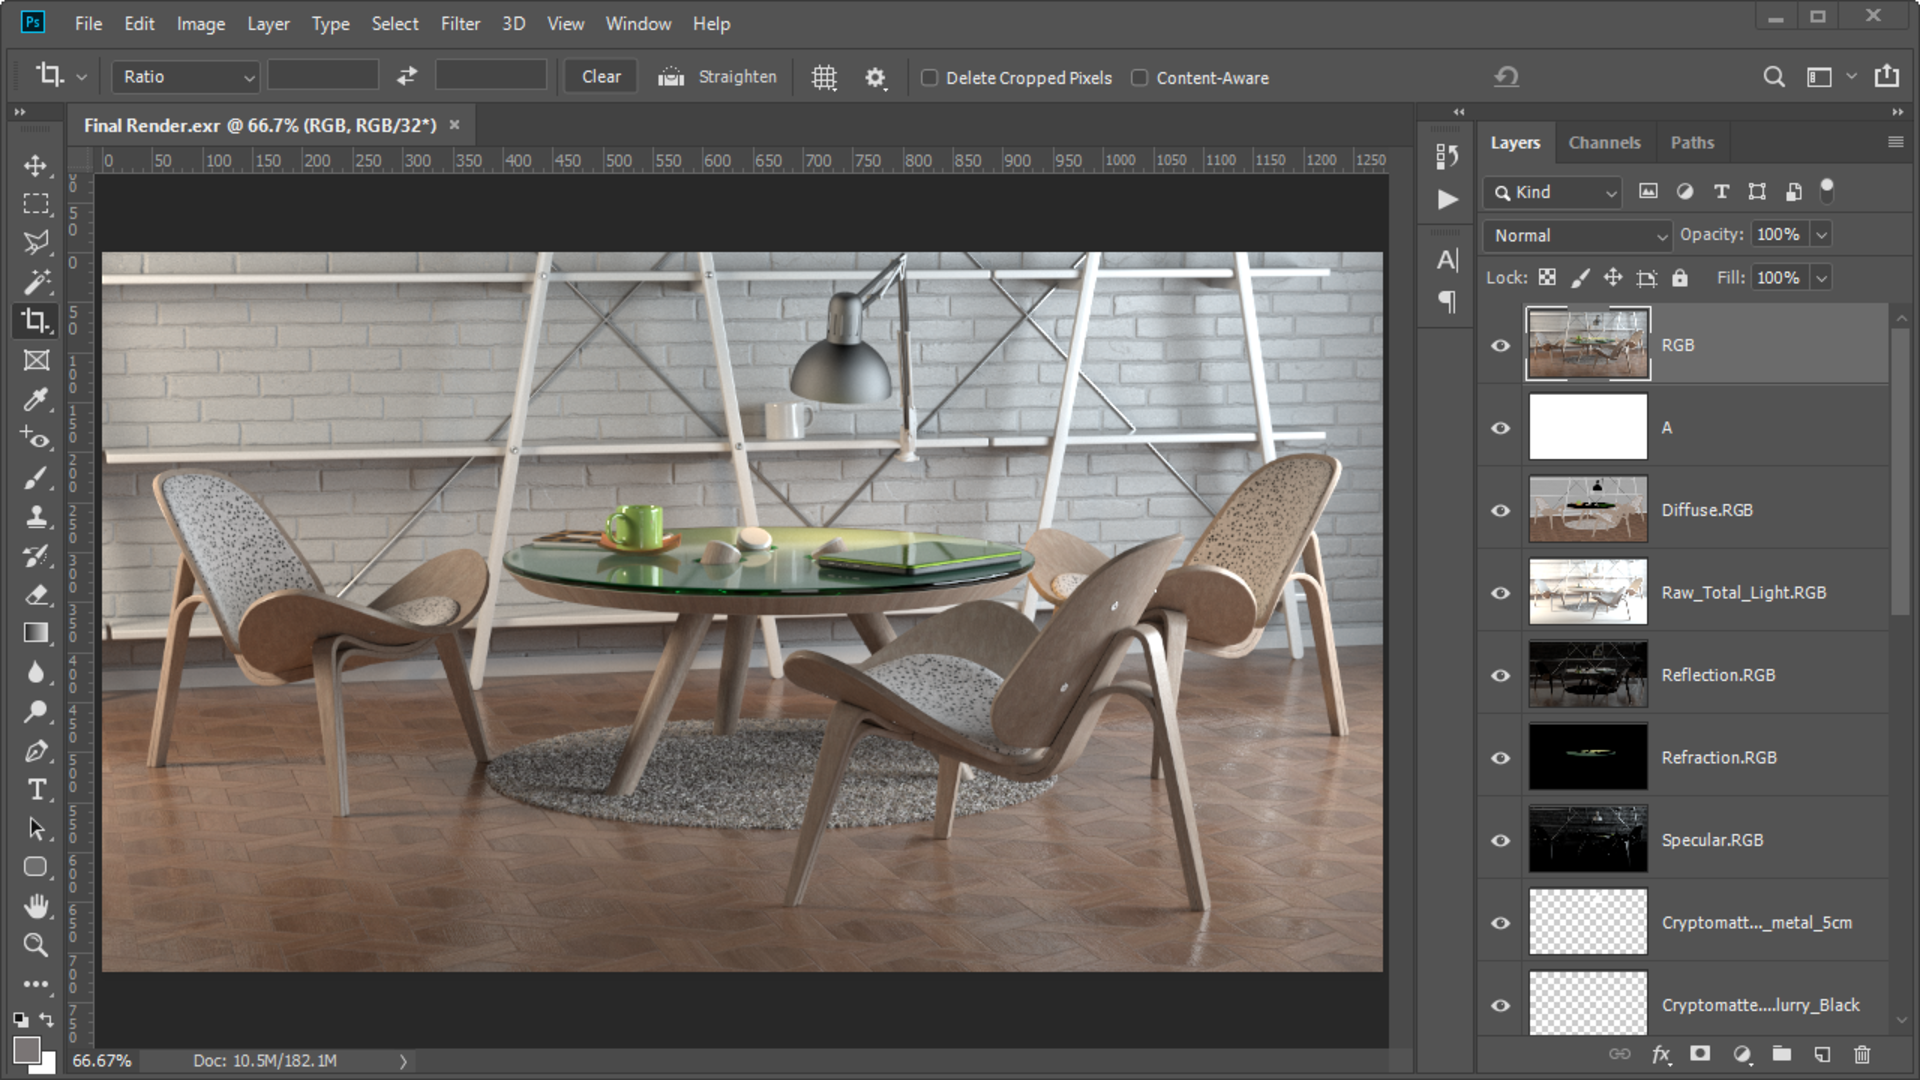
Note: The single Cryptomatte element that we added earlier has now been decoded into 14 separate layers because we have 14 different materials in the scene. This makes it very efficient!
We can now reassemble the Beauty pass. Keep the visibility of the following 5 Render Elements on: Diffuse, Raw Total Light, Reflection, Specular and Refraction, and turn off all the other layers.
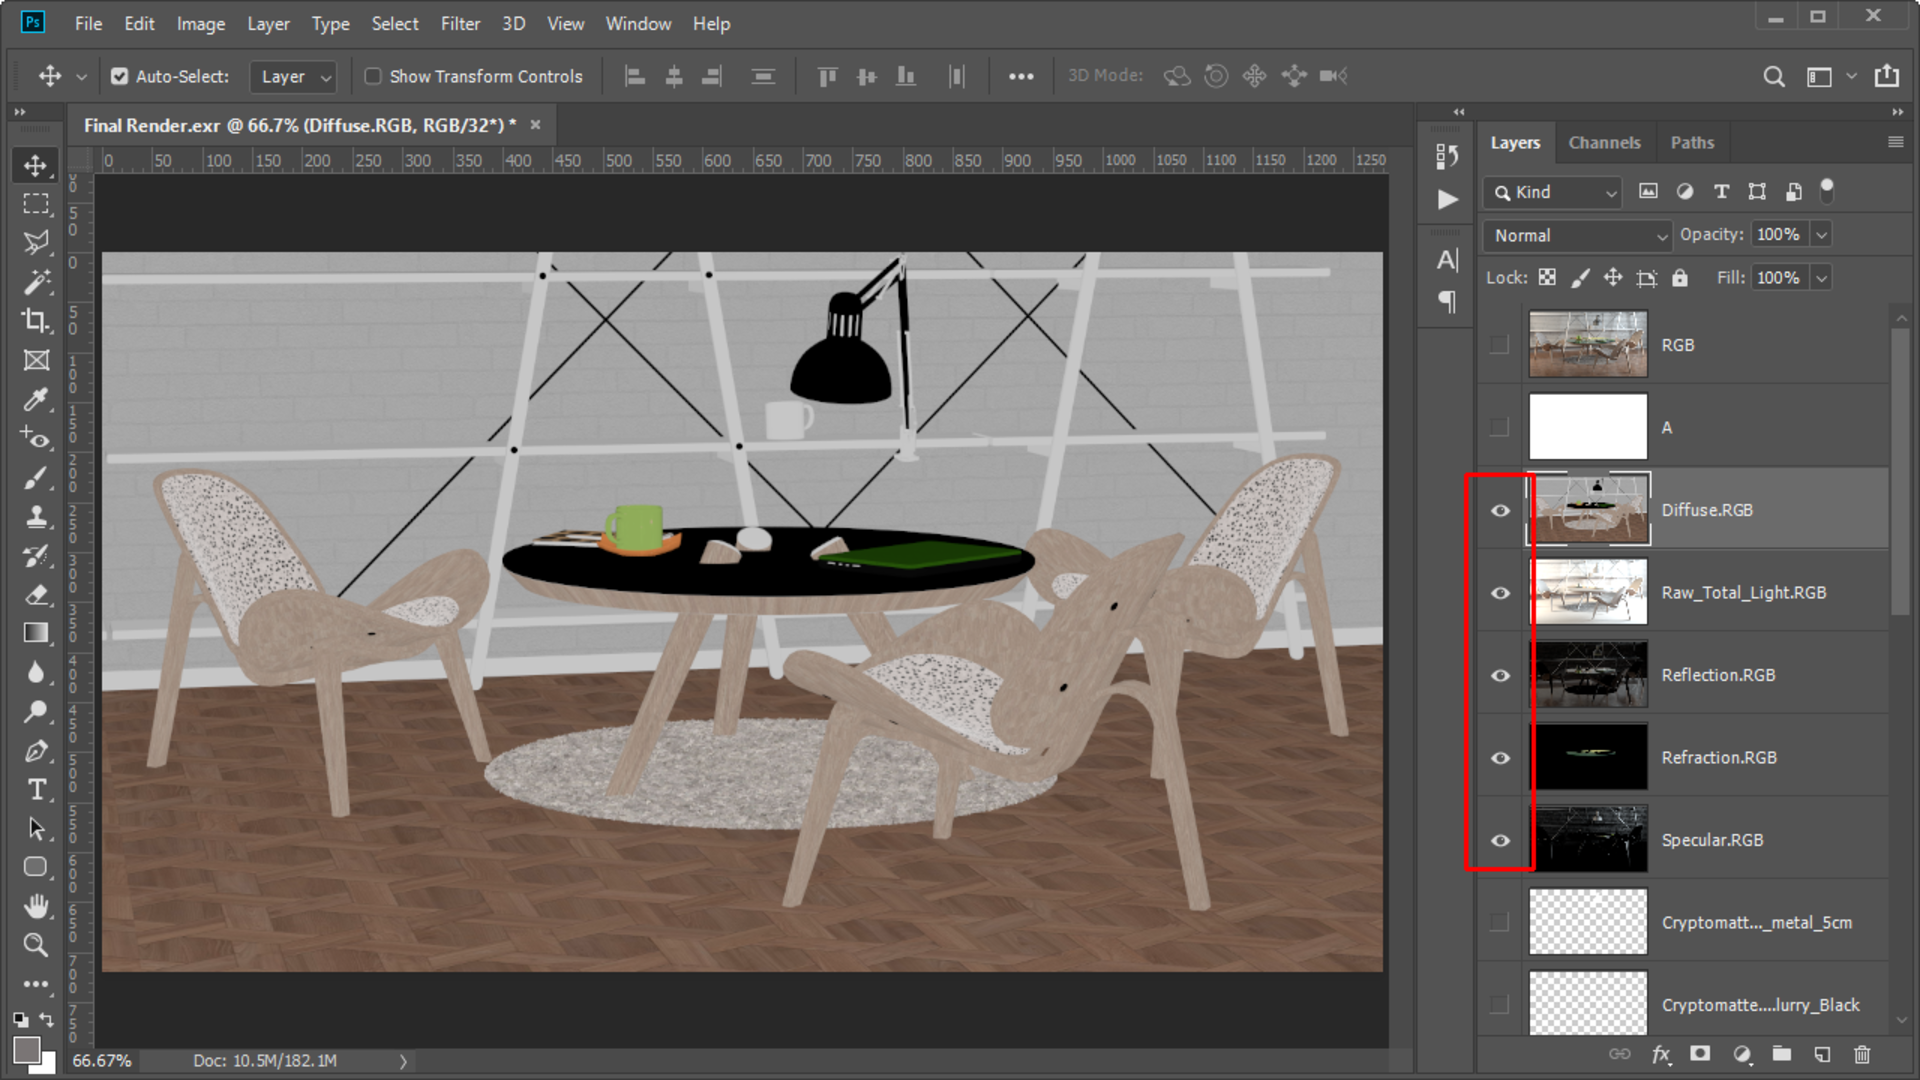
Select the Diffuse layer and change the layer’s Blend Mode from Normal to Multiply.
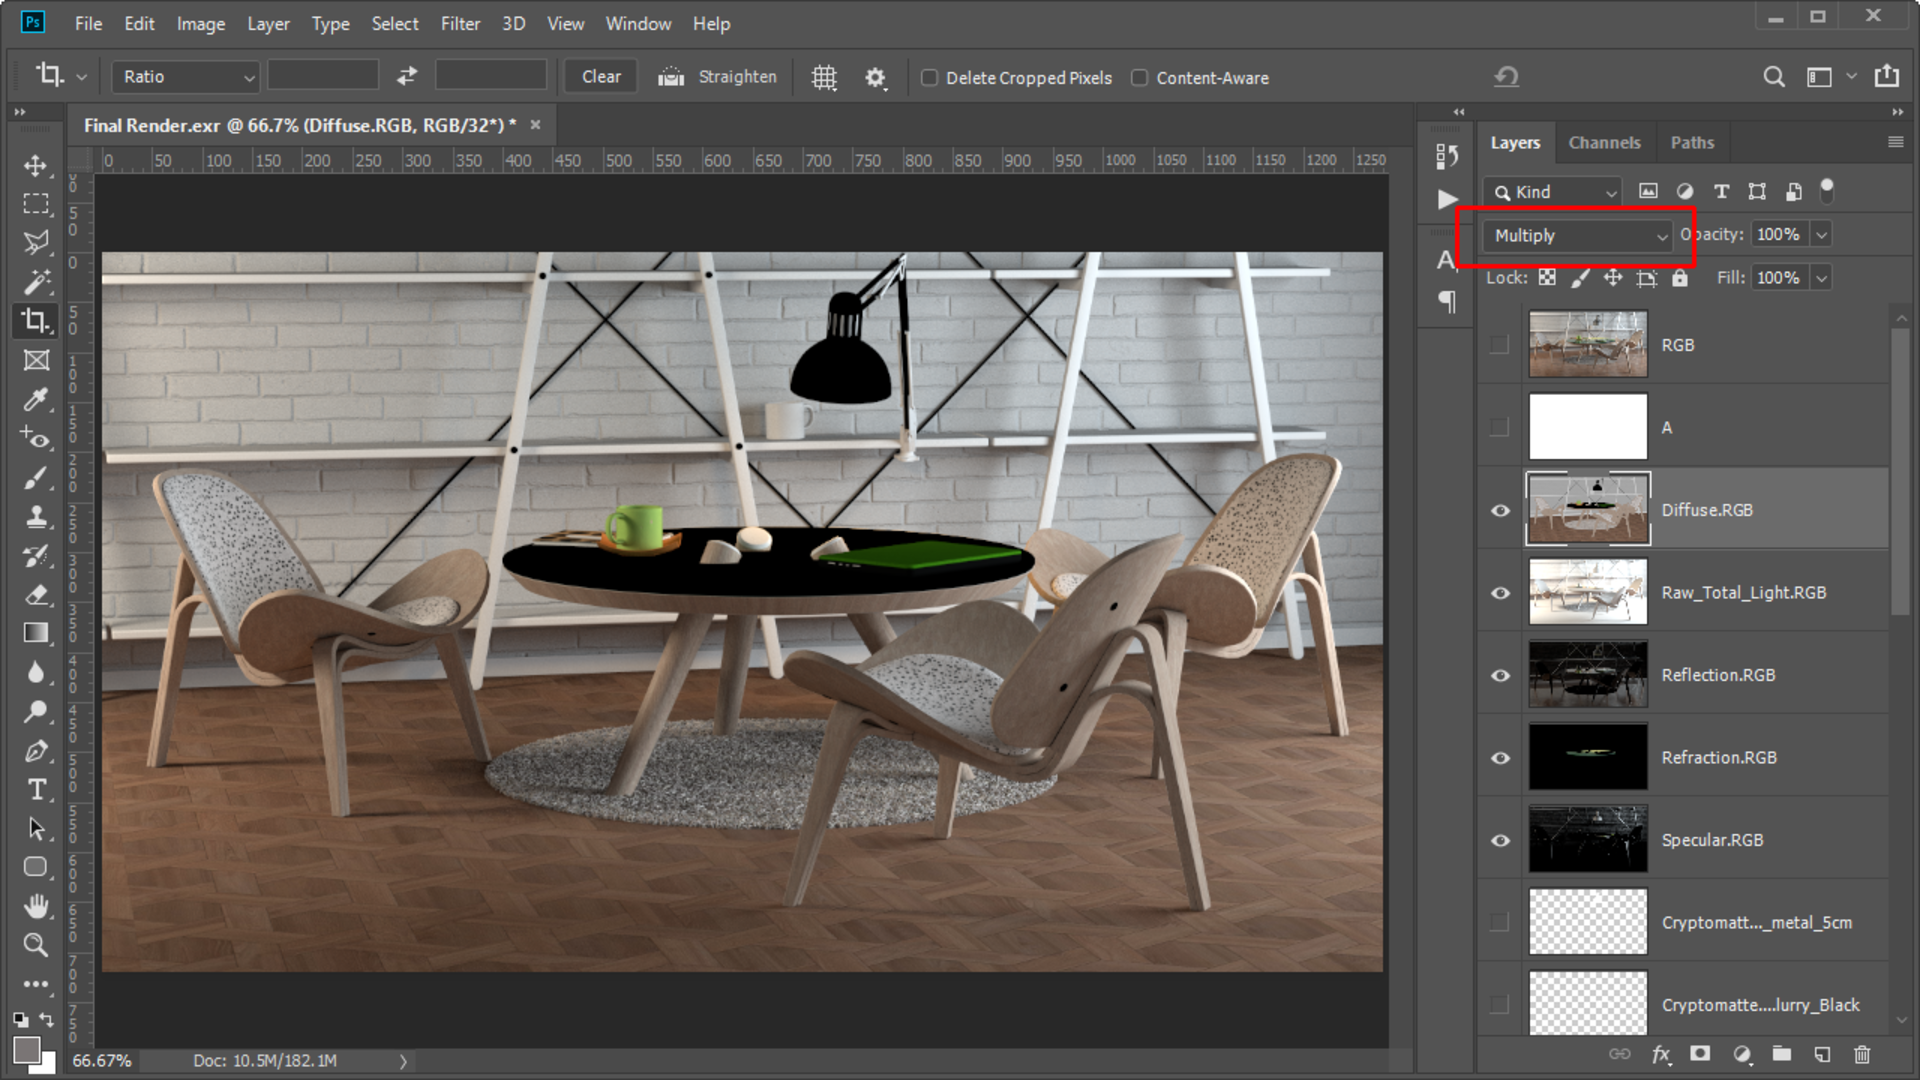
The result on screen now is Diffuse × Raw Total Light.
Next, select the Reflection, Specular and Refraction layers. Move these layers above the Diffuse layer and change the Blend Mode from Normal to Linear Dodge(Add).
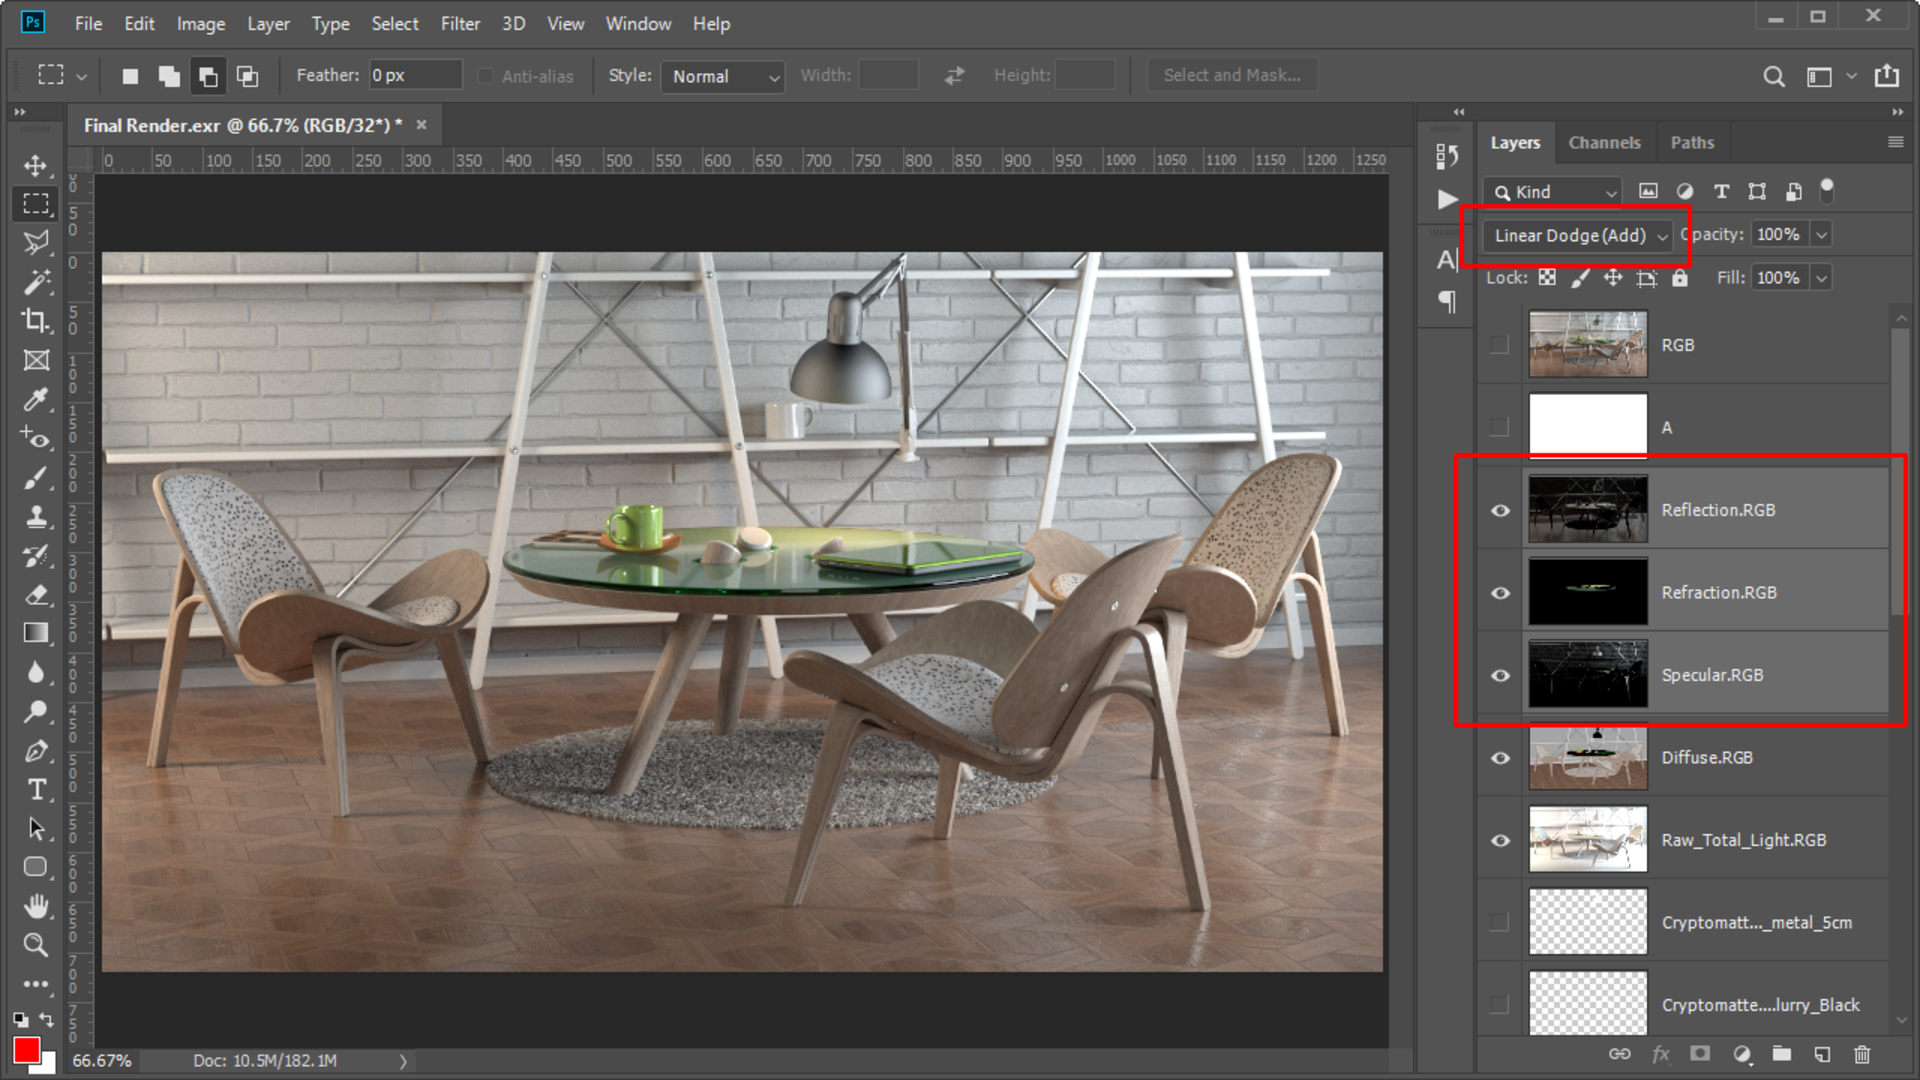
The Linear Dodge(Add) layer Blend Mode is simply the addition from the 4 operations, and it is just adding the color values together.
Now we have assembled the Beauty pass. The Reflection, Refraction, Light and Diffuse information is separated.
Step 5: How to color-correct non-metal materials in post-production
When we want to color-correct a non-metal material, we can’t adjust the Beauty pass directly. This is because it will change the reflection, light and diffuse information at the same time.
The correct way to do this is to only modify the diffuse color and leave the light and reflections as they are.
For example, in this scene, I want to modify the color of the floor. So first, I need to find the floor’s Cryptomatte — the layer name is “Cryptomatte.Flooring_Parquet_Geometric_A01_120cm.” If I hold down Ctrl and left-click its thumbnail, it will create a selection of the floor.
Next, I will select the “Diffuse.RGB” layer and create a Hue/Saturation Adjustment Layer. Click on the Clipping Mask button to ensure the Adjustment Layer only affects the Diffuse contribution.
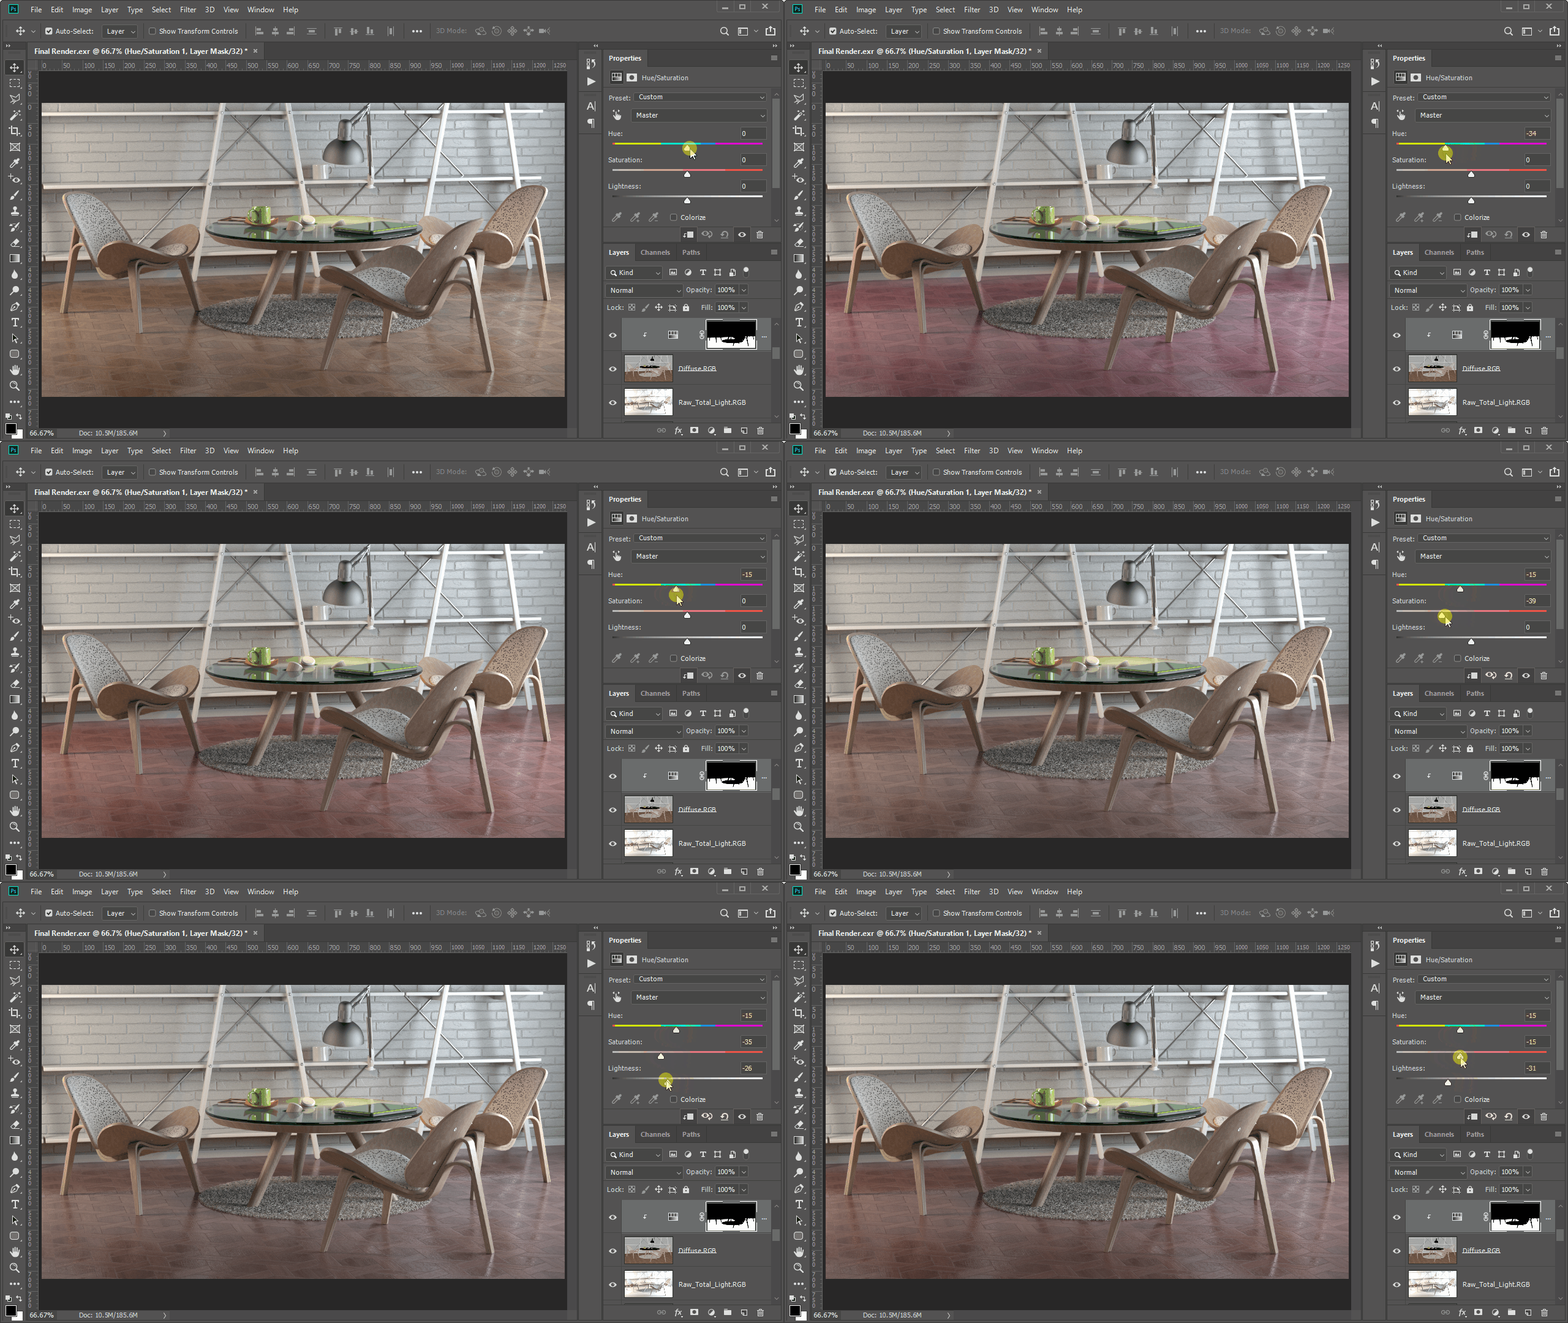
I can now easily change the floor color to a darker and redder tone — and the reflection and light information will be preserved perfectly!
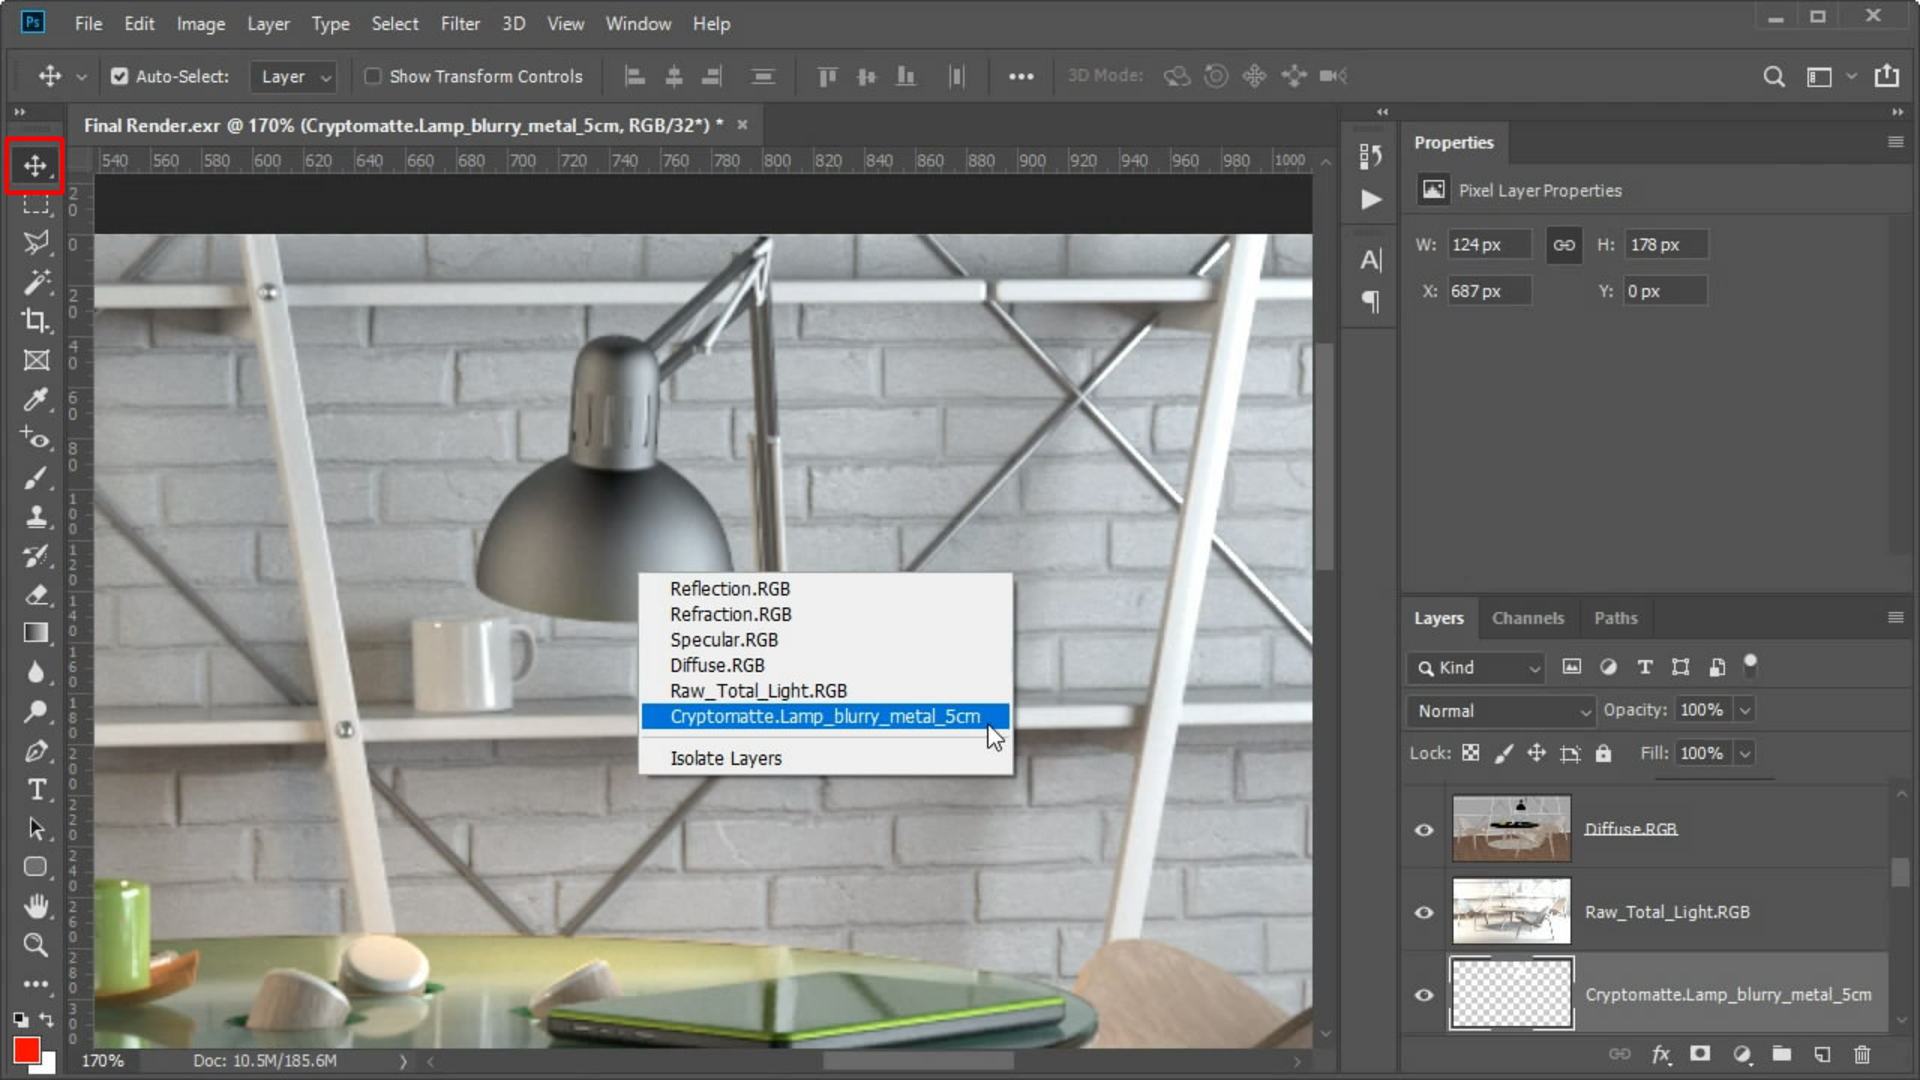
For the metal materials, let’s use the brushed-metal lamp in the scene as an example.
In Photoshop, simply select the Move tool and right-click the lamp; you can then easily select its Cryptomatte.

Hold down Ctrl and left-click the thumbnail to create a selection of the lamp.
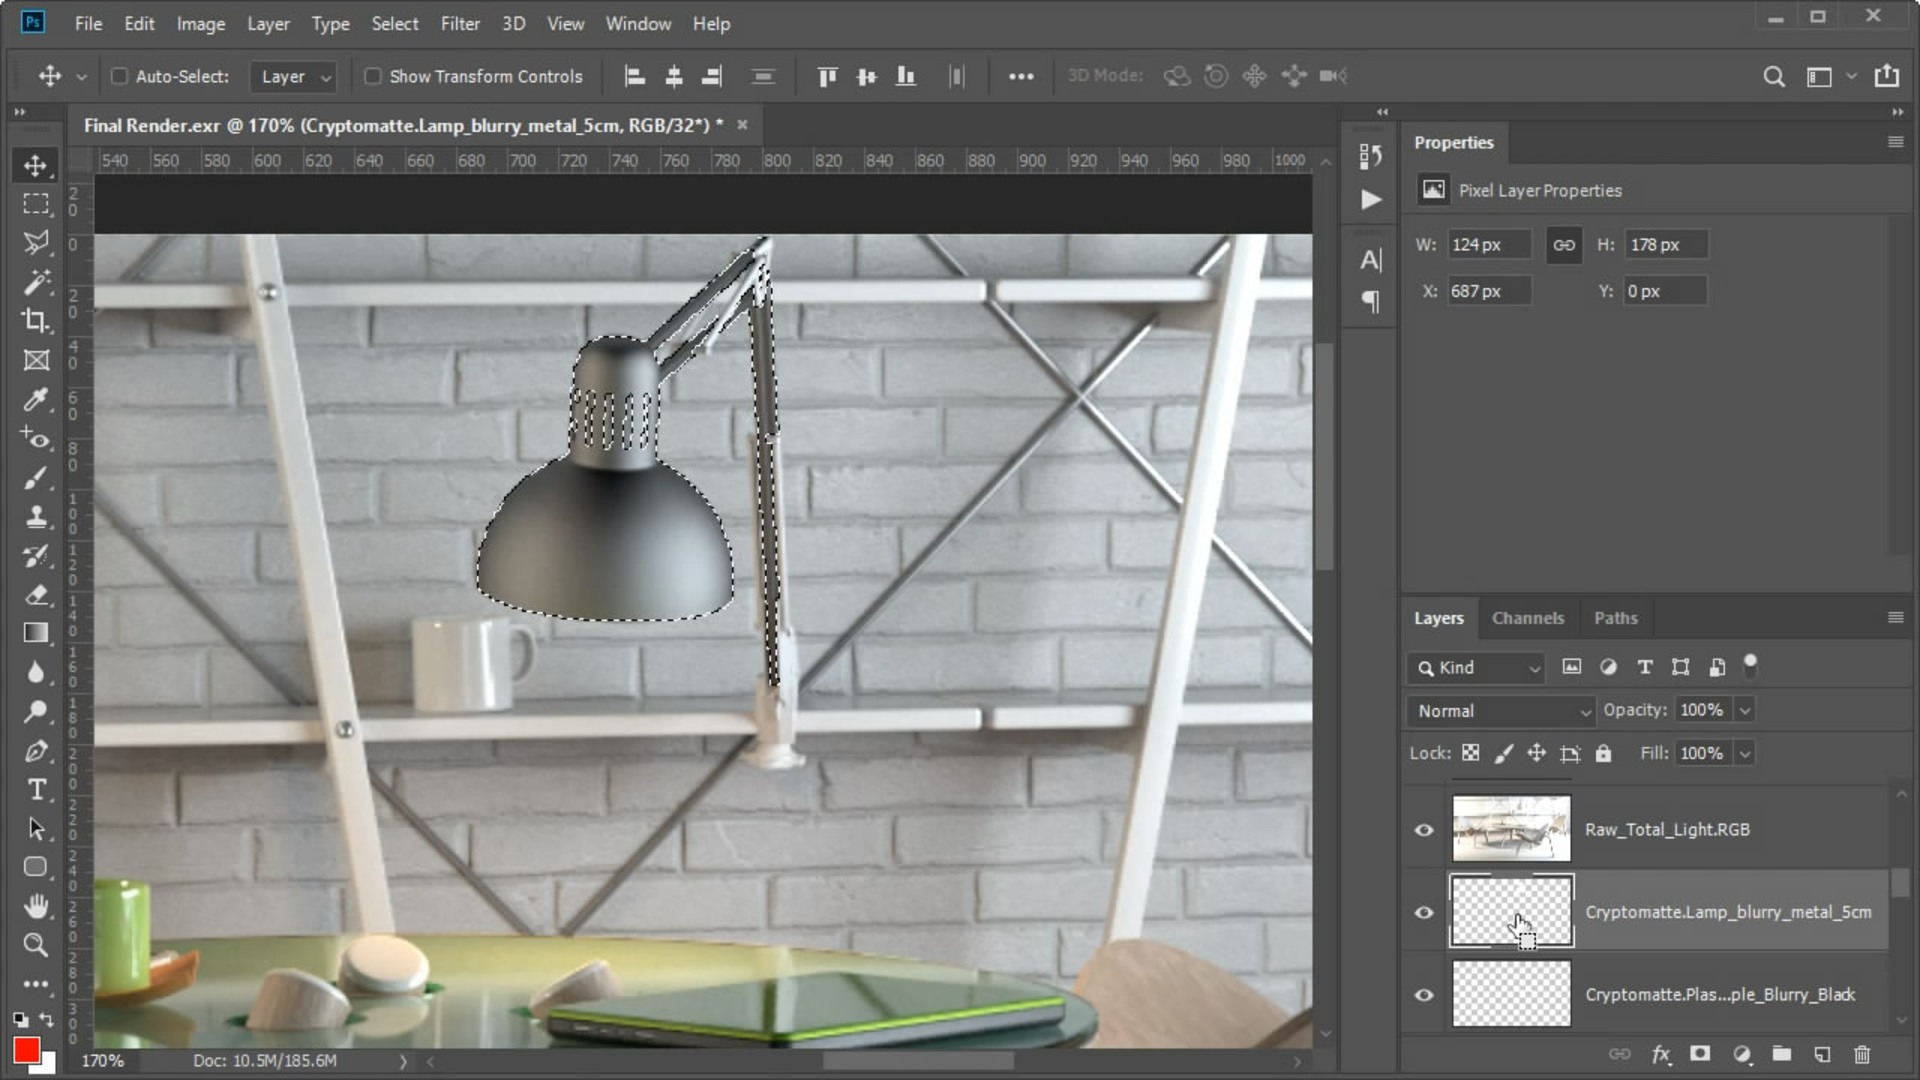
Now I can select the Reflection layer and add a Hue/Saturation Adjustment Layer.
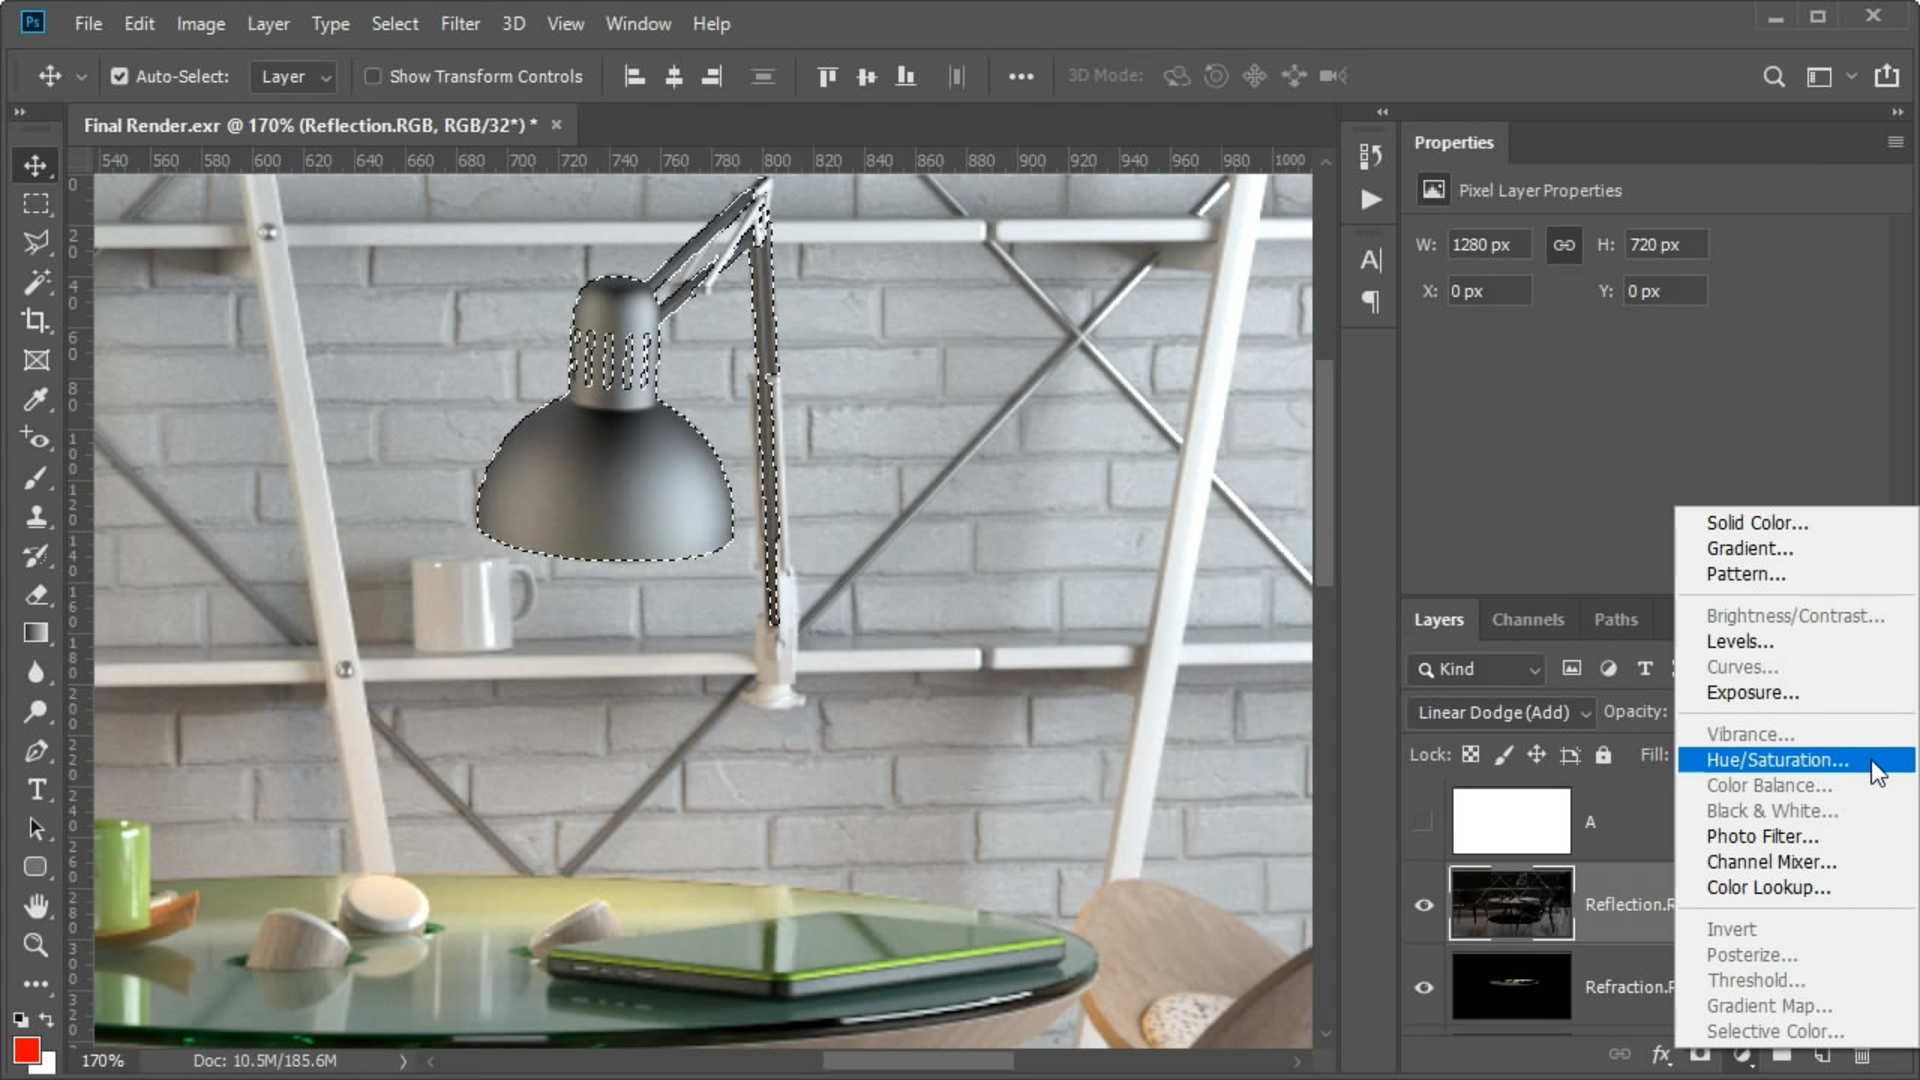
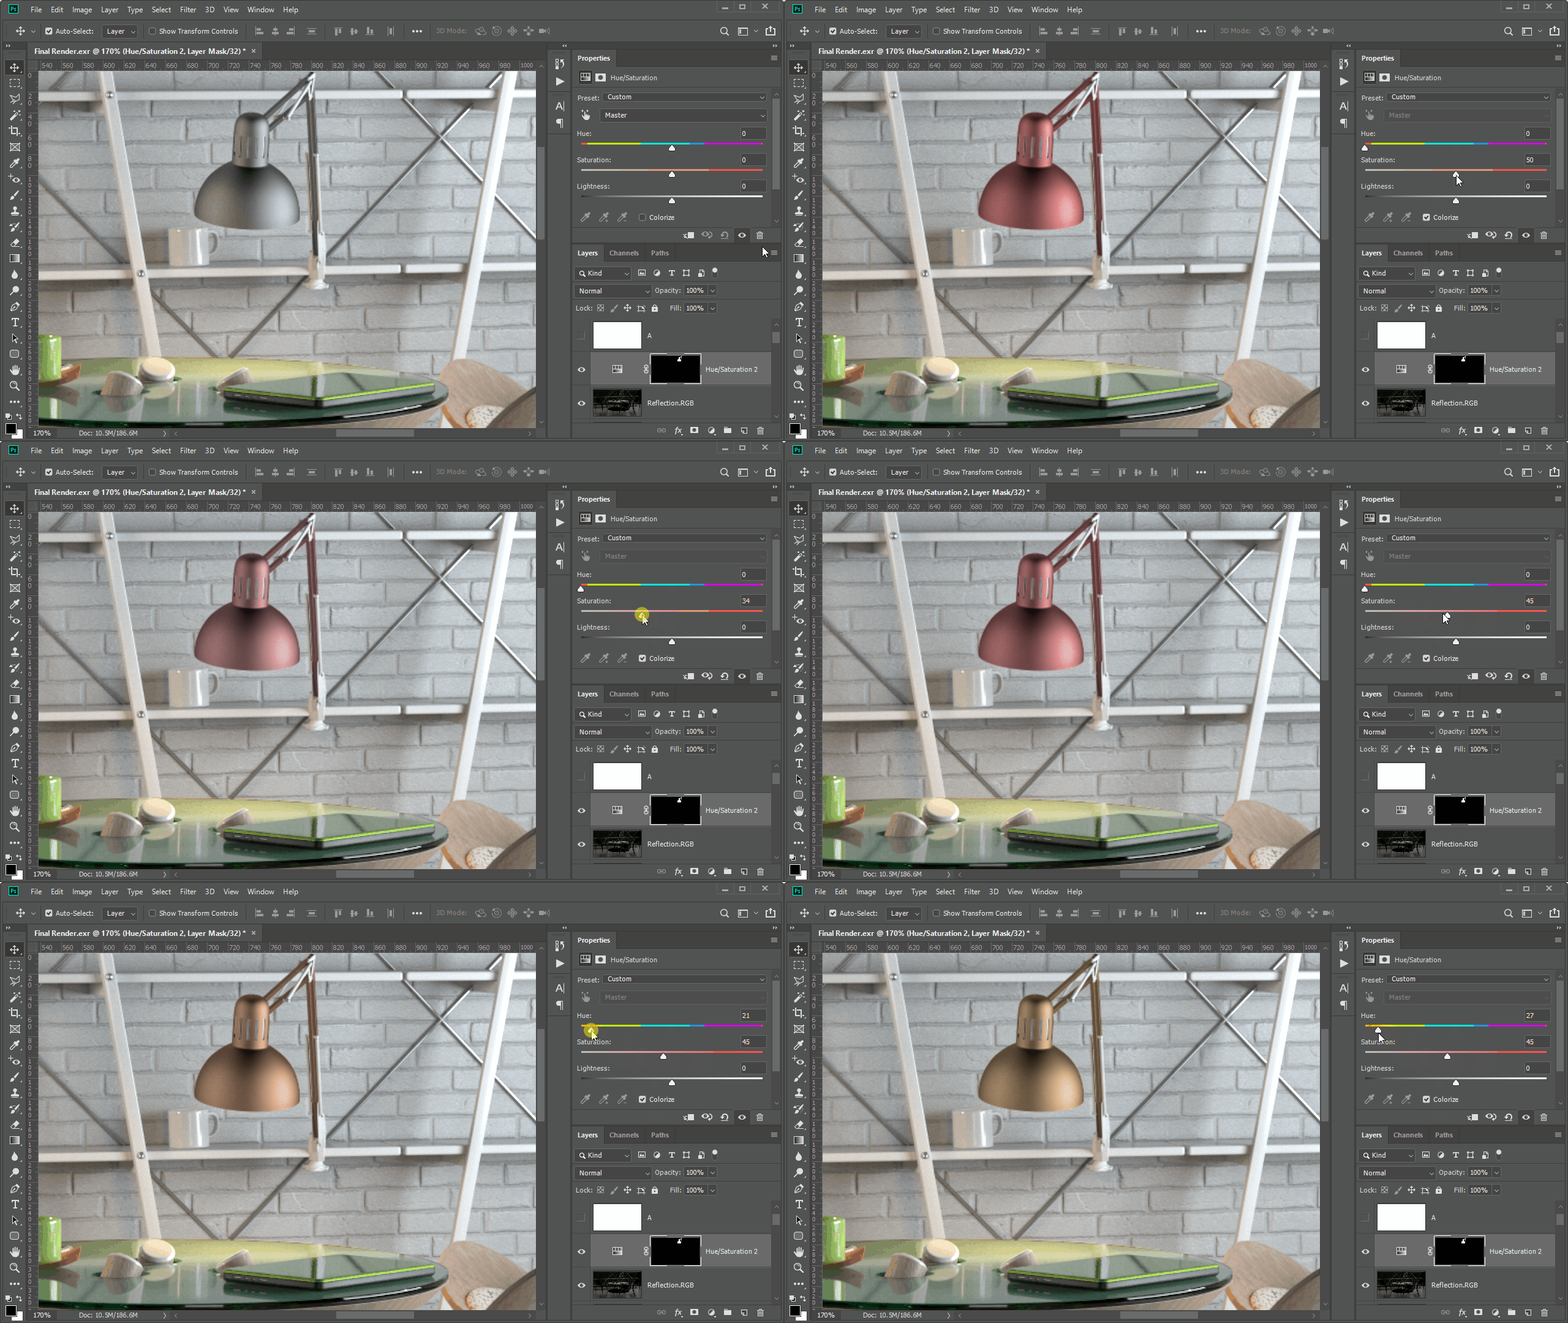
The Adjustment Layer with the lamp mask will be automatically generated. Now, check the Colorize option box and adjust the color to give it a copper appearance
Step 6: Load the color-correction file in Photoshop
If you made any color corrections in the V-Ray frame buffer, you can now export them as a LUT file (*.cube) from the VFB Color Correction panel (Globals… > Save).
Note: Make sure the VFB color corrections are disabled when exporting the .exr file.
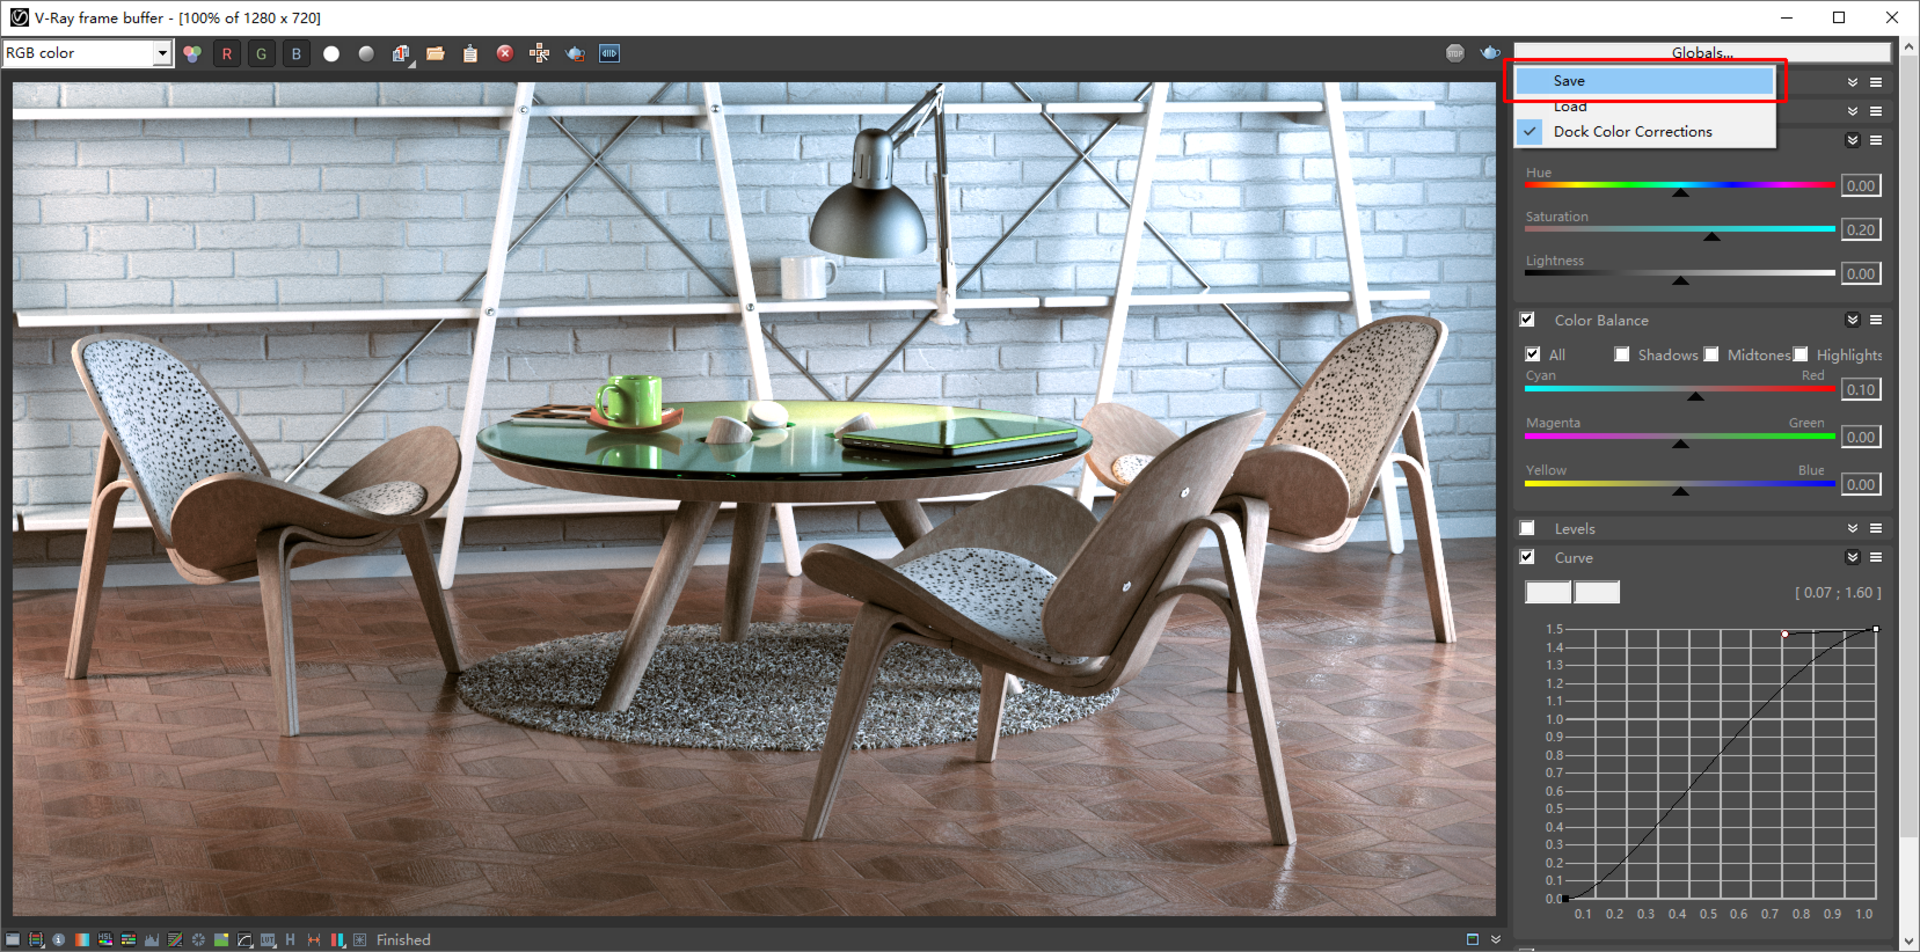
In Photoshop, you can now load the LUT file as an Adjustment Layer on top of all layers (Color Lookup Adjustment layer > Load 3D LUT File).
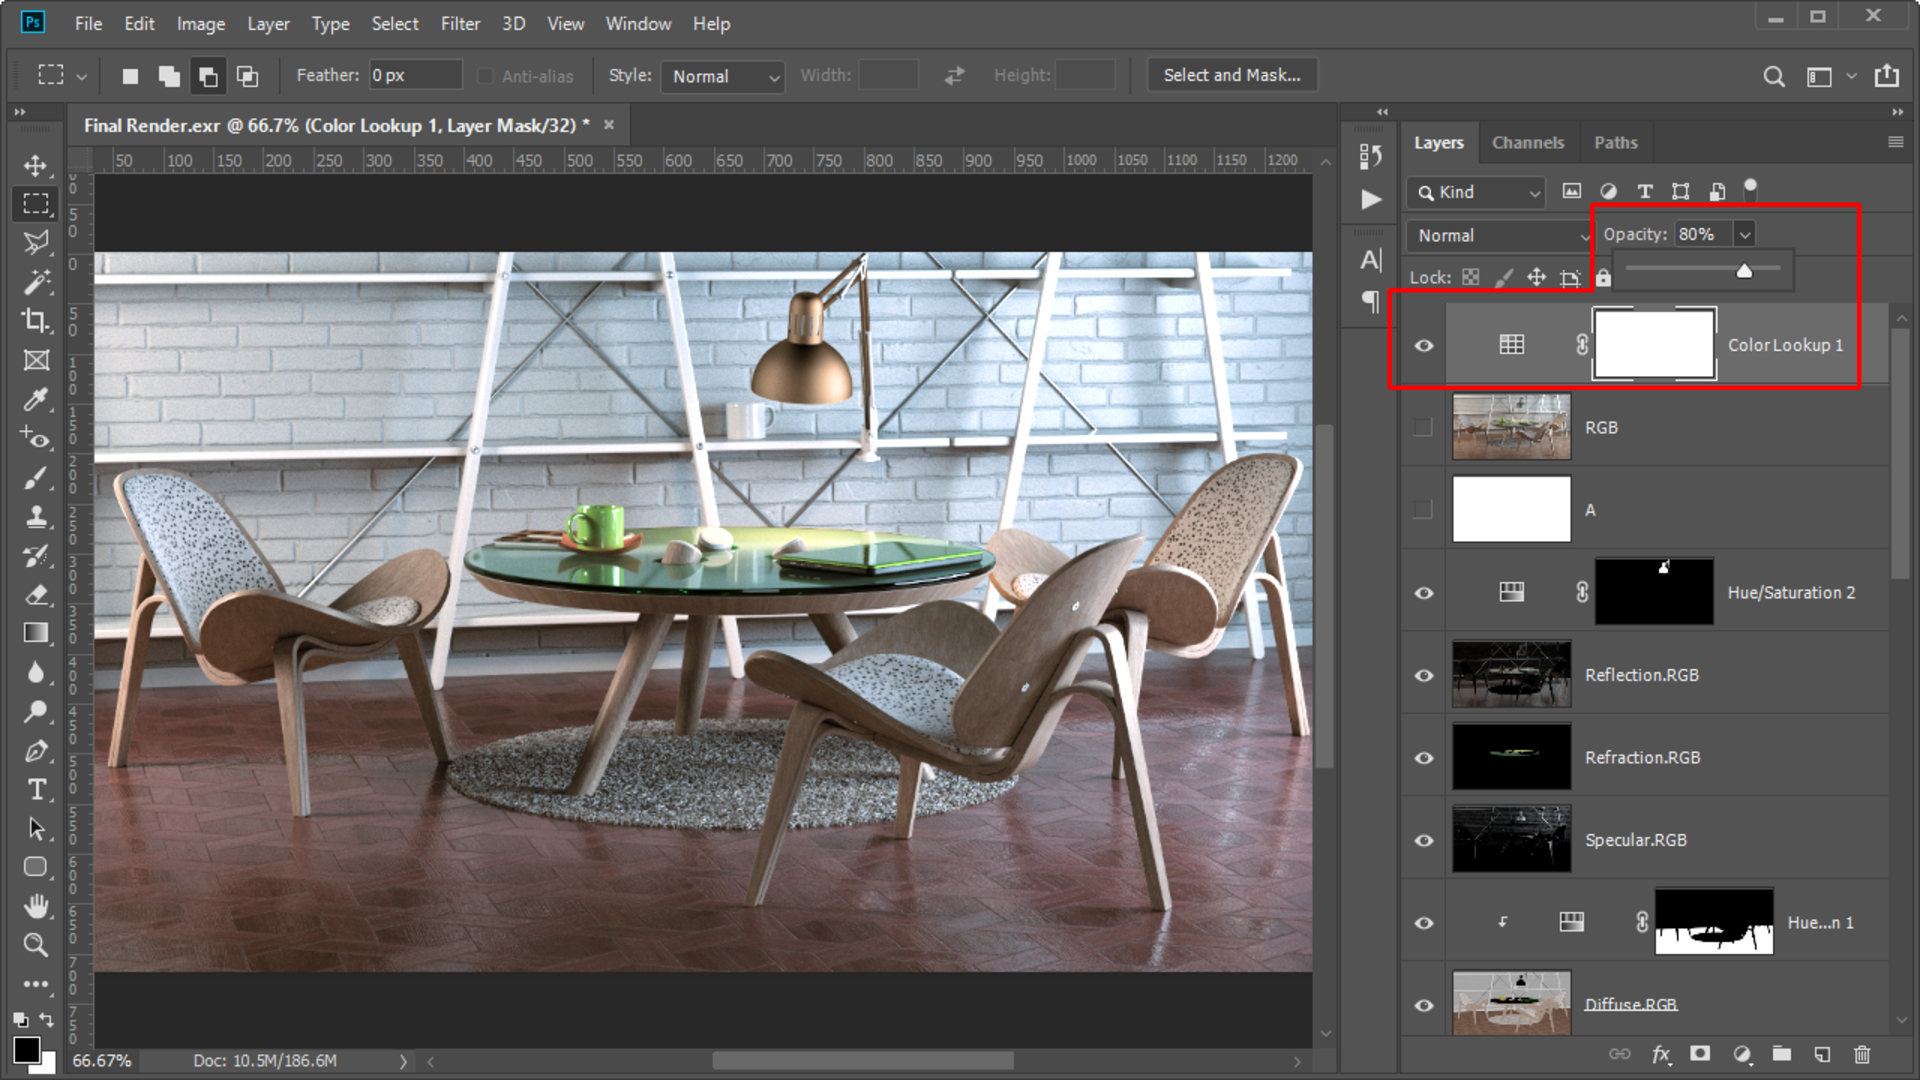
As a final step, you can adjust the Opacity of the LUT layer to further control the color-correction effect to your liking.
For more helpful guides, tips and tricks, be sure to check out our Quick Start Video Tutorials for V-Ray Next for SketchUp.

 Tiếng Việt