You can convert PDF files to DWG files quickly and easily in BricsCAD®. When you convert a PDF to a DWG file, BricsCAD® converts straight lines to polylines, true type fonts to MTEXT, and filled solids to hatches, giving you a working drawing file in place of your PDF! Here’s how you can do it!
How to create a PDF underlay in BricsCAD®
In this example, we want to convert a PDF file of a house plan to a drawing file.
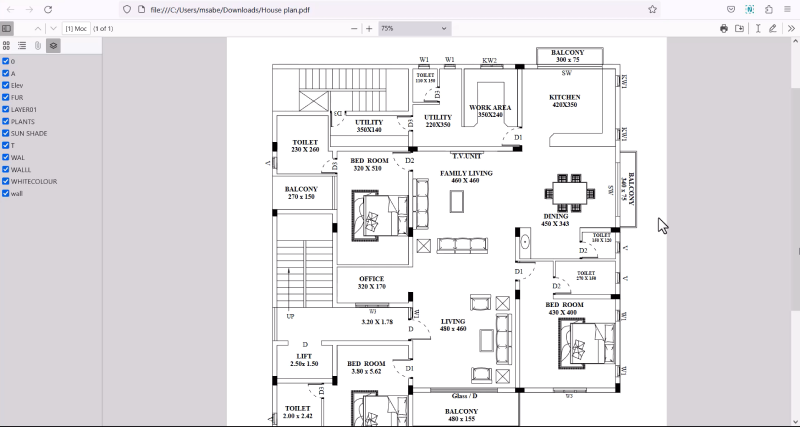
You can create a PDF underlay to attach a PDF file to your current drawing.
- Click on the Insert tab.
- Click on the Attach PDF button.
- Select the PDF file and click on Open.
- Now, the Attached PDF Underlay dialog box appears.
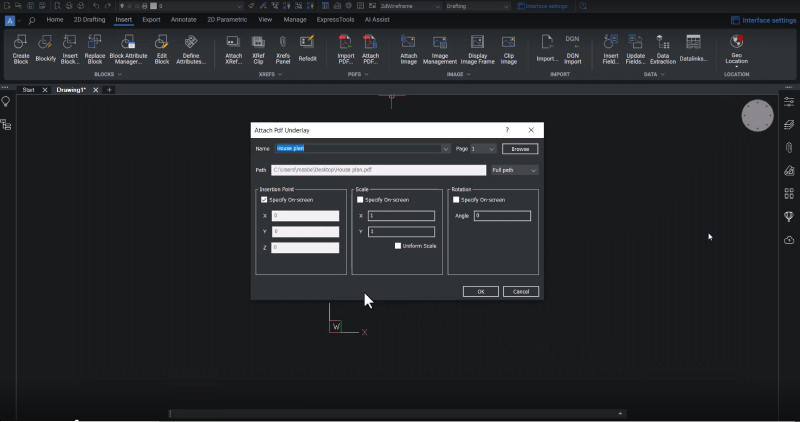
- Use the dialog to specify the insertion point, scale factor, and rotation angle.
- Click on OK.
- Pick a point to specify the insertion point.
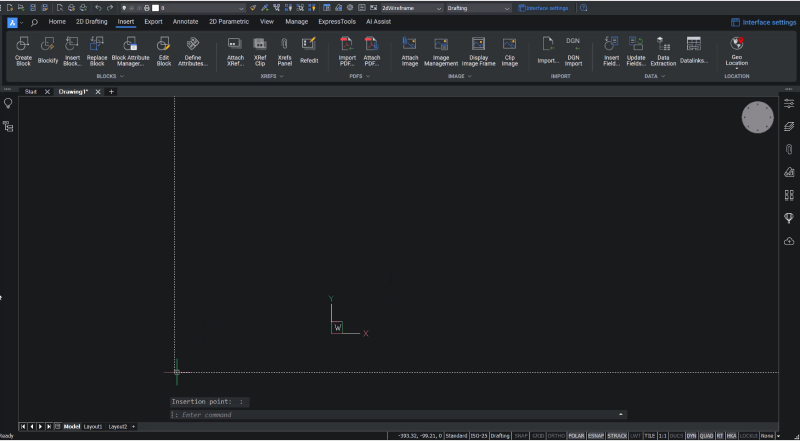
- Now you’ve inserted the PDF file.
- Double-tap the scroll wheel of the mouse to zoom out.
You have attached the PDF file as an underlay into the current drawing.
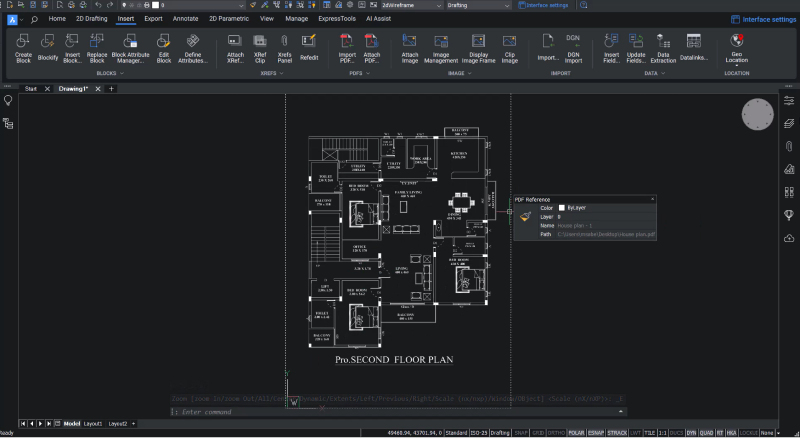
- Click on the PDFs fly out.
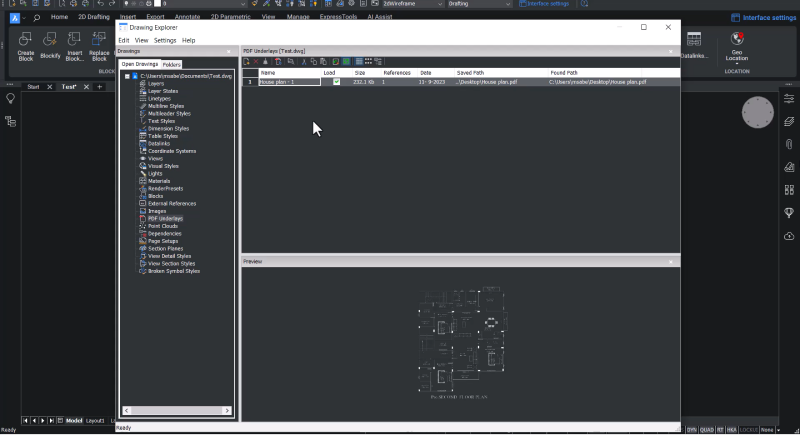
- Click on PDF underlays.
Now you can see the PDF underlays interface in the drawing explorer. The drawing explorer shows a list of PDF underlays in the drawing alongside information like file size, date, and saved path. It also displays a preview of the PDF file.
How to convert PDF files to drawing files in BricsCAD
You can convert this PDF file to a drawing file in various ways. For that, you can use the PDF import command. You can access this command in different ways.
- Click on the Bricsys application button on the top left corner of your screen.
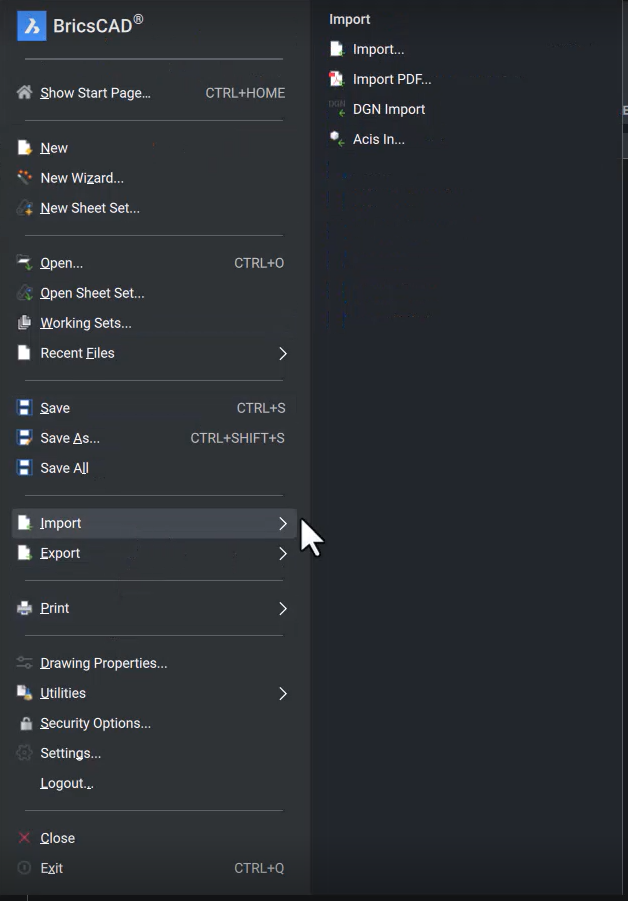
- Click on Import.
- Click on Import PDF.
- Go to the Insert tab.
- Click on the Import PDF button.
- Enter the PDFIMPORT command using your keyboard.
In BricsCAD, you can convert PDF to CAD entities in two ways.
Method 1: Select PDF underlay
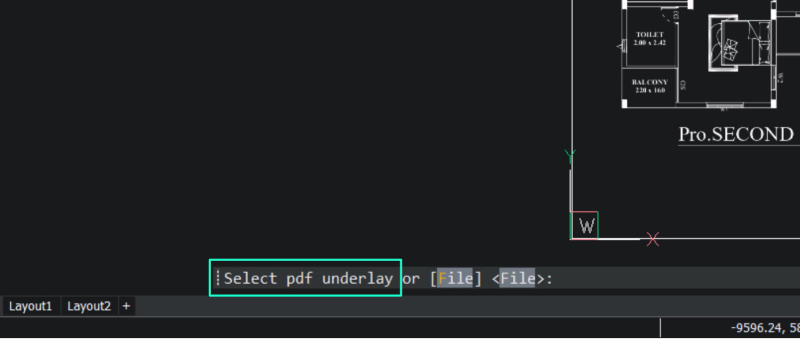
- Click on the PDF underlay.
You can choose to convert the entire area in the underlay to CAD entities or define an area in the PDF underlay using a rectangle or a polygon.
- To choose a rectangular area, click on the first corner and then its opposite corner.
- The polygonal option defines the conversion area using a polygon.
- Or you can use the ALL option – this selects all the entities in the PDF underlay to be converted to CAD entities.
If you choose the Settings option, the settings dialog box will appear.
In this dialog, you can choose what data you want to import.
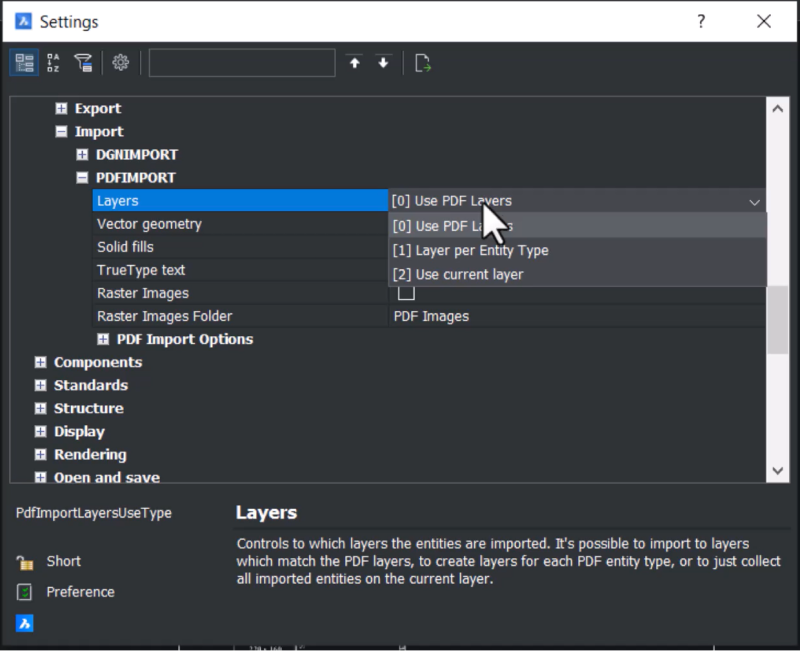
- Click on the layers option to Use PDF layers. All the layers in the PDF are available here.
When you choose Layer per Entity Type, each entity type is kept in a separate layer. If you choose “Use current layer,” only the current layer is used, and new layers won’t be created. In this example, we chose “Use PDF layers”.
Now, you can import the vector geometry, solid fills, true type text, raster images, and raster images folder. You can also expand the PDF Import Options menu to see several additional options.
In this example, we chose ALL as we want the entire PDF underlay converted to a CAD drawing. Now, you’re presented with three options: keep, detach, and unload.
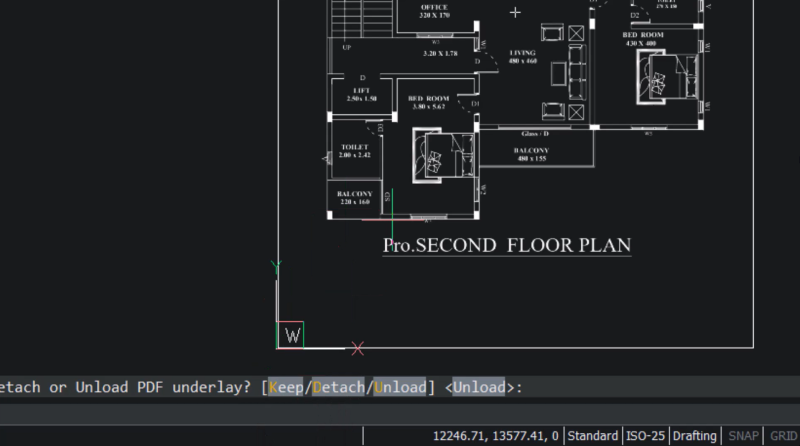
Keep: keeps the PDF underlay and converts its vector portions to CAD entities.
Detach: completely detaches the PDF underlay from the drawing, and it will not be shown.
Unload: Unload the PDF underlay so that it is no longer seen in the drawing but is still attached to the drawing.
In this example, we chose to keep the PDF underlay and the converted drawing.
When you move the PDF underlay, you’ll see both the underlay and the converted drawing on the screen.
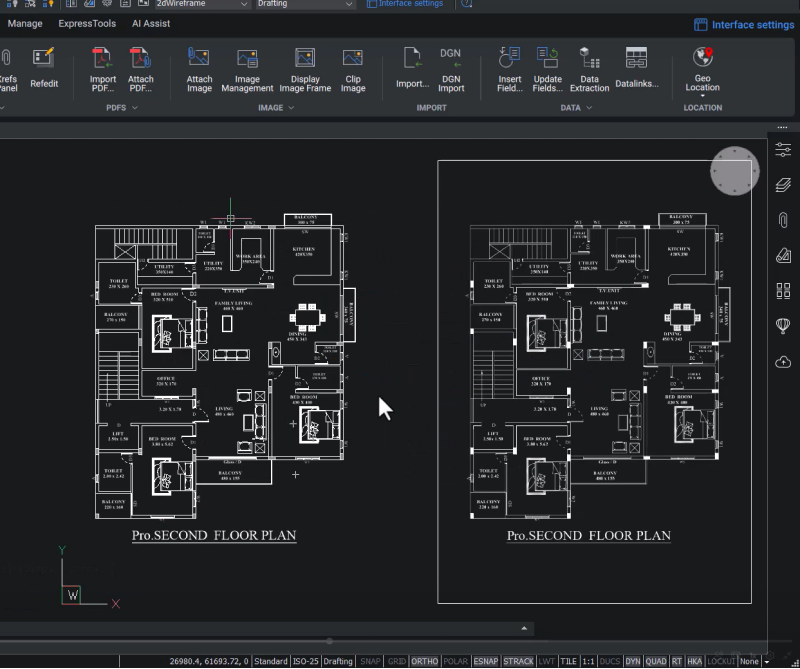
If you check the drawing now, you’ll see that the straight lines were converted to polylines, true type fonts were converted to multiline text, solid fills were converted to hatches, and layers in the PDF file were converted to layers in the CAD drawing.
To use the Detach option:
- Click on Import PDF.
- Select the PDF underlay.
- Click on ALL to select the entire underlay.
- Click on Detach, and you’ll see that the PDF underlay is detached from the drawing, and the drawing is created. Click on the PDF fly-out.
- Click on PDF underlays, and the underlay is no longer listed as it is detached.
To use the unload option:
- Click on Import PDF
- Select the PDF underlay
- Click on All
- Then click on Unload, and you’ll see that the PDF underlay is unloaded, and while it is no longer seen in the drawing, it is still attached to the drawing.
- Click on PDF fly-out.
- Click on PDF Underlay, and you’ll see the PDF underlay here, but it is not seen in the drawing.
- To insert the underlay to a different location in the drawing, select the PDF underlay.
- Click on the Insert button.
Method 2: Import PDF
You can import a PDF file directly into the current drawing.
- Click on the Import PDF button.
- Click on the file option.
- Select the PDF file you want to import.
- When you have a PDF with numerous pages, you can choose which page(s) you want to import.
- Pick a point to specify the insertion point, and you can set a scale factor if required, and a rotation angle.
- Double-click the scroll wheel of the mouse to zoom.
You have now successfully converted the PDF to a drawing file!
Get started with BricsCAD today!
Buy BricsCAD V24 or download the 30-day free trial now and discover how you can accelerate your time to deliverable with BricsCAD.
Source: Bricsys


 Tiếng Việt