Follow along to learn how to set up a production render and post-process efficiently in the V-Ray Frame Buffer to achieve a high-quality render.
Congrats, you’ve almost made it to the end of the tutorial! We started off our three-part tutorial by setting up the V-Ray Denoiser, making use of the Interactive Production Render (IPR), and adding life to our scene by placing Chaos Cosmos assets.
In the second part of the tutorial, we explored V-Ray’s Physical Camera, materials and textures, as well as setting up natural lighting using an HDRI.
In the final part of the tutorial, we will focus on:
- Applying various settings to render a high quality preview
- Retouching the lights in a scene with Light Mix
- Using color correction tools in V-Ray Frame Buffer
- Saving the final render
1. Adjusting the settings
When you’re happy with your image, it’s time to render a high quality preview. First, you should decide whether it will be rendered by Bucket or Progressive samping mode. In the V-Ray tab, under Image Sampler (Antialiasing) you can select a Type. Selecting progressive sampling will gradually clean your image, generating a preview from the very beginning.
Tip: If you’re rendering animations, setting a Render time (min) limit on the image can be helpful. You can calculate the amount of time needed to render in advance and set a time limit per frame.
Bucket sampling is the more memory-efficient option when it comes to rendering complex scenes in high resolution.
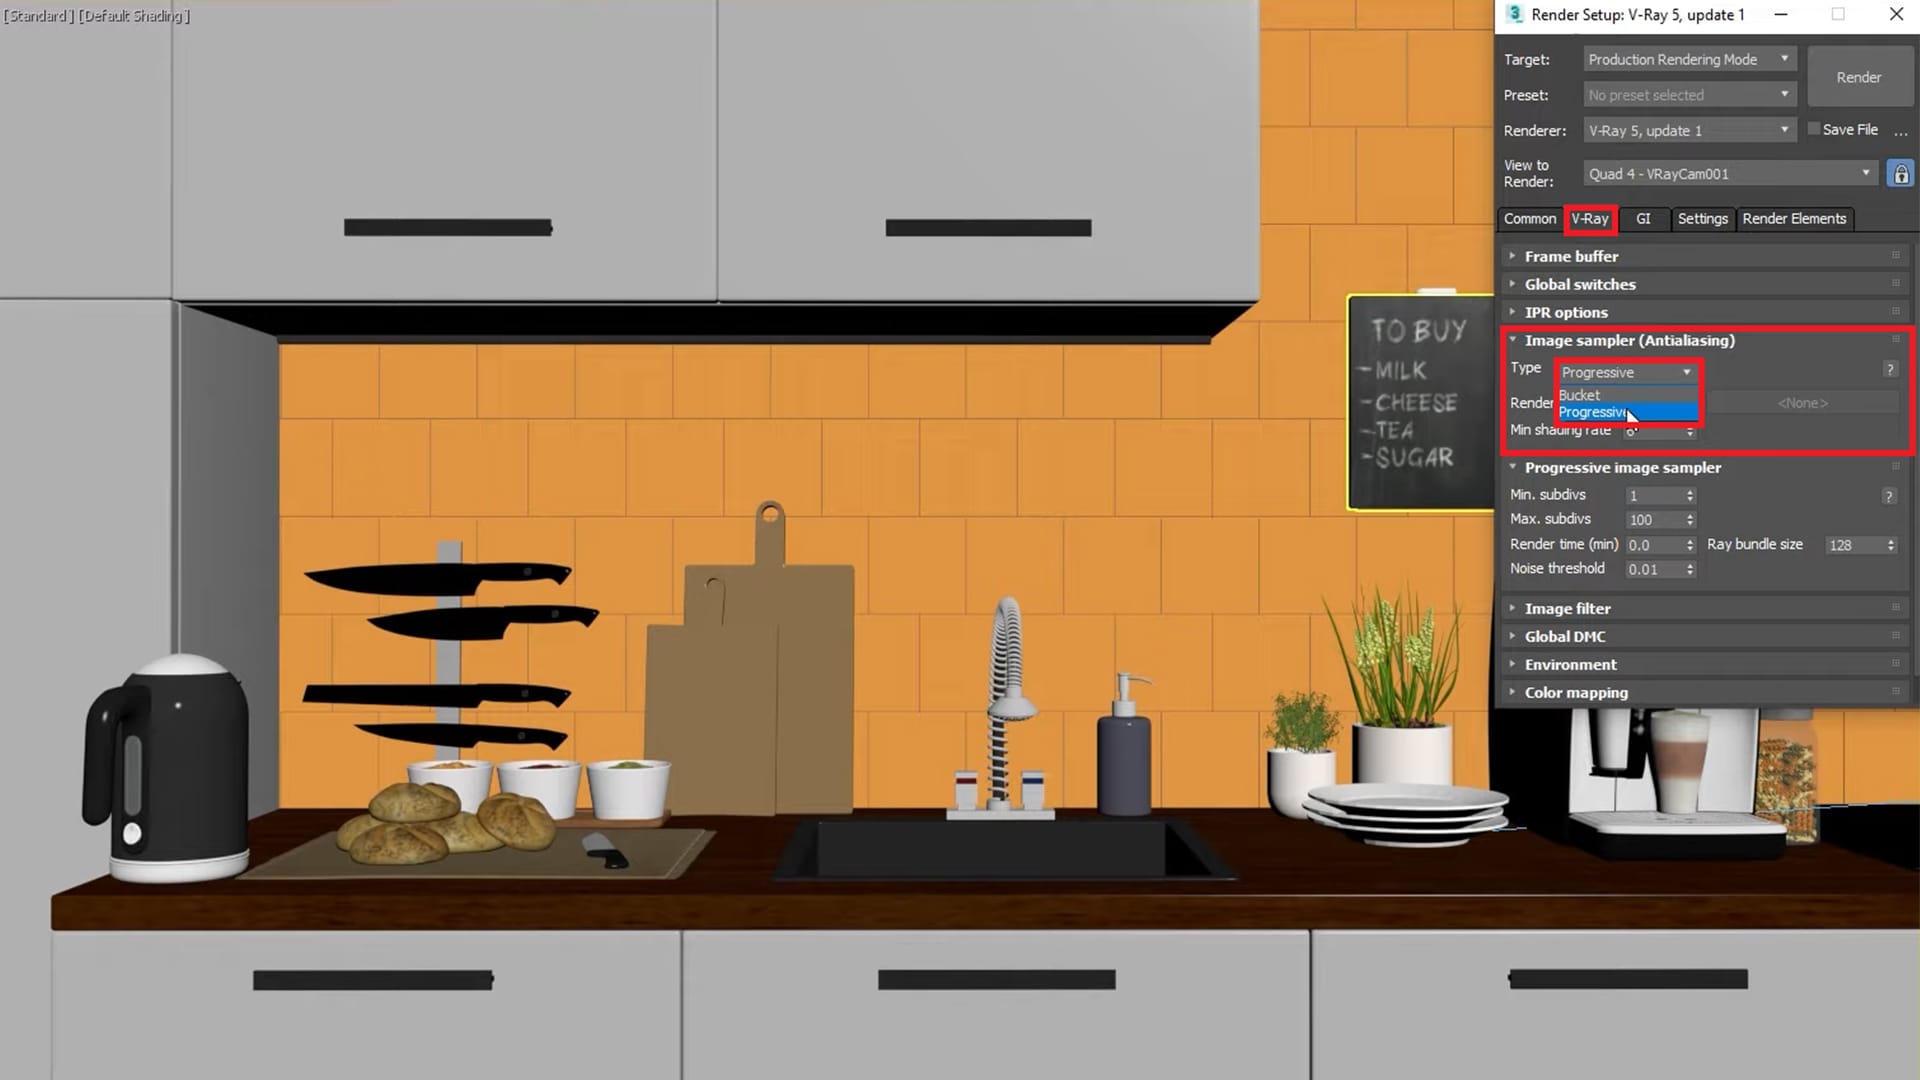
Next, click on the Render Elements tab. You’ve already added a V-Ray Denoiser, and now you can also add VRay Cryptomatte and VRay Light mix. Click on the Add… button, select them from the list and hit OK.
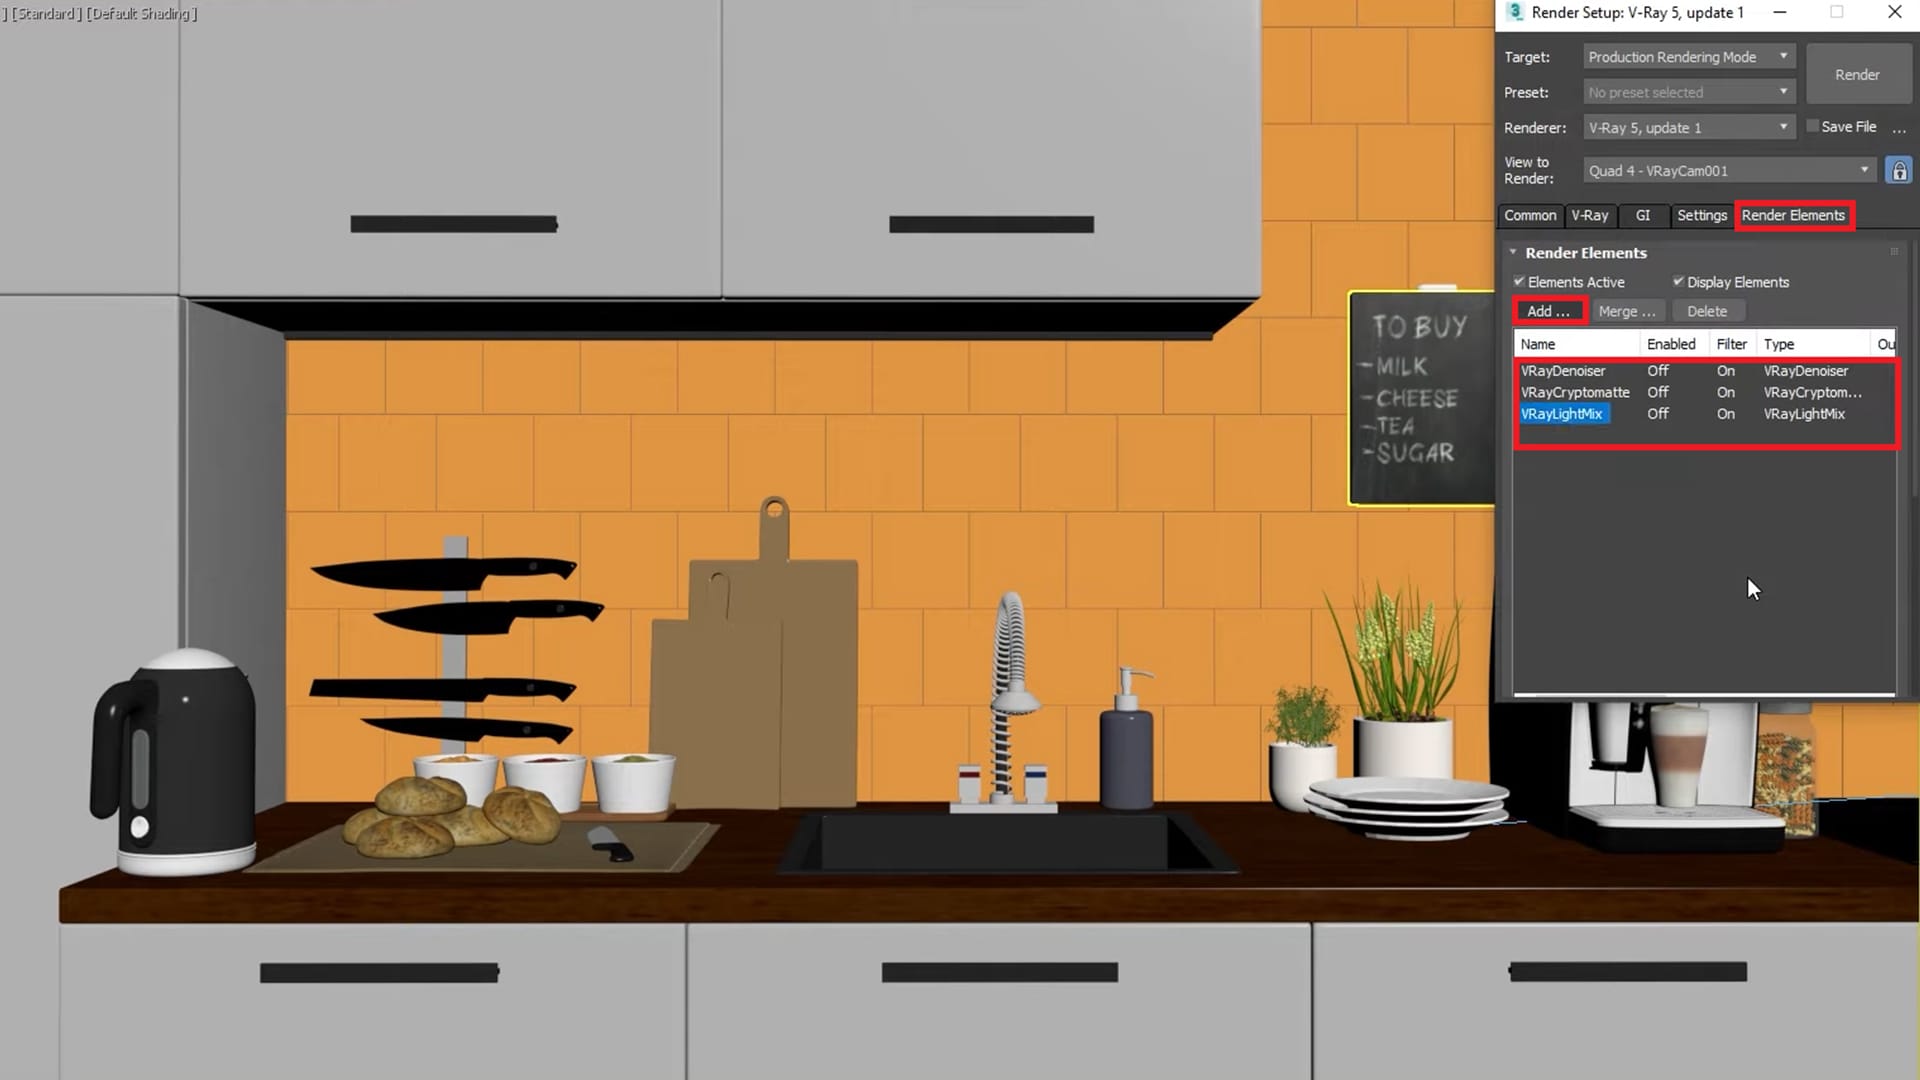
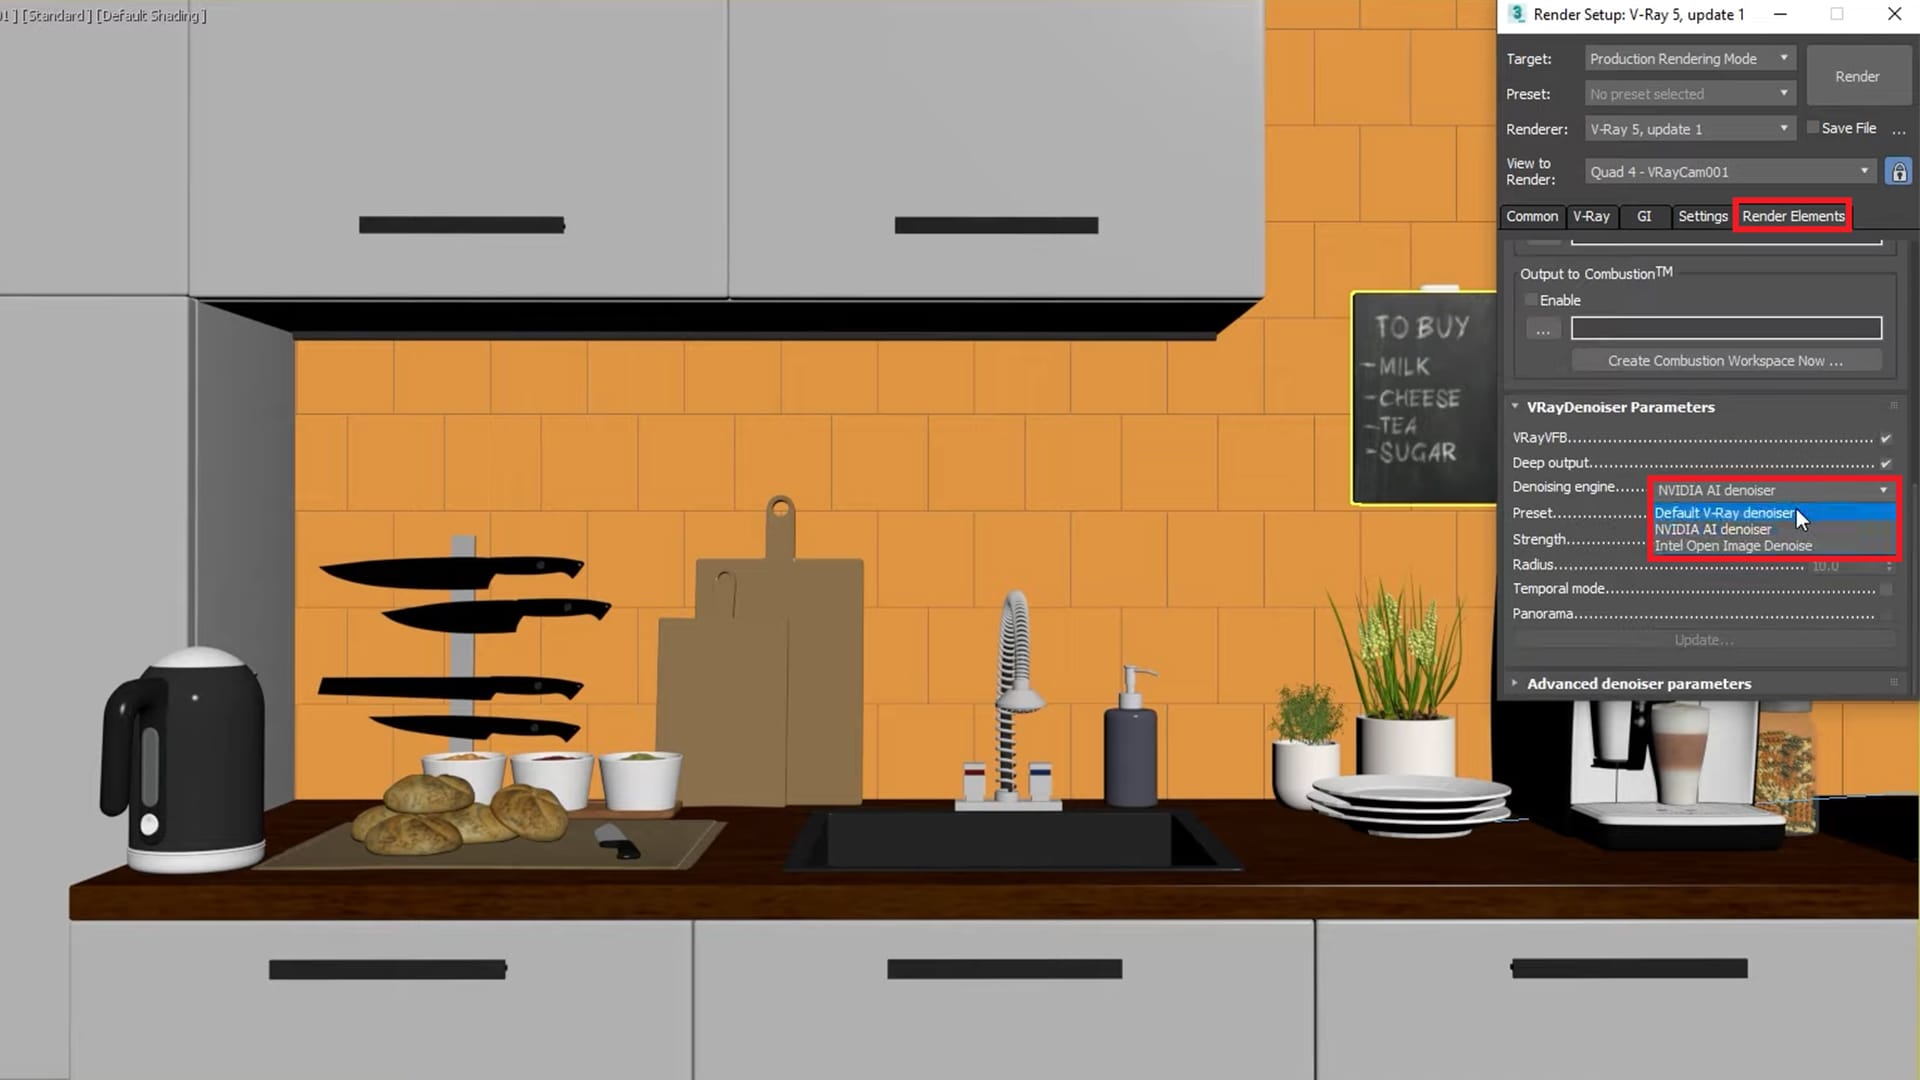
To achieve high-quality denoising in our production render, you need to change the Denoising engine from NVIDIA AI denoiser to Default V-Ray denoiser. From the Render Elements chart select VRayDenoiser, then scroll down to the VRayDenoiser Parameters menu to apply the setting.
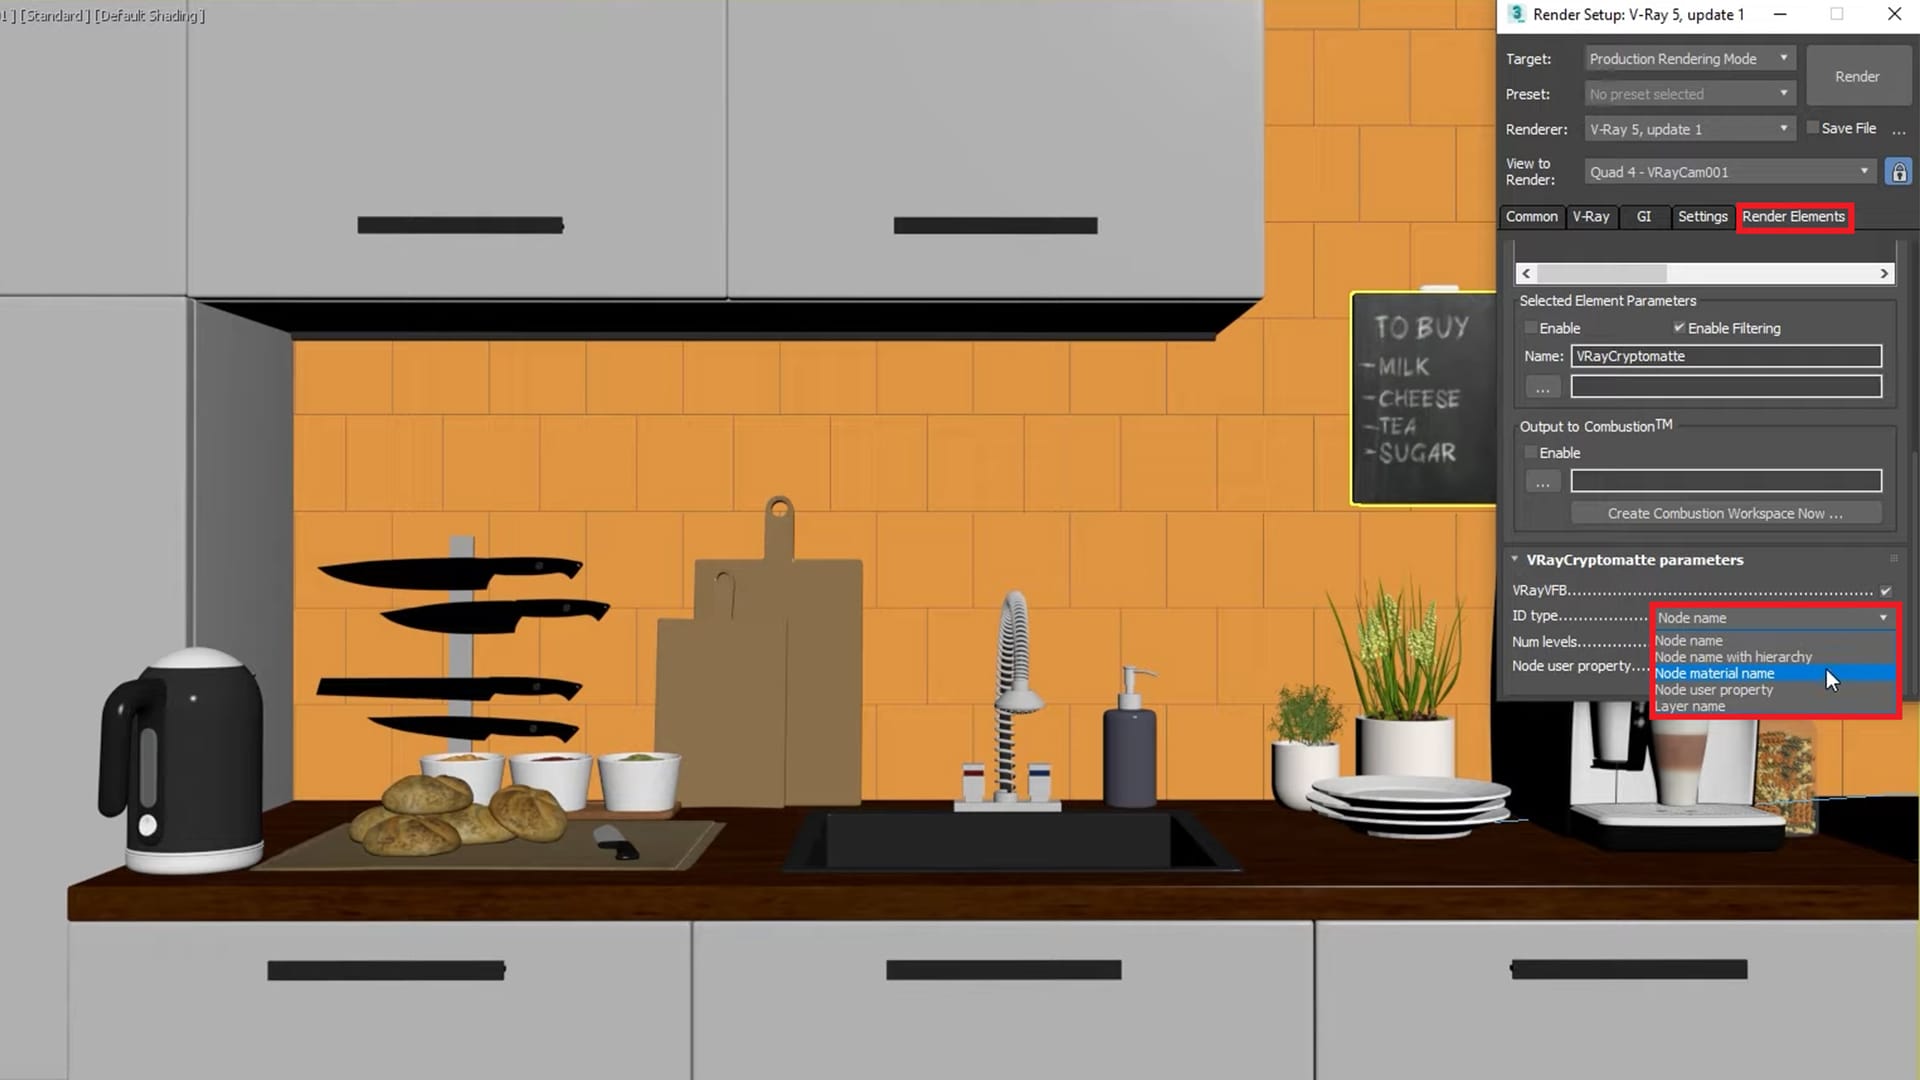
VRay Cryptomatte allows us to mask out elements by different ID types. The tool is used in the post-processing stage, in situations where you want to change the color, reflection or the appearance of an object, after your image is rendered.
Go ahead and select it from the Render Elements chart and scroll down to VRayCryptomatte parameters. In the ID type dropdown you have several options. Select the Node material name, which will allow you to pick masks by their material.
The final render element is V-Ray Light Mix. It provides adjustment control to lights in the scene from inside the V-Ray Frame Buffer. When this render element is added before rendering, the intensity and color of the lights and light emitting materials can be changed directly from the VFB during and after rendering. Lights can also be enabled or disabled on the go without re-rendering the final output or navigating to individual light parameters during IPR.
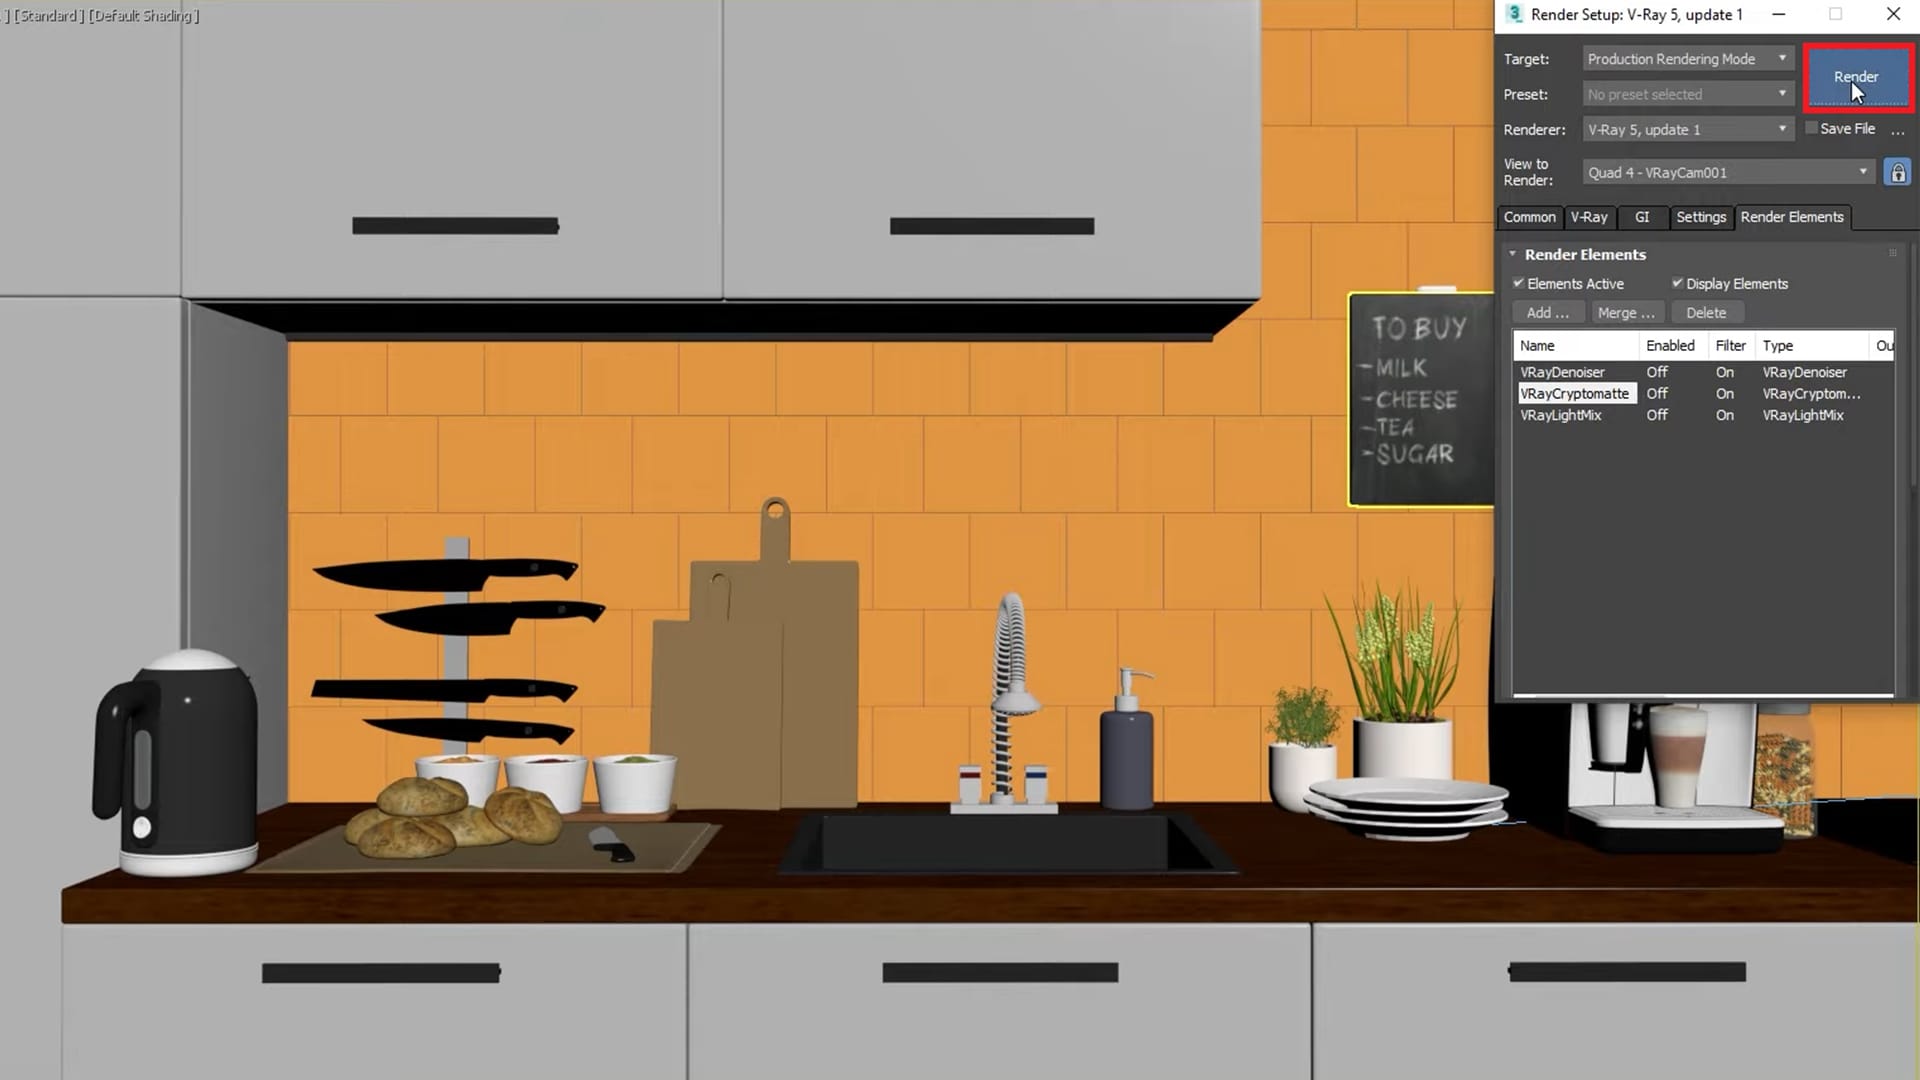
You now have an understanding of the most important render settings and you’ve set them accordingly. Hit Render to start the production render.
2. Post-processing: Light Mix
Post-processing is an important stage and the final phase of producing your render. Thanks to V-Ray Frame Buffer, all edits can be made directly in V-Ray for 3ds Max without leaving the application.
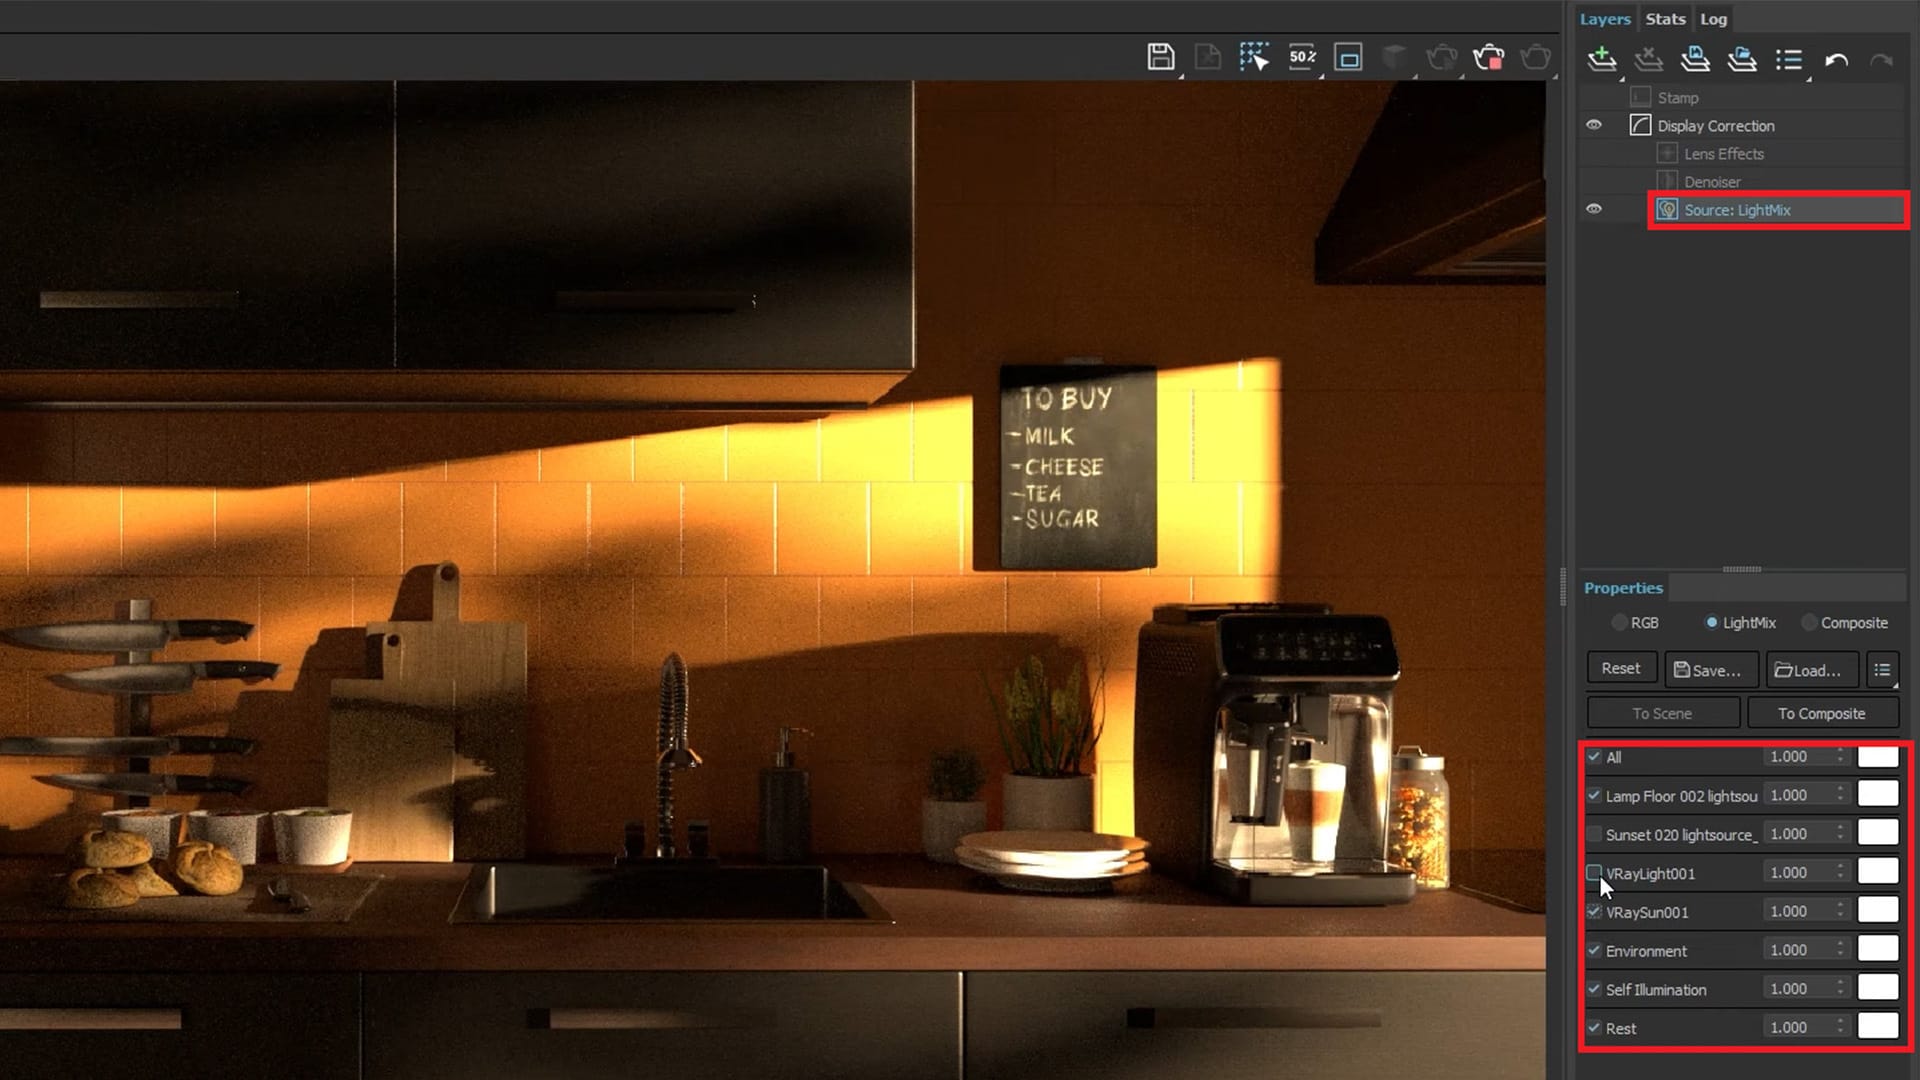
Clicking on Source: LightMix will display all the light sources in your scene. Untick the All checkbox to disable all of them and tick each one separately to observe how they individually contribute to the scene. You can also mix the light of the adaptive domes in your scene by changing the multiplier values.
Tip: Holding Alt + left click on a light’s checkbox isolates everything but that light.
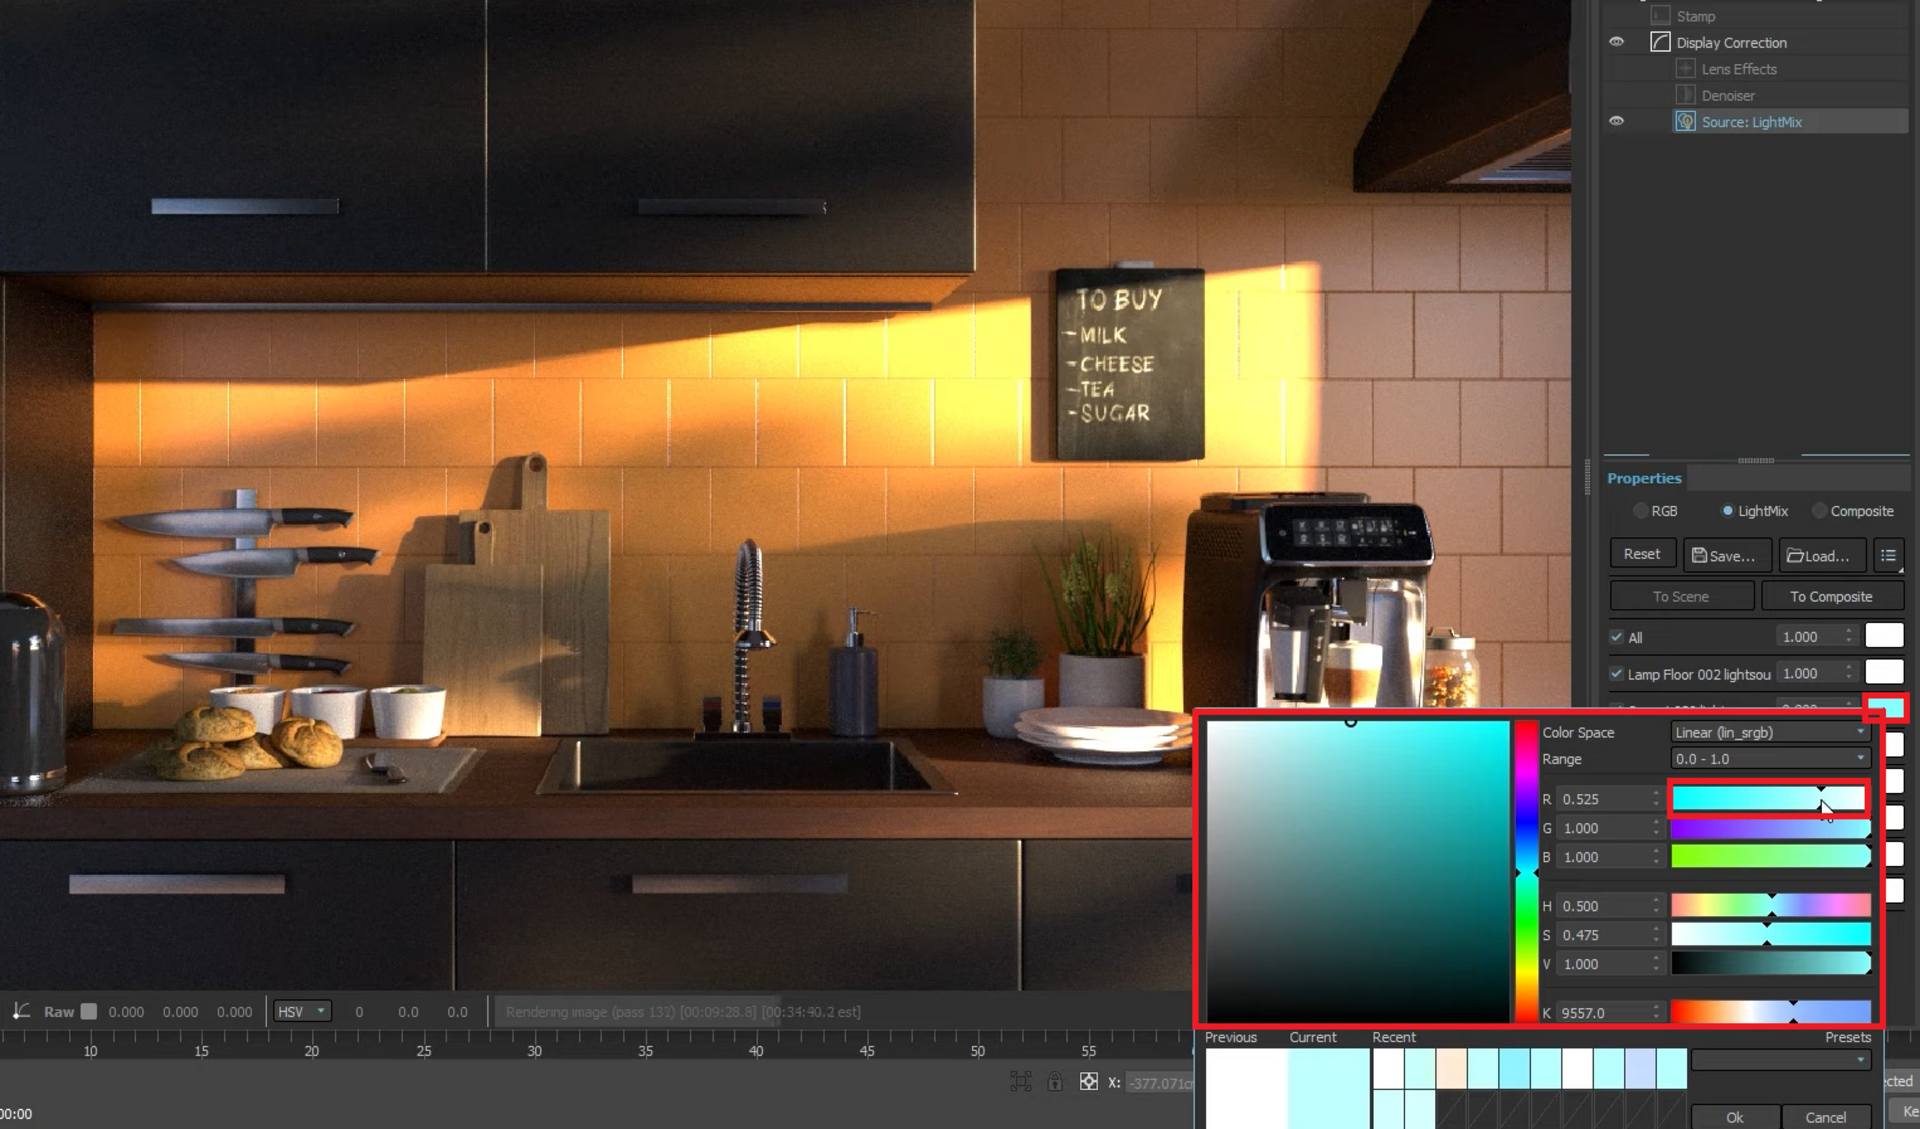
To add a specific tint to your domes or lamps click on the white swatch next to it to bring up the color spectrum chart. Pick a color and it will instantly be applied to the light source.
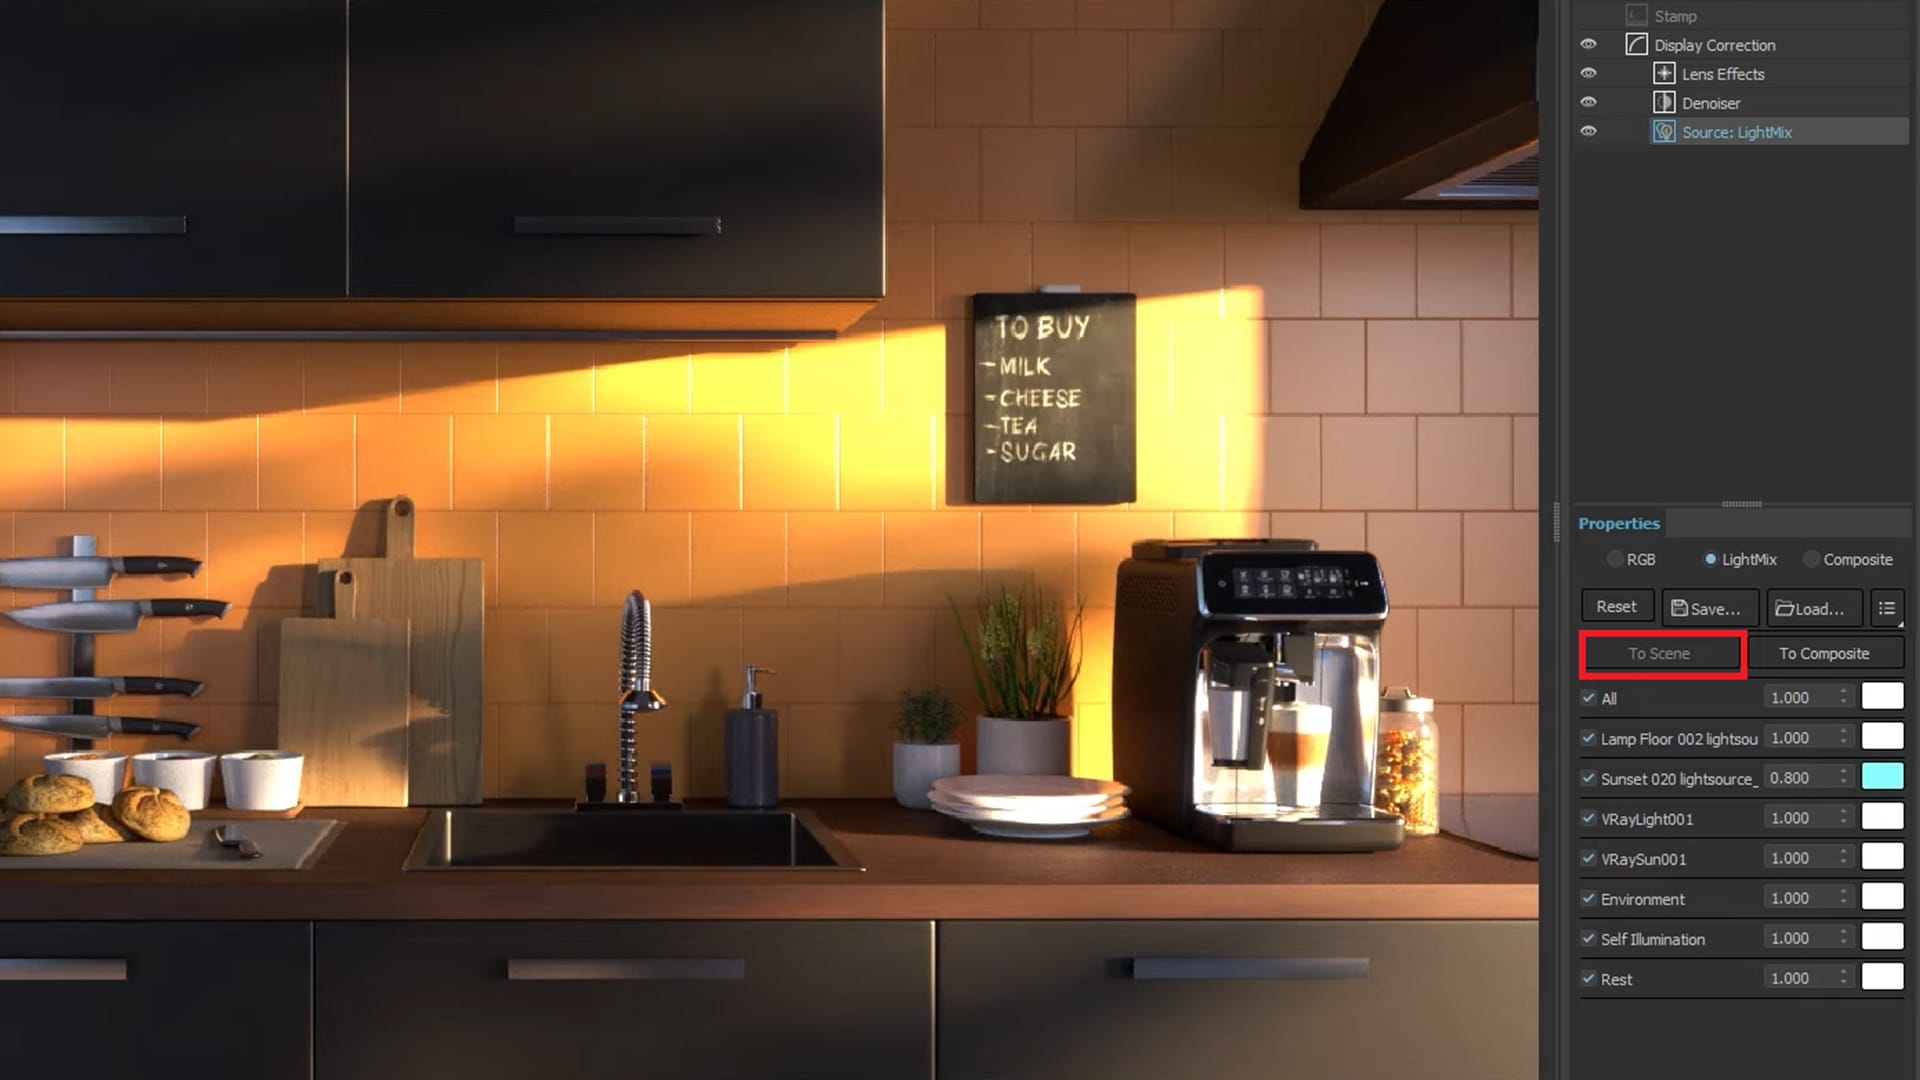
When you like the way your image looks, transfer the changes by clicking To Scene. This will automatically transfer the properties from Light Mix to the lights in your scene.
3. Post-processing: Color correction in the VFB
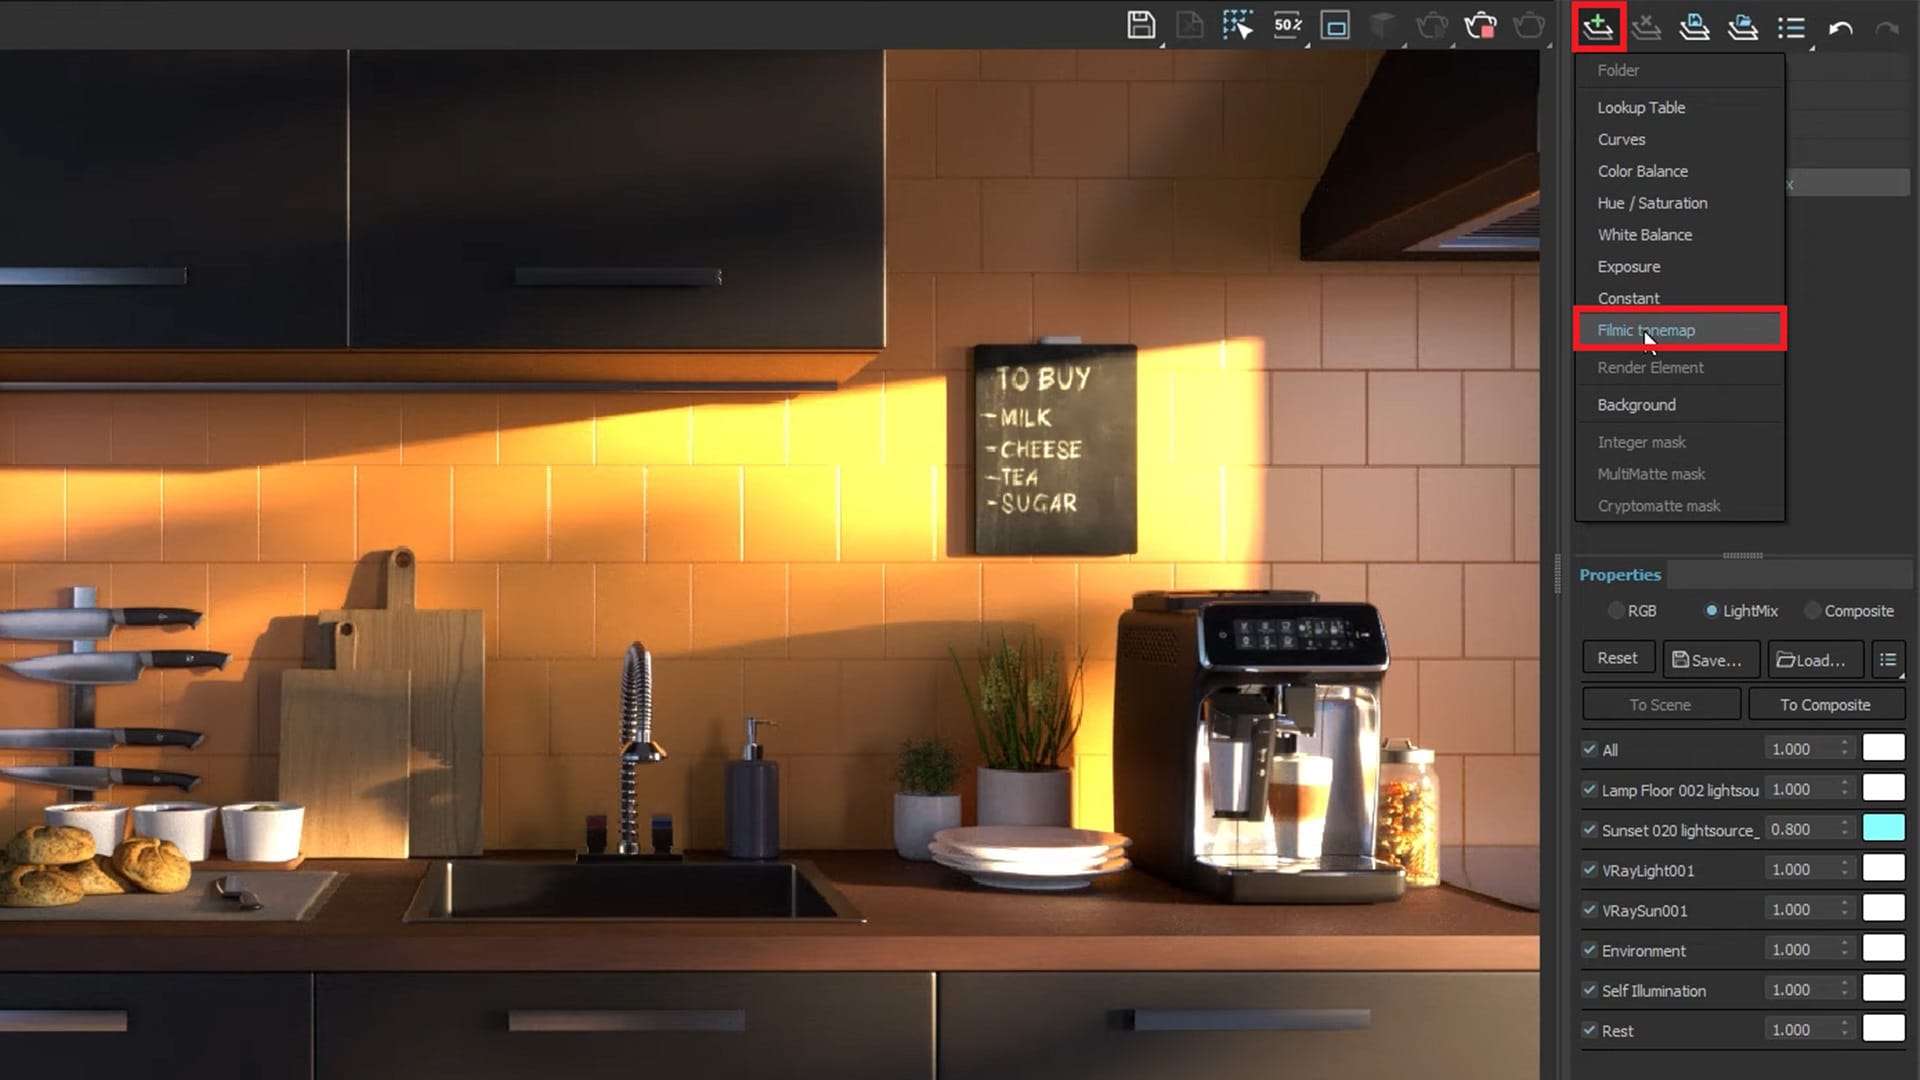
Now it’s time to focus on color correction in the V-Ray Frame Buffer. Click on the Add layer button and select Filmic tonemap. The tonemap allows a selection of a color space and has many different modes. The modes contain various types of mapping curves and gamma corrections that you can try out and apply to your scene.
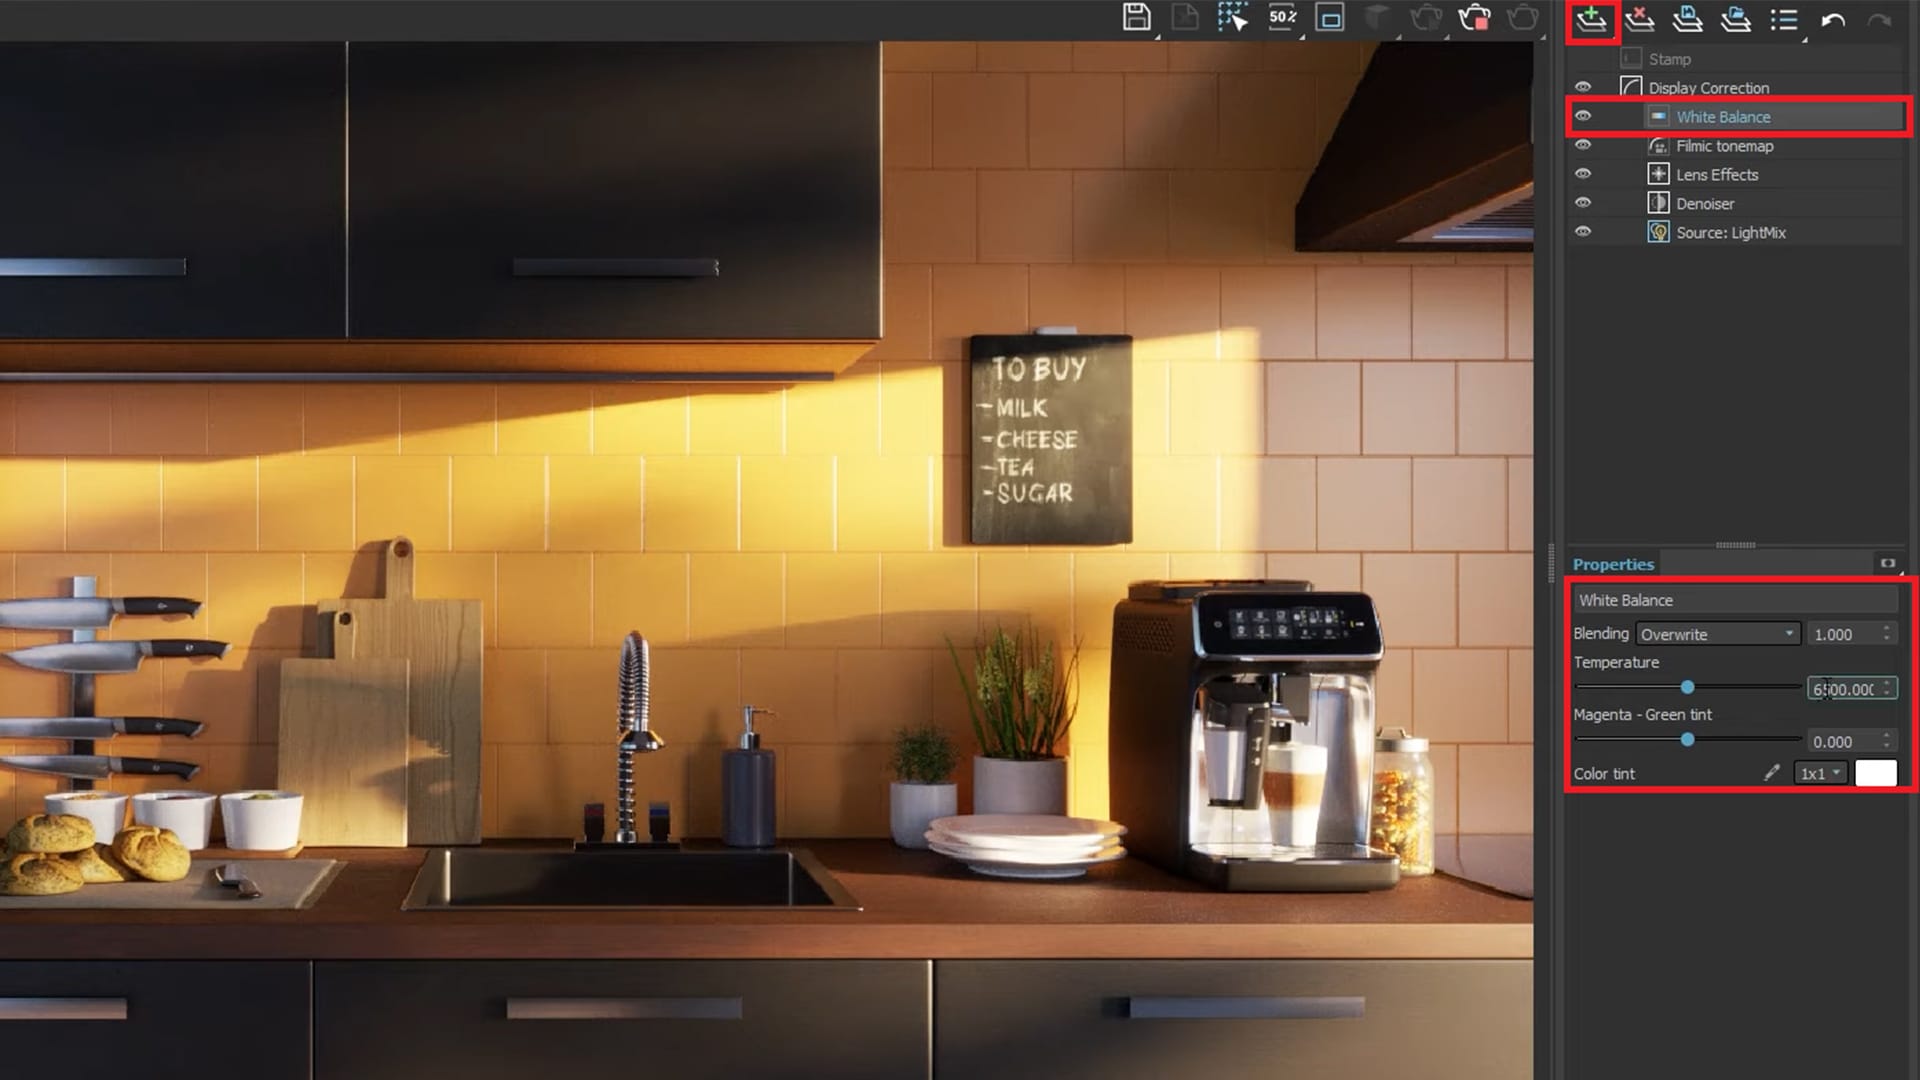
Next, you should add a White Balance layer, which can change the temperature of your image to cold or warm. Try to achieve a perfect balance by combining both warm and cold tones.
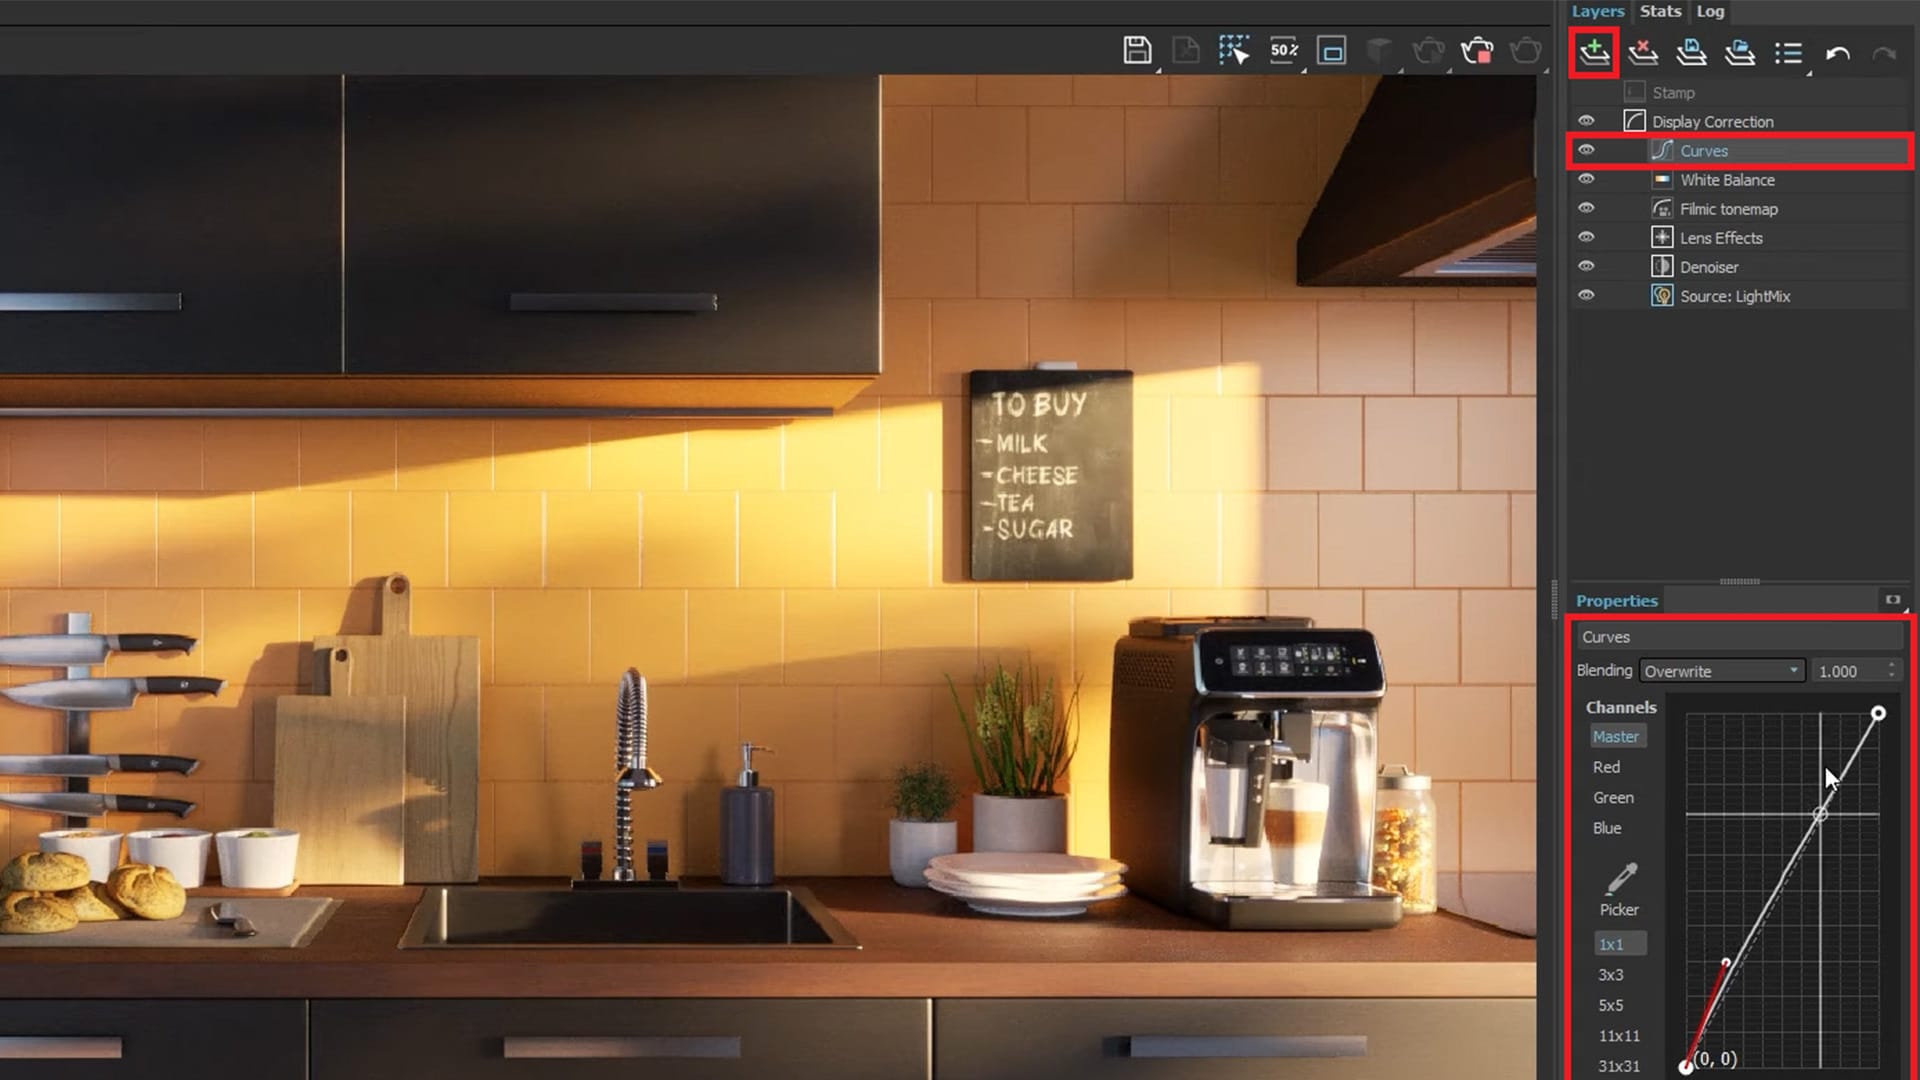
After that, you can add Curves. This layer will adjust the image based on the tonality – the zones of light and dark in your image (or the individual color channels). The bottom of the graph represents the shadows, the top represents the highlights.
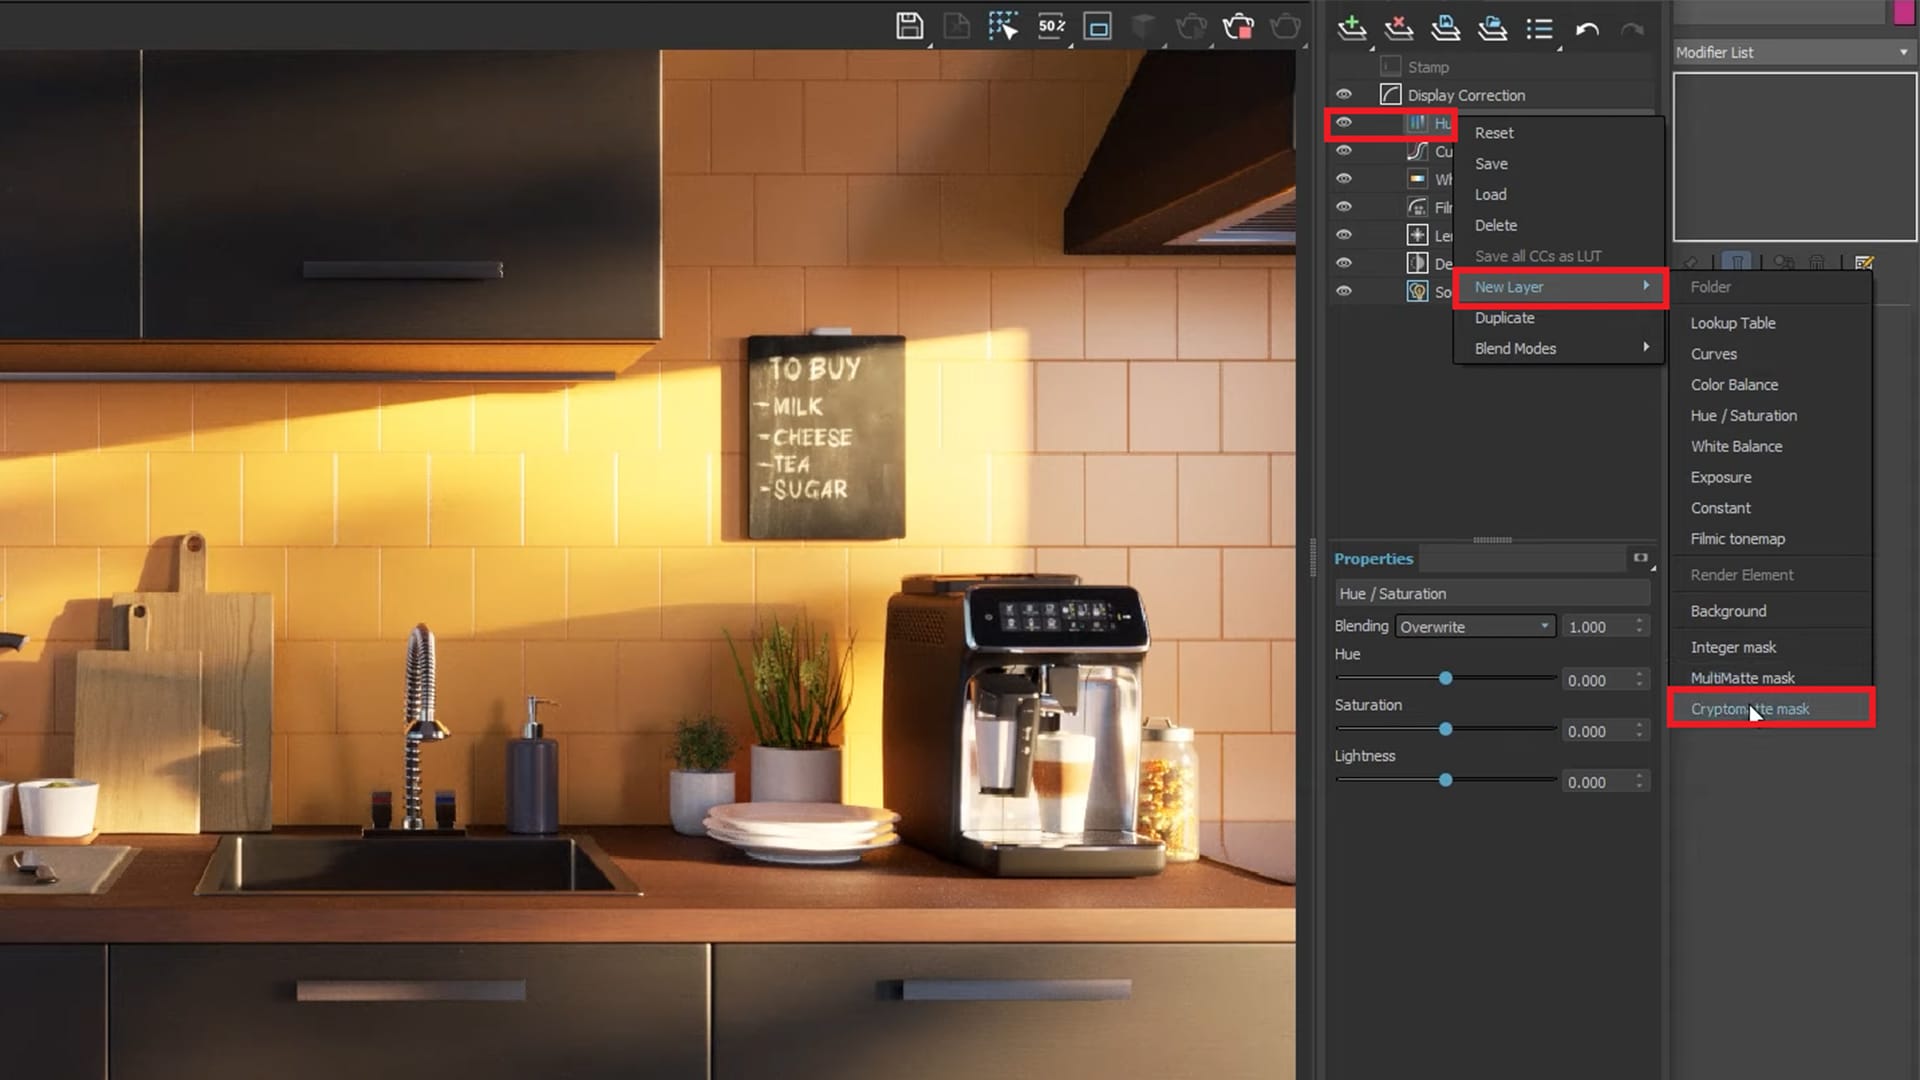
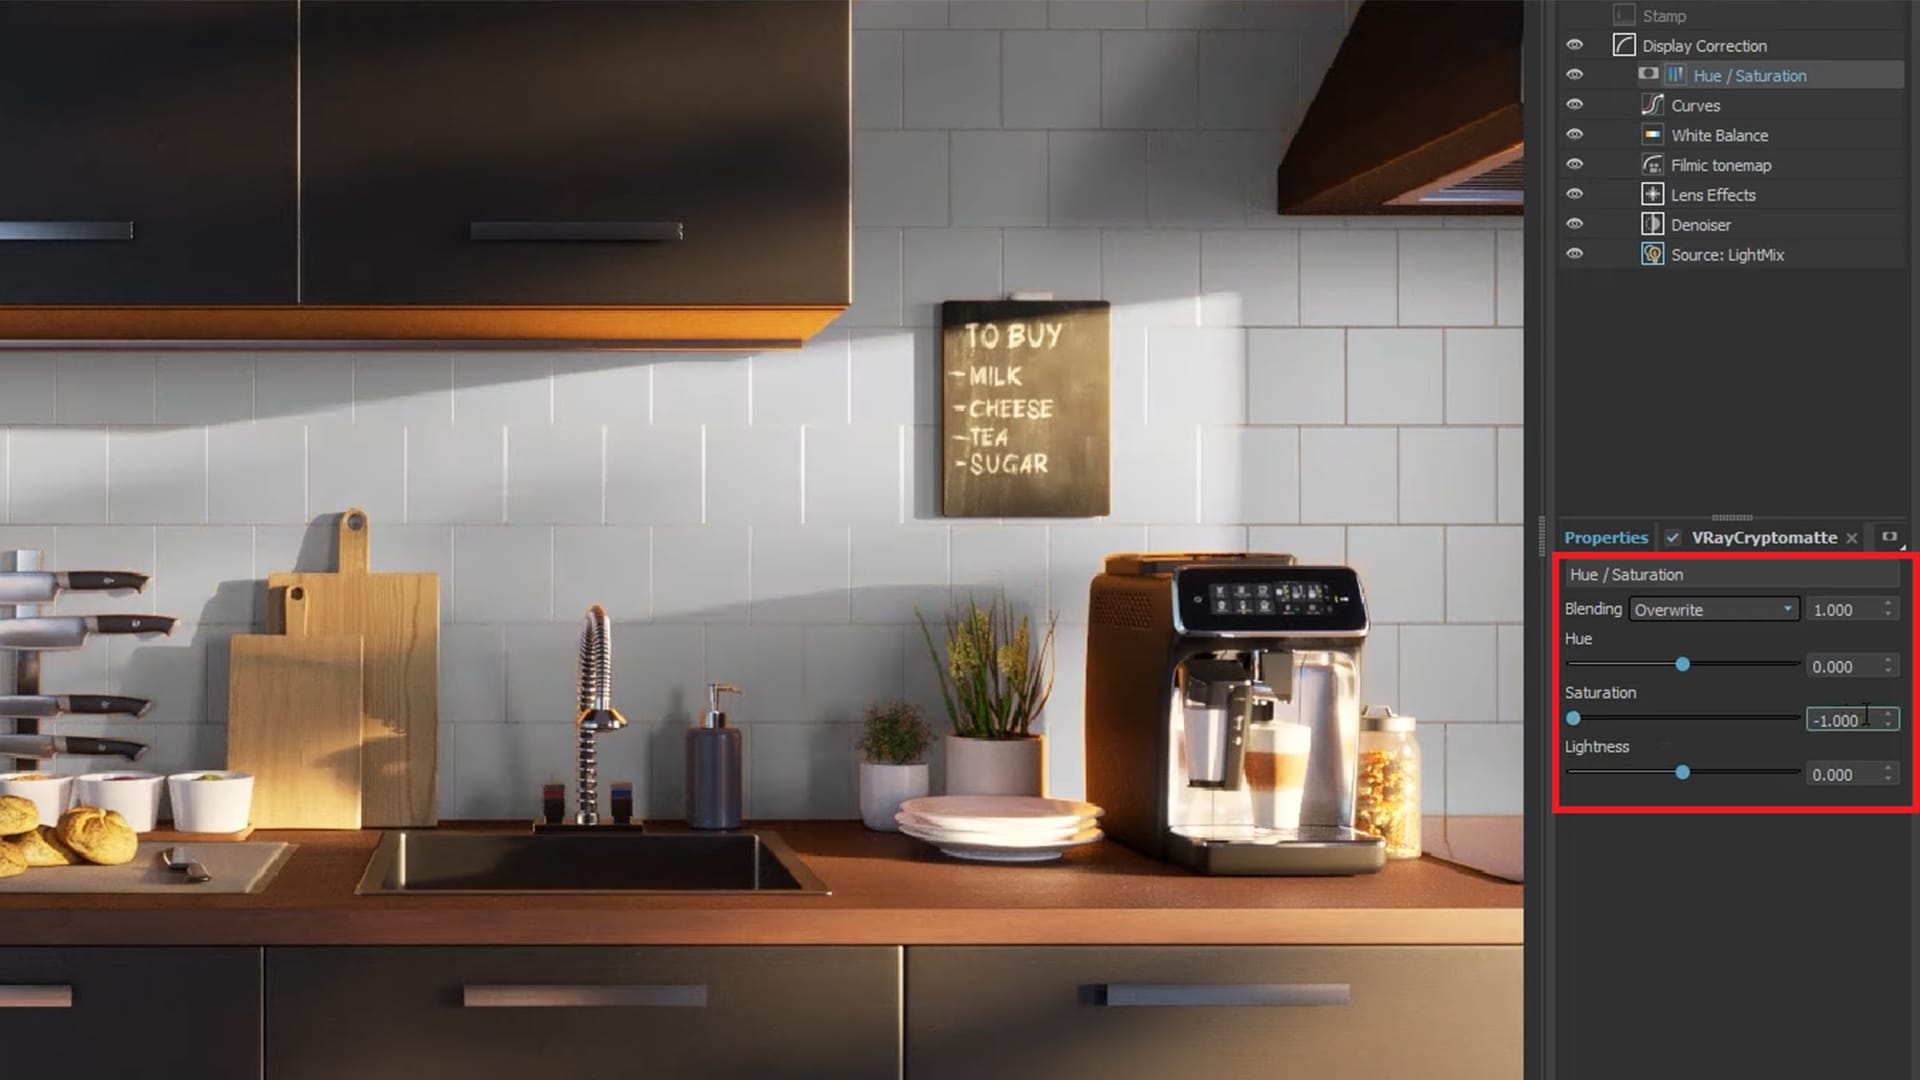
Next, it’s time to add some Masks using the V-Ray Cryptomatter you added earlier. You can add any color correction layer to get started. The Hue/Saturation layer was chosen for this example. Right click on the layer, and click on New Layer > Cryptomatte mask to add the mask.
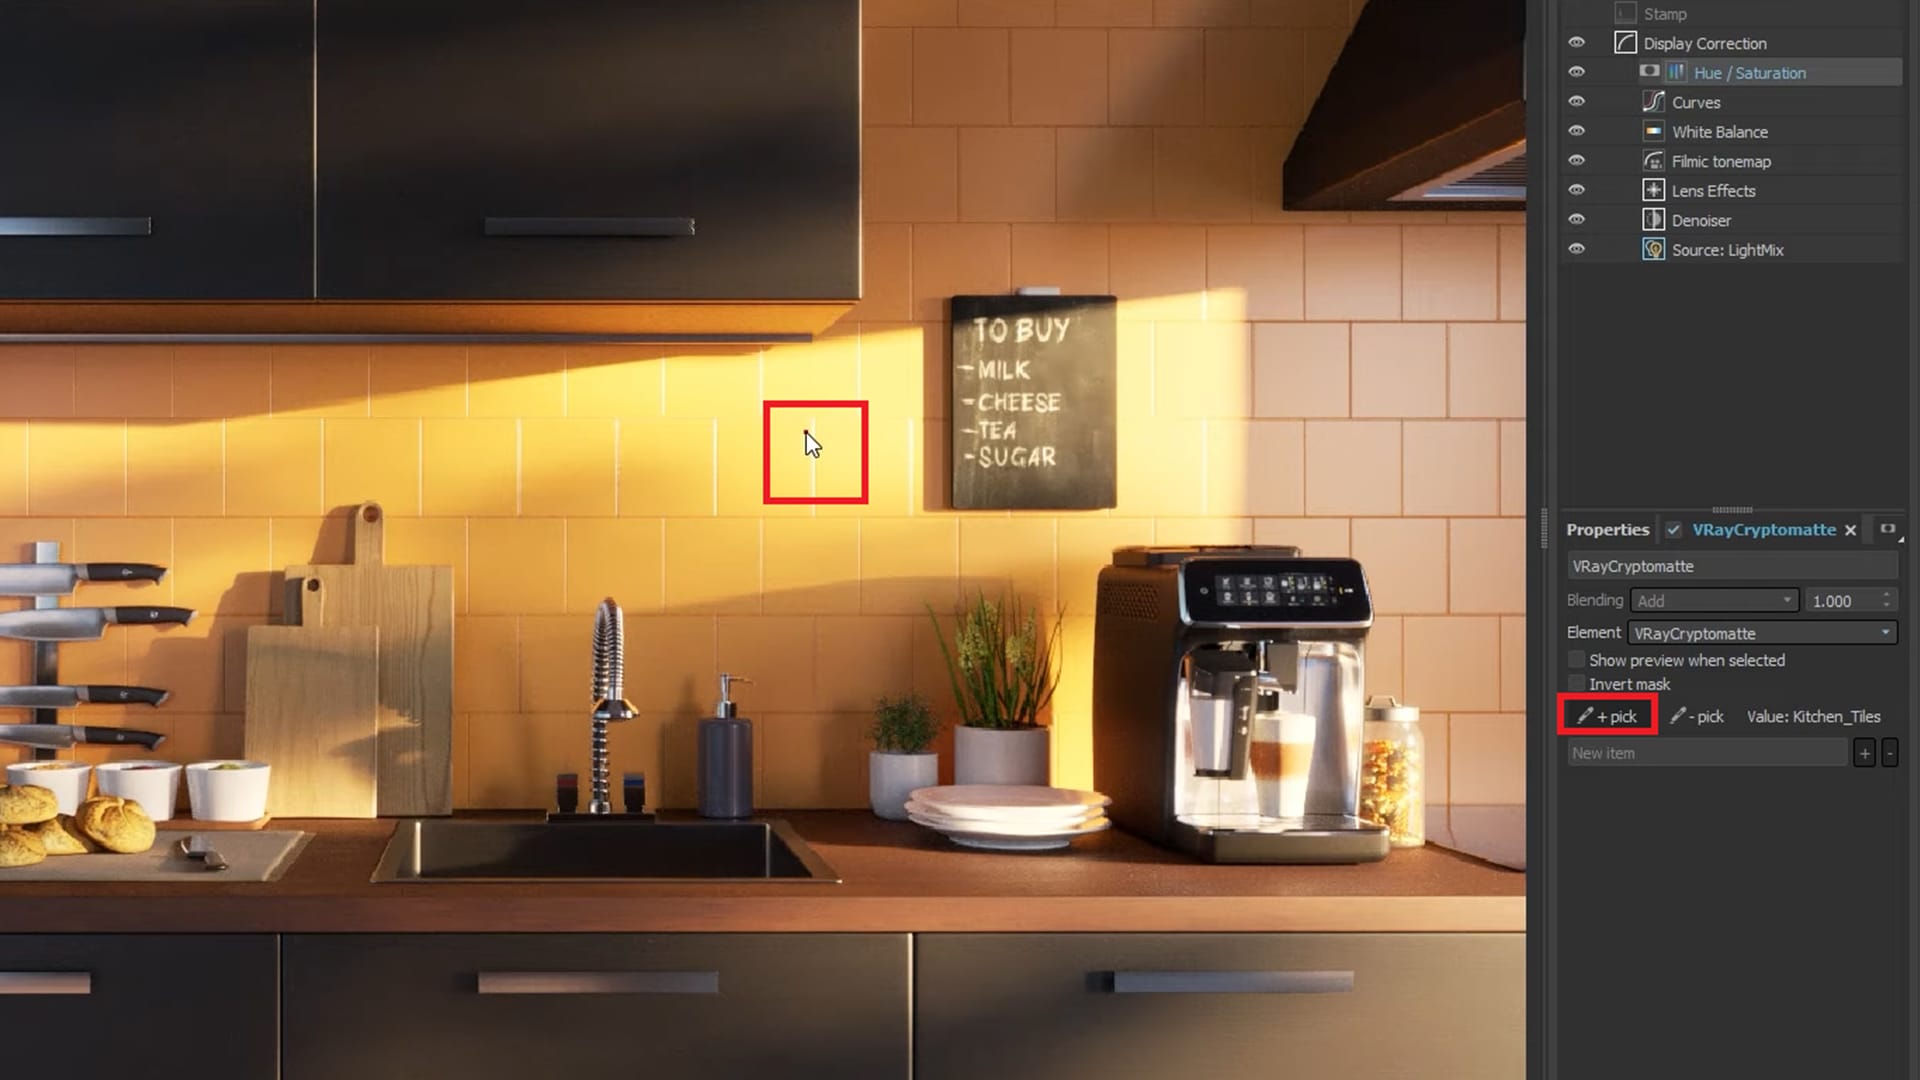
As you previously set the cryptomatte by Node material name, when you use the picker, you can see the name of the materials in your scene. Click on the +pick button to show the cursor. In the example scene, the cursor is pointed at the kitchen tile material and after a click the item’s name appears.
Click on Show preview when selected to see your mask.
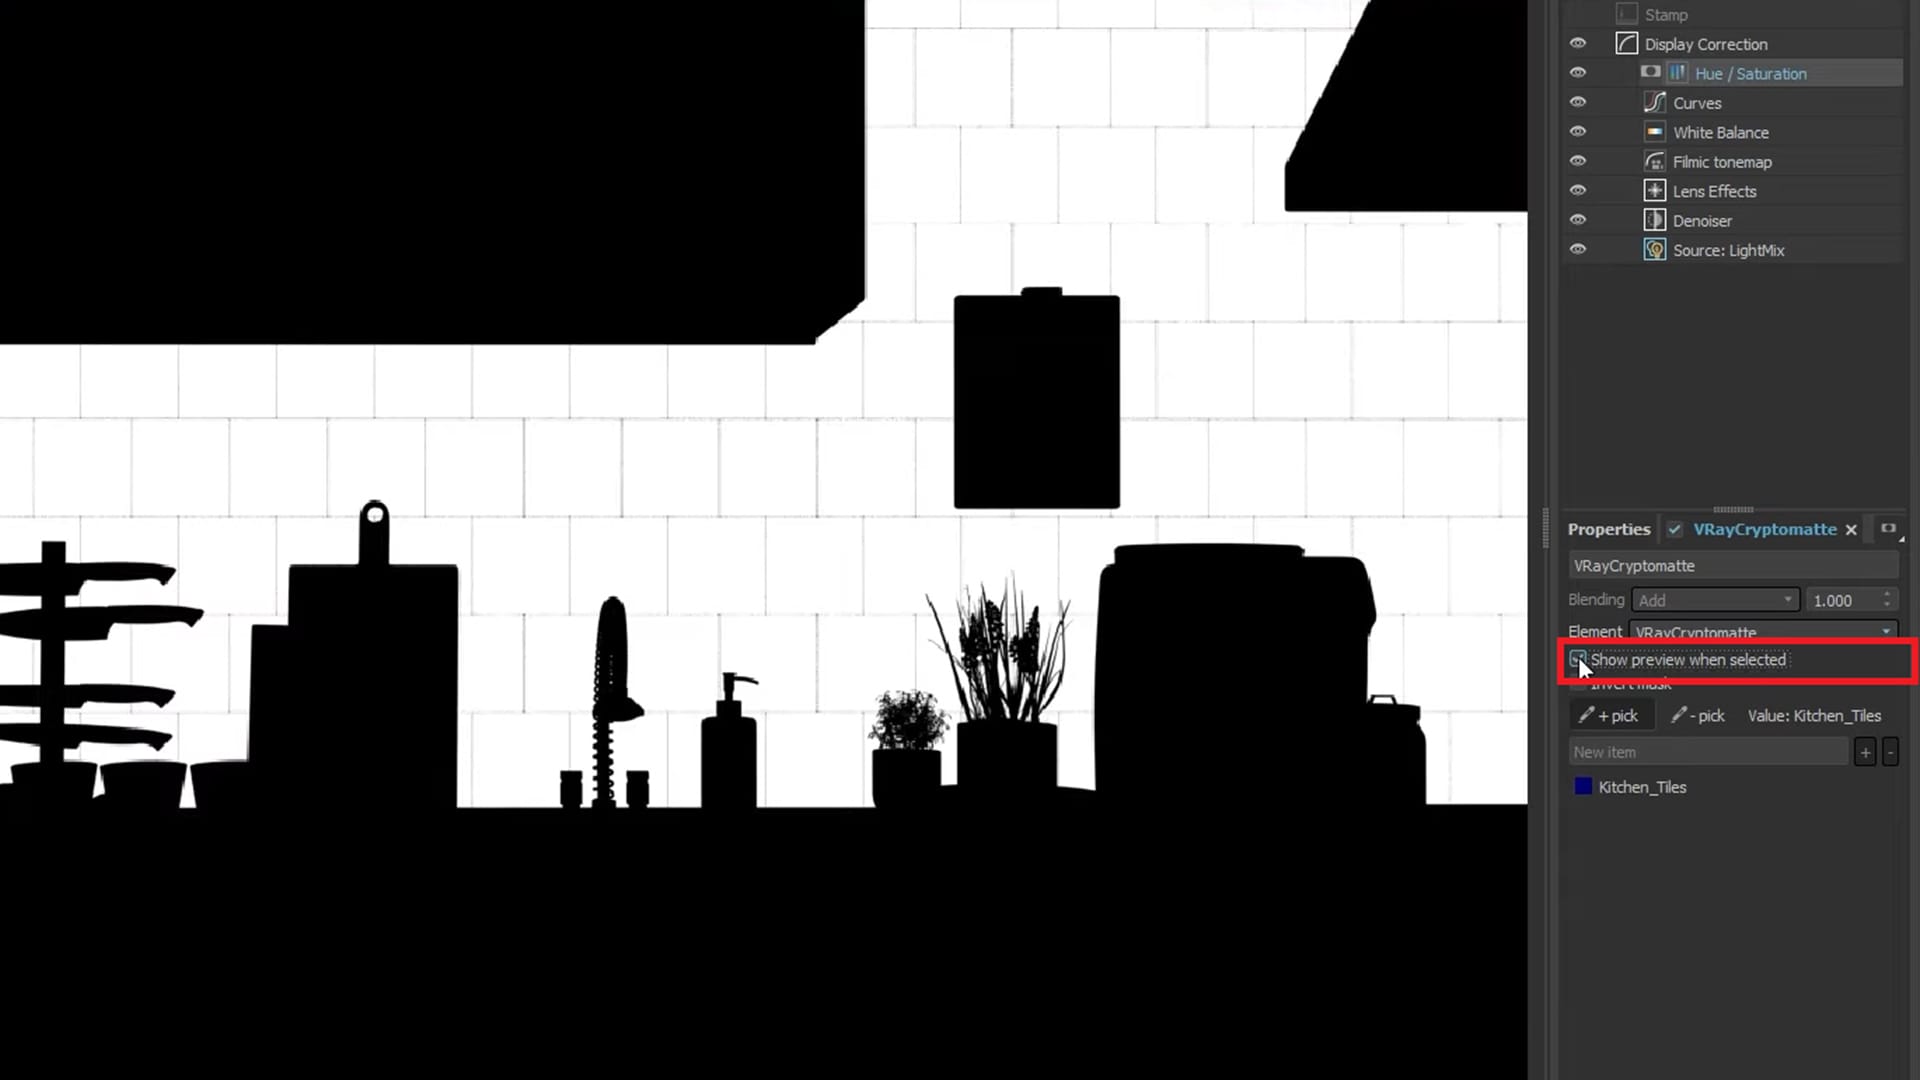
To test out the Cryptomatte mask, you can tweak the saturation of different nodes. In the scene example, you will notice how the look of the kitchen tiles is drastically changed, losing its color by setting the value to -1.
After setting an appropriate saturation value, you may notice that some elements in your scene look a bit dark, as is the case with the kitchen tiles. To fix that, you can add Curves as a color correction layer and a Cryptomatte mask. Right click on Curves and select New Layer > Cryptomatte mask.
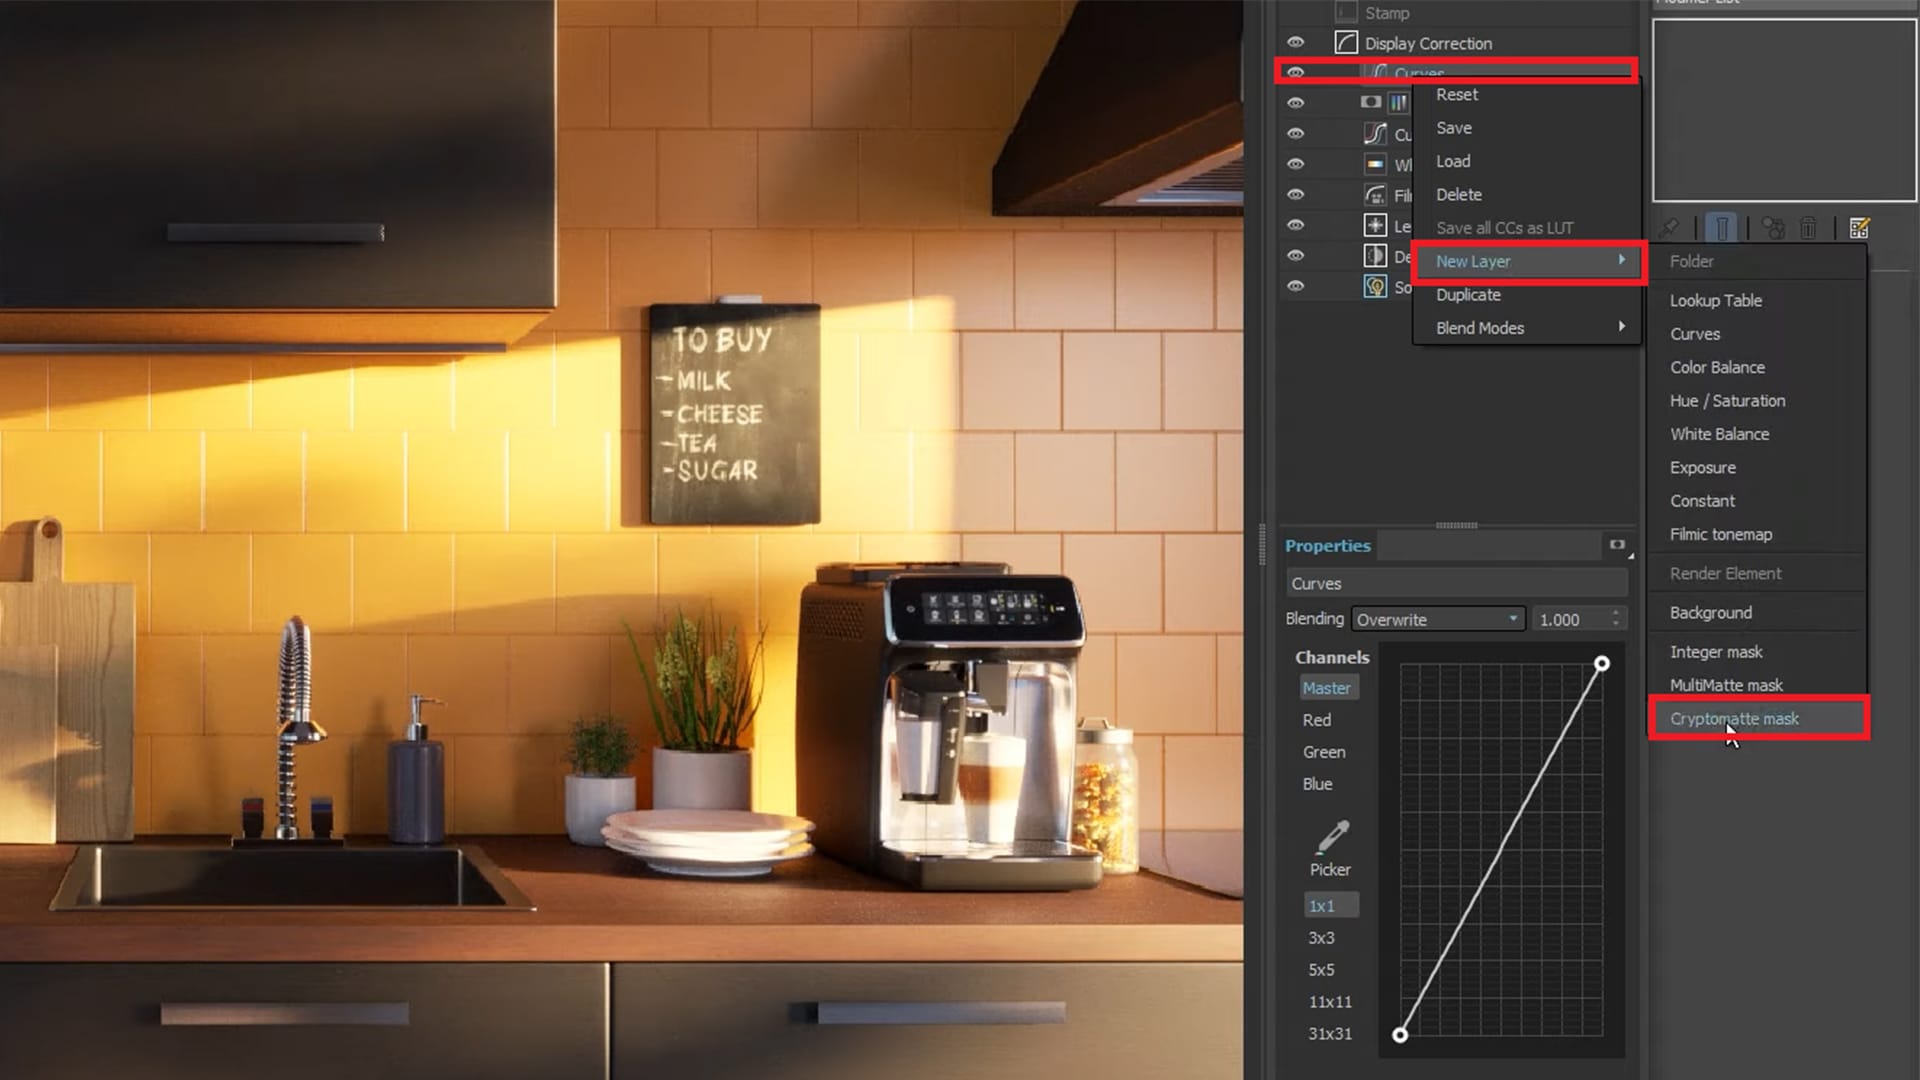
Then, click the + pick button and select the tiles as you did before. Tick the box Show preview when selected to see the mask you created. To brighten up the tiles, click on the Properties tab and lift the shadows and highlights by dragging the points on the line graph.
Another advantage of the progressive sampling mode is that you can use the post-processing capabilities of the VFB while rendering your final Image.
4. Saving your render
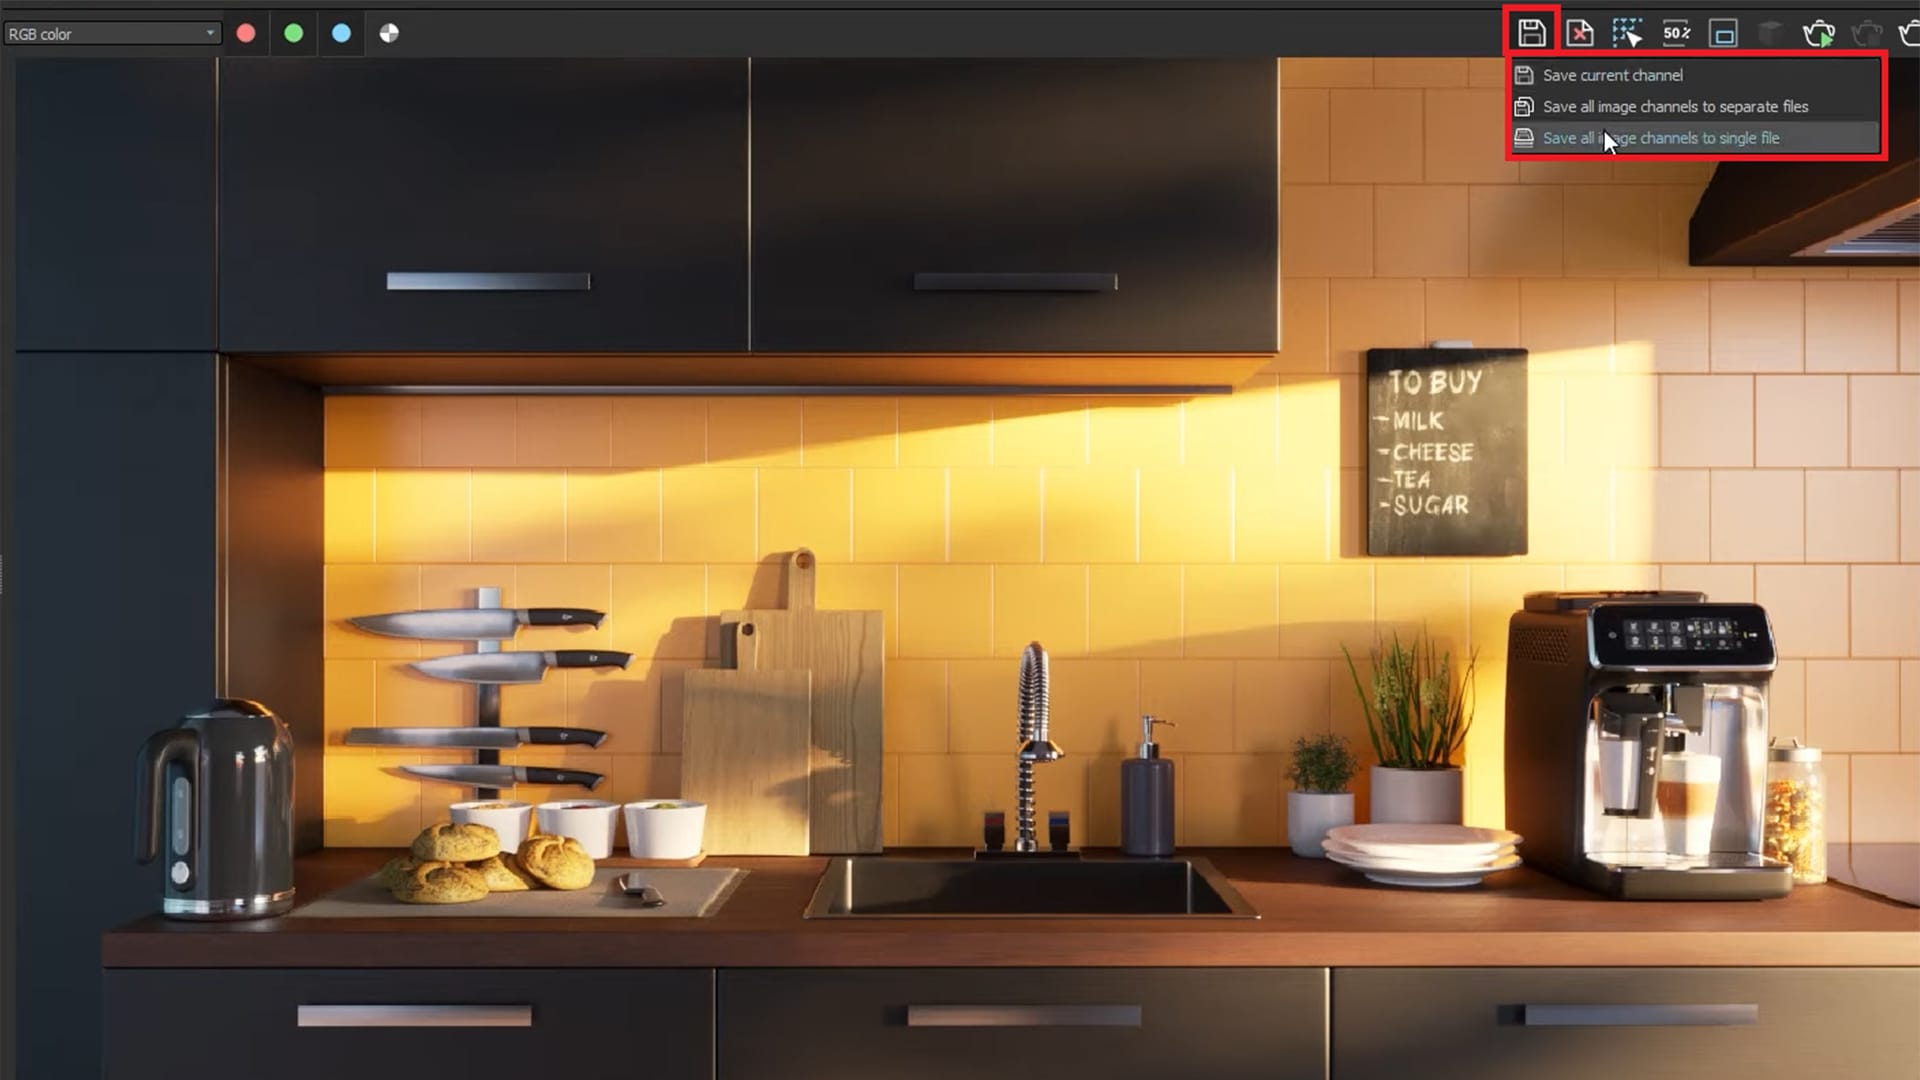
You did it! Your render is finally finished. Click on the Save icon to save your render. By clicking and holding on the icon, you will be able to choose from a list of options that let you save all channels on separate files or save all channels to a signal file using the EXR or VRIMG formats.


 Tiếng Việt

